“The near side of a galaxy is tens of thousands of light-years closer to us than the far side; thus we see the front as it was tens of thousands of years before the back. But typical events in galactic dynamics occupy tens of millions of years, so the error in thinking of an image of a galaxy as frozen in one moment of time is small.” In this Photoshop tutorial, we will learn how to create a Galaxy Portrait. First, we created a background then place a Model and blended it with Adjustment Layers. Next added some texture and planet. Finally, we use Camera Raw Filter.
Preview of Final Image

Tutorial Resources
Step 1
Now, let’s start by creating a new image file, go to the Menu bar and click File > New, and then input the following values on their respective fields
- Preset: Custom
- Width: 3080px
- Height: 3080px
- Resolution: 300px
- Color Mode: RGB Color 8 bit
- Background Contents: Transparent

Step 2
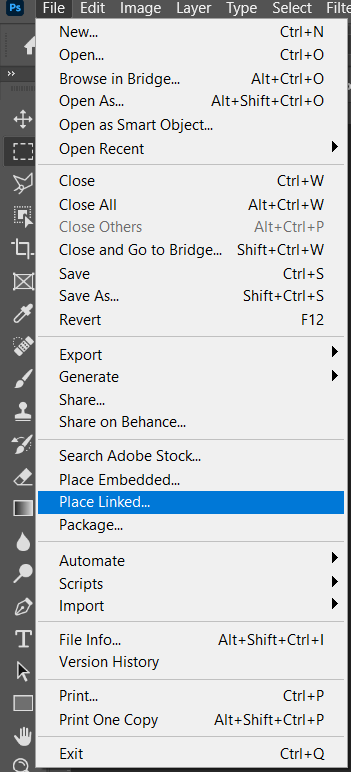
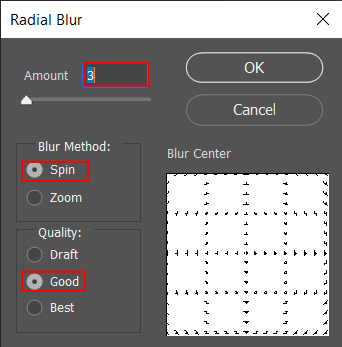
Now, place Background Go to File > Place and select Background Then place it to our work canvas and position the image with the transform tool (Ctrl / Cmd + T). Hold Alt + Shift and rasterize like the image below. In Photoshop CC only hold Alt to rasterize all sides together. Then go to Filter > Blur > Radial Blur and set radius to 3px.


Now create a layer mask and use Black soft round brush and paint on center area.
Step 3
Add Adjustment Layer “Curves”

Step 4
Add Adjustment Layer “Color Balance”

Step 5
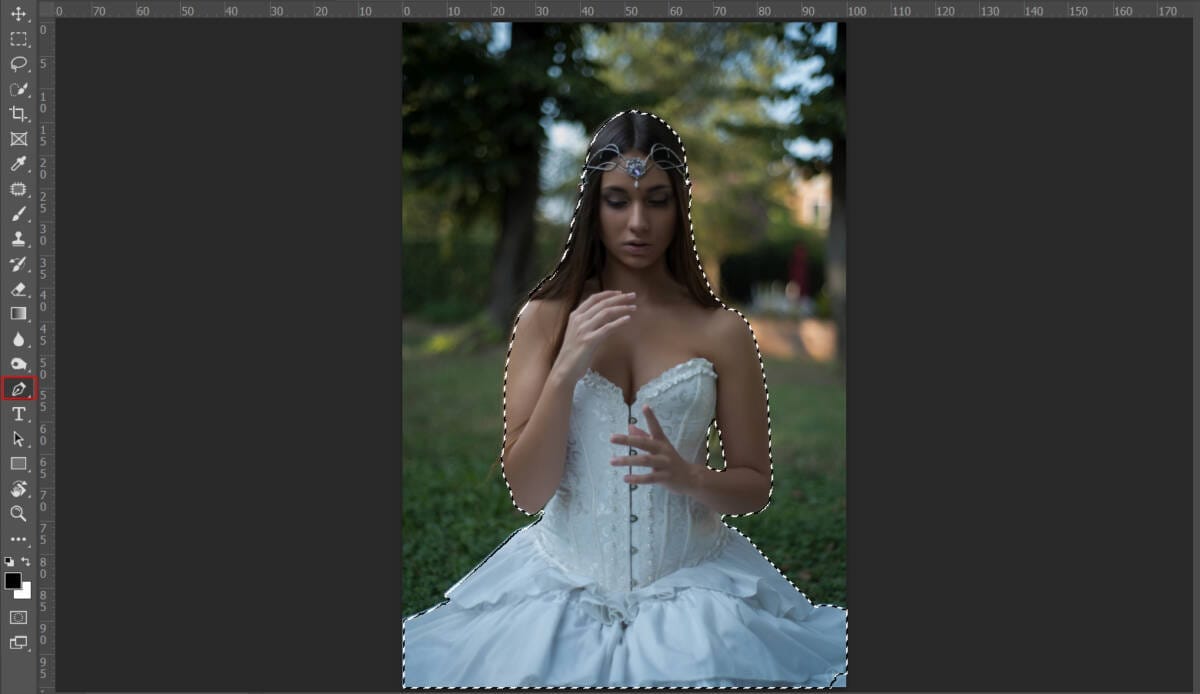
Now, go to File > Open and select Model. Then use a Pen Tool(P) and start selecting woman. When we finish the selection press right-click on mouse and “Make Selection” then create layer mask. The simplest path you can draw with the standard Pen tool is a straight line, made by clicking the Pen tool to create two anchor points. By continuing to click, you create a path made of straight line segments connected by corner points.
- Select the Pen tool.
- Position the Pen tool where you want the straight segment to begin, and click to define the first anchor point (do not drag).
- Click again where you want the segment to end
- Continue clicking to set anchor points for additional straight segments.
- The last anchor point you add always appears as a solid square, indicating that it is selected. Previously defined anchor points become hollow, and deselected, as you add more anchor points
- Complete the path by doing one of the following:
- To close the path, position the Pen tool over the first (hollow) anchor point. A small circle appears next to the Pen tool pointer
 when it is positioned correctly. Click or drag to close the path.
 - To leave the path open, Ctrl-click (Windows) or Command-click (Mac OS) anywhere away from all objects. To leave the path open, you can also select a different tool.


Step 6
Next, create a new layer below Woman layer and use a Brush Tool(B) Soft Round with foreground color black and start painting the shadow but first drop a flow to 10%. Blend mode change to Multiply.


Step 7
Add Adjustment Layer “Curves”

Step 8
Add Adjustment Layer “Curves” and press Ctrl/Cmd + I to invert. Then use Brush Tool(B) Soft Round with foreground color white and paint the left side.
2 responses to “How to create a Galaxy Portrait in Photoshop”
-
thank you!
-
I really like this project, one question you did not include a link for the clouds!
Thanks


Leave a Reply to DavidCancel reply