Download Lightroom presets and LUTs, absolutely free. Use the presets to add creativity and style to your photos.
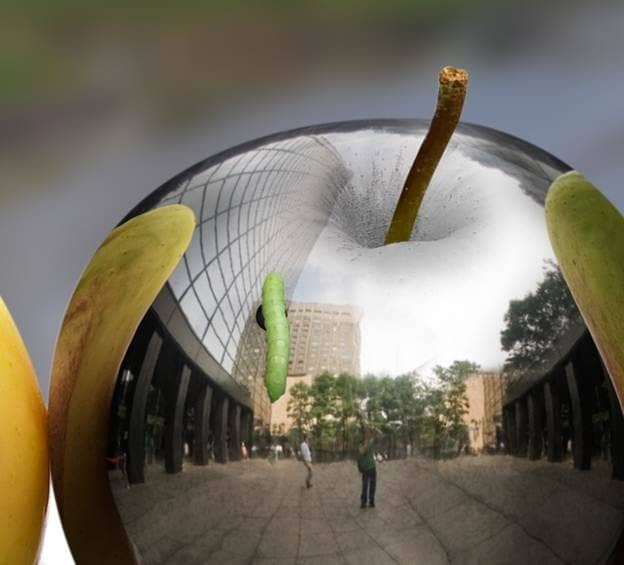
Step 35
Add a layer mask to the worm layer by choosing Layer > Layer Mask > Reveal All. Select a round soft brush and paint with black in the layer mask the upper part of the worm to give the illusion that the worm is crawling into the hole.
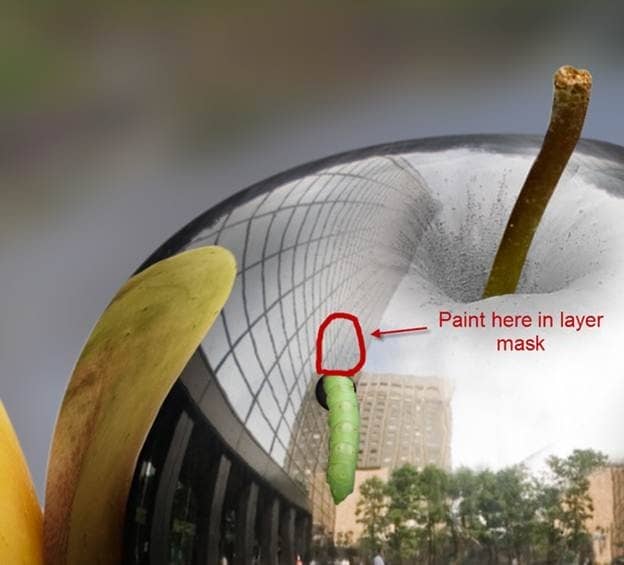
Step 36
Let's create some shadow below our worm. Create a new layer (Ctrl + Shift +Alt + N) and place it just below the worm layer. Choose a round soft brush and paint carefully with black to create a shadow. Change the layer blend mode to Multiply and lower the opacity to around 80%.
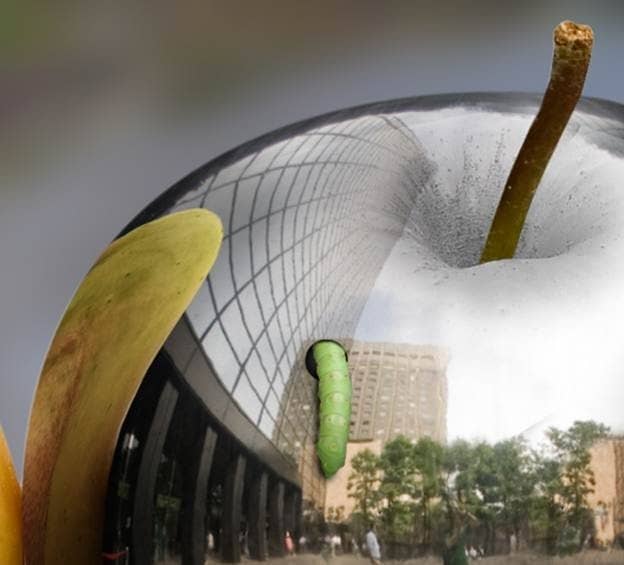
Step 37
For even a further dose of realism I decided to also add a worm reflection on our metal apple. To do this simple click on the worm layer and press Ctrl + J to make a duplicate. Put this layer below the shadow layer and lower its Opacity to 64%. Press V to select the Move tool and drag the worm a little bit to the left. It is barely visible but it's important for the realism of the whole scene.
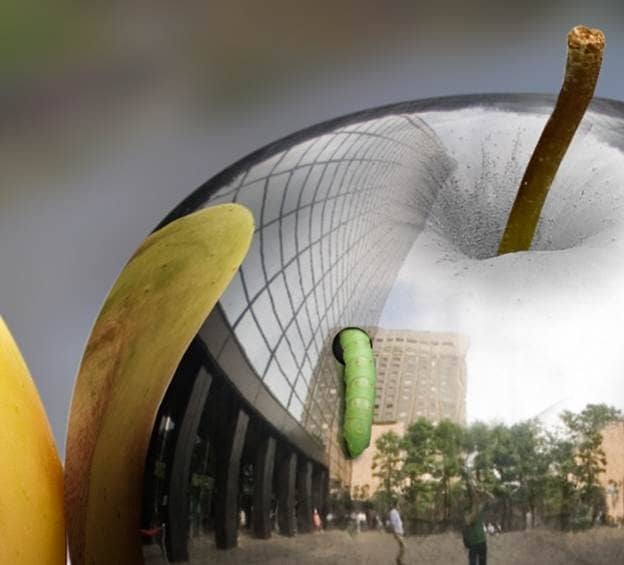
Step 38
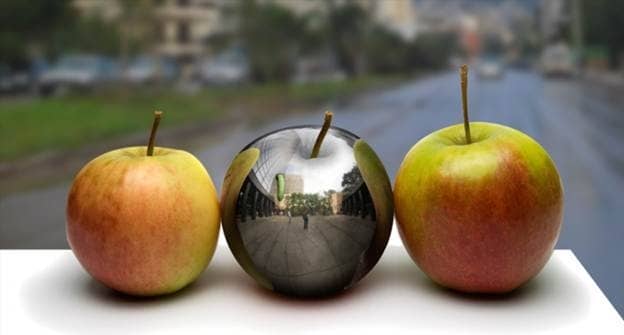
It's time for the final adjustments. Let's take a look at what we accomplished so far. The composition looks good; however I find the image a bit too reddish for my taste. We will correct that in the next step.
Step 39
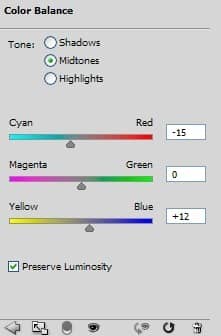
Add a Color Balance Adjustment layer and decrease the red amount while increasing the blue.
Step 40
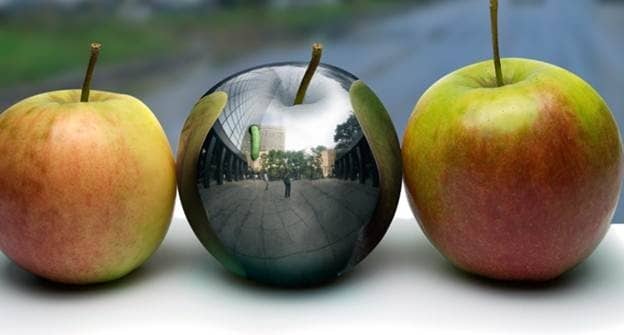
Take a look at the shadow below the metallic apple. Notice that it has the a dark red hue. That's natural because it was the shadow of a red apple. But now it is the shadow of a metallic apple and it should have more cool color. In order to adjust that add a Color Balance Adjustment layer and drag the Cyan-Red slider to the left (-34). Fill the layer mask with black (you should know how to do that by now) and with a round soft brush paint with white over the shadow area (paint in the layer mask). Now we should a have a proper shadow below the metallic apple.
Step 41
To further increase the 3D look of the apple let's add some light in the middle of it. Create a Curves Adjustment layer and drag the curve upwards to lighten. Fill the layer mask with black and with a round soft brush paint with white the center area of the apple in the layer mask.

27 comments on “How to Create a Photo-Realistic Metal Apple in Photoshop”
boo boo bam
Hi I couldn't download the Metallic Ball. I received an" Imagine could not be loaded" message. Is there another way to download this image?
Mrs. Johnston? you probably don't remember me but I think I am one of your 4th grade students.
I tried to download the metallic ball and was told Image could not be found..
https://upload.wikimedia.org/wikipedia/commons/9/9d/Chrome_ball_in_Ginza.jpg
I like me!
Enjoyed it!
Great tutorial, I learned a lot!
THX! I did an awsome metallic cherry :)
Amazing. . Very nice, thanks for sharing................
Nice tutorial. Only think I didn't like is that you kept forgetting to tell us when to add layer masks...
techniques and ideas was great
The detail in this is amazing
This is fantastic!
forgot to fix the white triangles at the bottom of the apples curve
amazing work!
Great!
Great! I learned from it..
Very nice tutorial..
khupach chhan explain kelele ahe
fantastic!
This is really good thank you sir.
Nice, but the light sides (non-adjacent) of two non-metallic apples was left unfixed thus it didn't jibe to the light source 'you' have indicated.
no
Exvellent tutorial!!! I like the fact that you are focusing on details!
Impressive tutorial, Adrian!
Good..!
how do you un-desaturate