Make skin look perfect in one-click with these AI-powered Photoshop actions.
Step 13
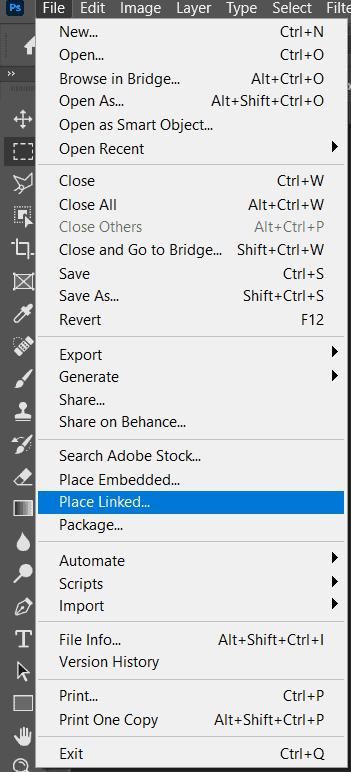
Next we will open Cloud. Go to File > Place and position the image with the transform tool (Ctrl / Cmd + T). Hold Alt + Shift and resterize like image below. In Photoshop CC only hold Alt to resterize al sides together.

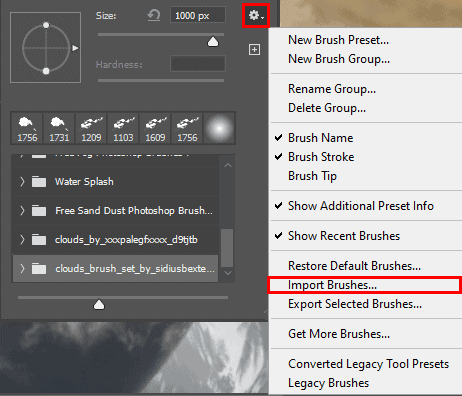
Next, we need to import brushes. Select a Brush Tool(B) and right click on background. Now click on the gear icon and Import Brushes (Select a downloaded brush).
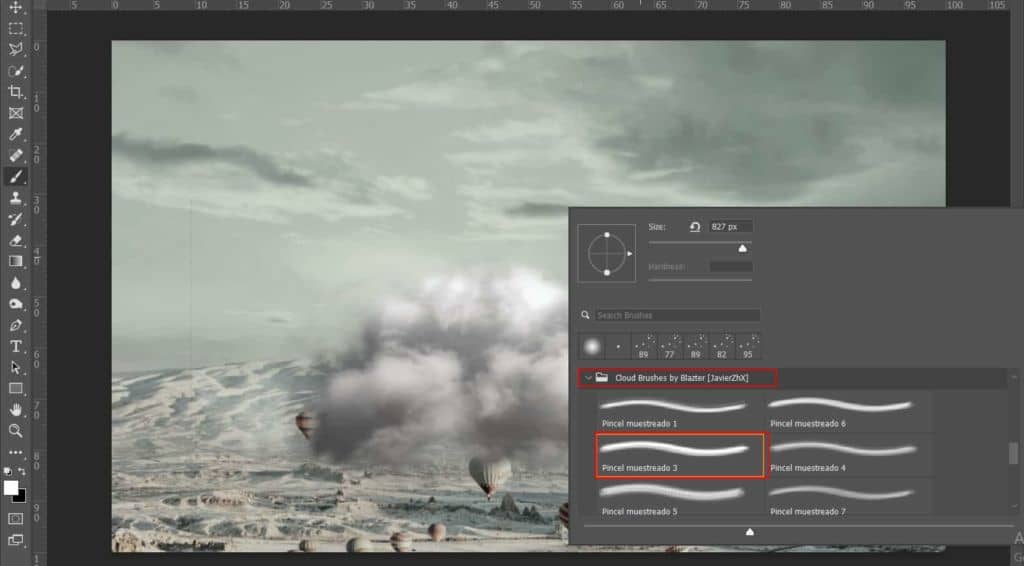
Create a layer mask to a cloud layer and use "Clouds Brushes by Blazter " number 3 and start painting the cloud. Foreground color set to black.

Step 14
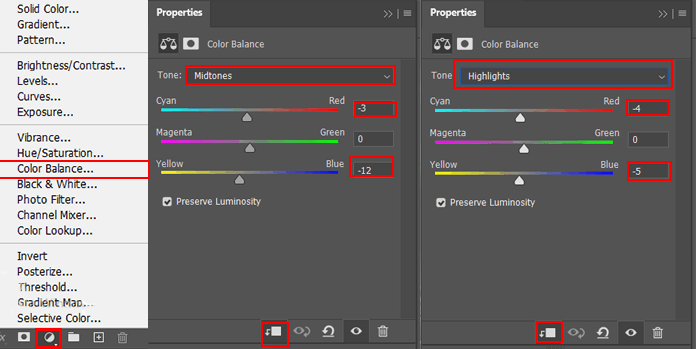
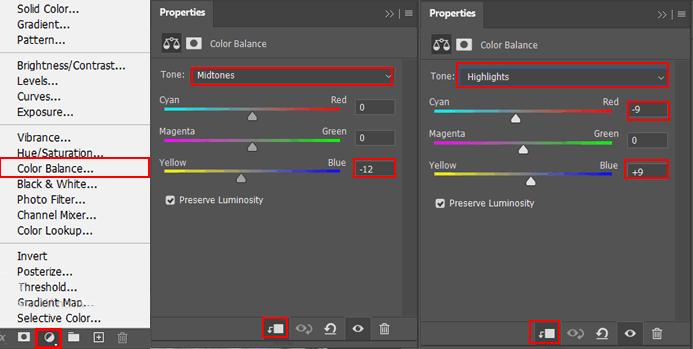
Add Adjustment Layer "Color Balance"
Step 15
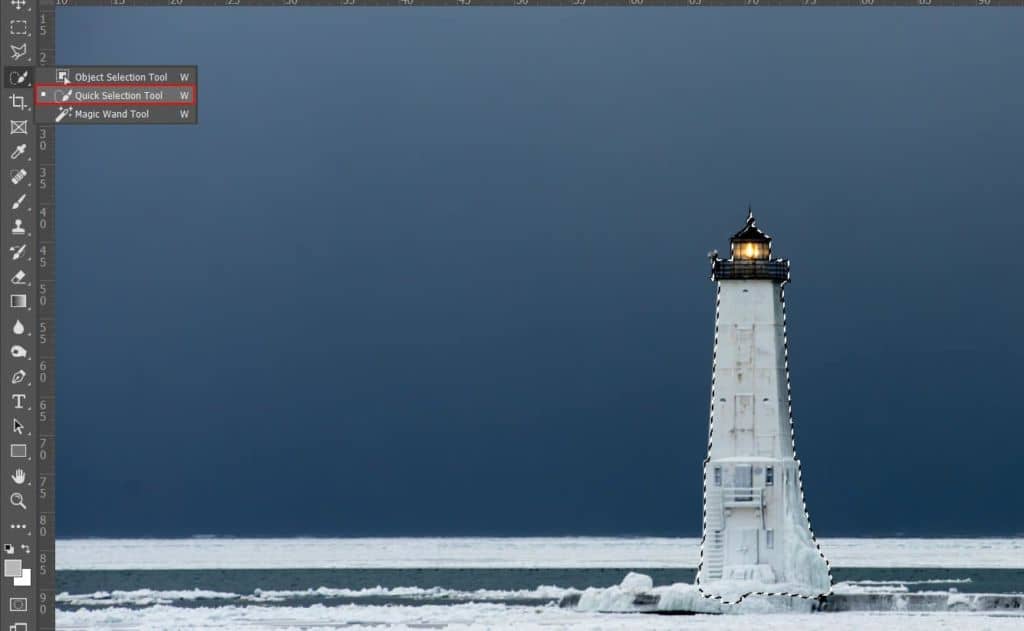
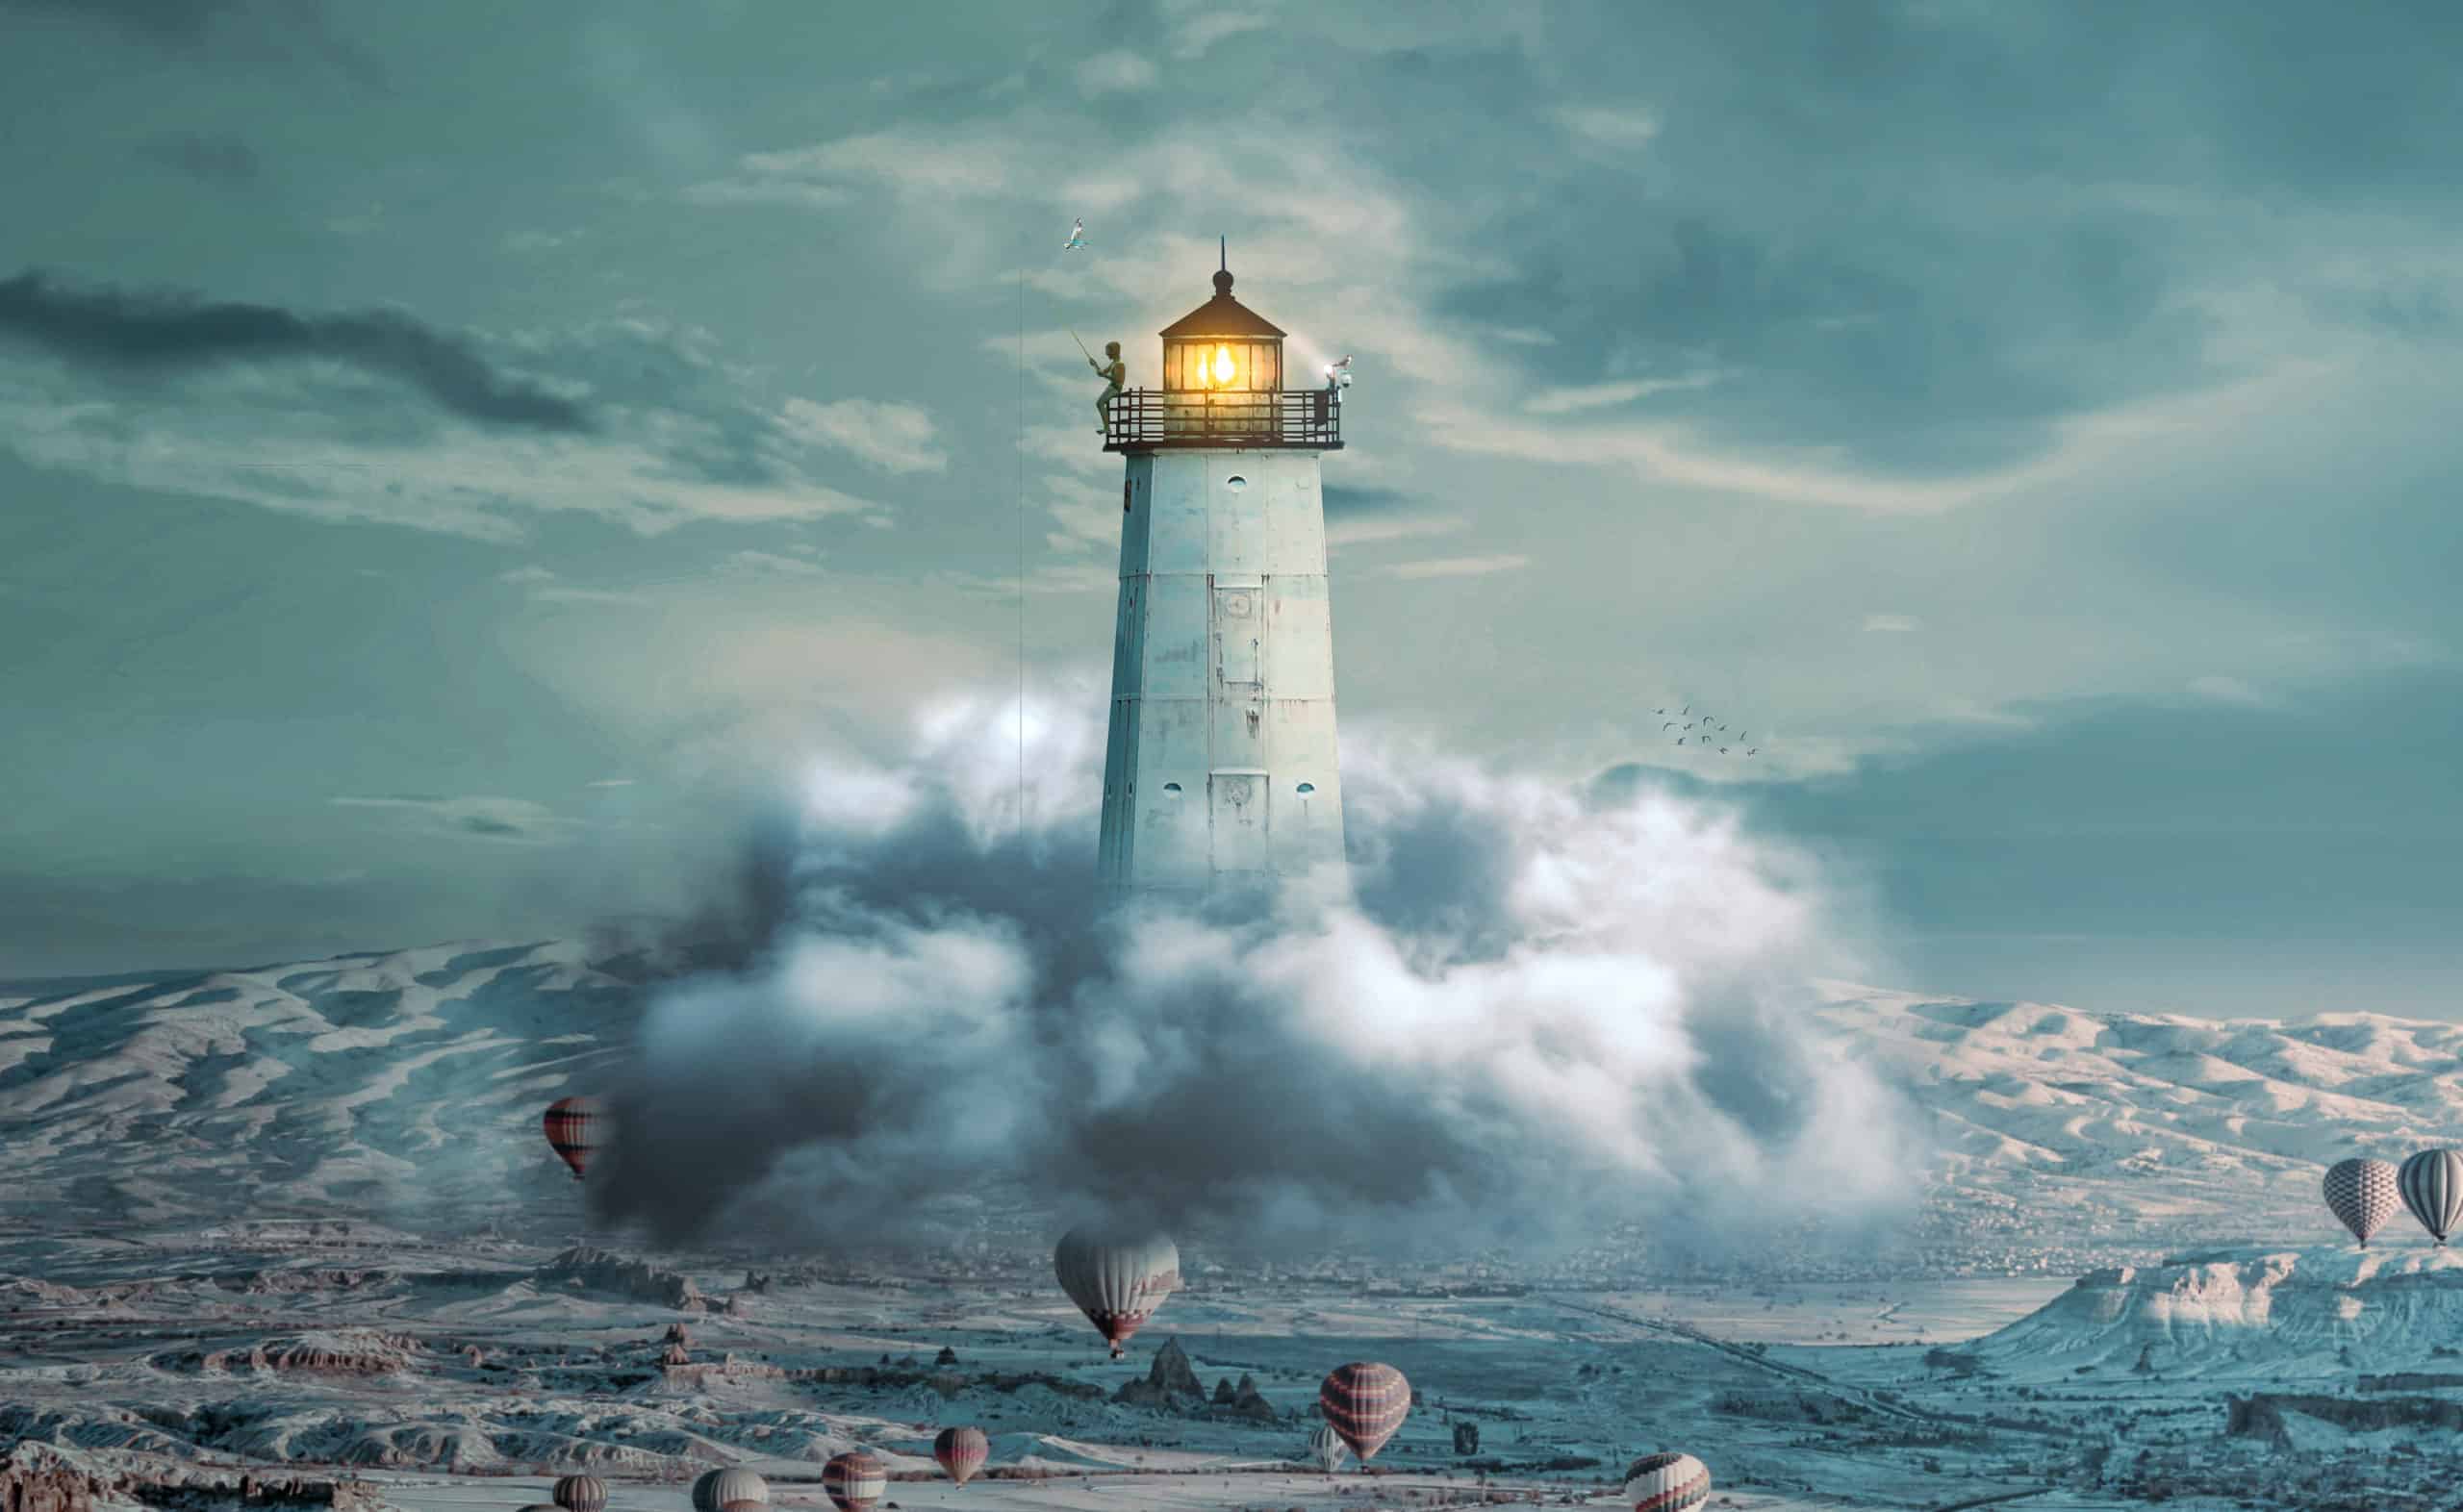
Next we will open Light House. After you open the image, use Quick Selection Tool(W) and start selecting. After the selection area has been created, simply copy (Ctrl / Cmd + C) and Paste (Ctrl / Cmd + V) it to our work canvas. Then position the image with the transform tool (Ctrl / Cmd + T). Hold Alt + Shift and resterize like image below. In Photoshop CC only hold Alt to resterize al sides together.

Step 16
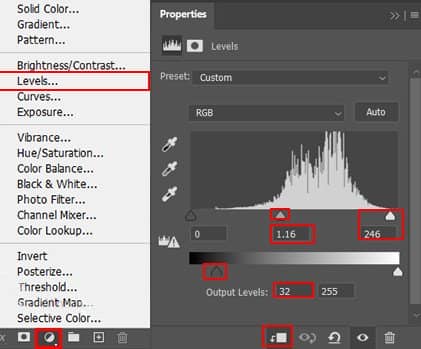
Add Adjustment Layer "Levels"
Step 17
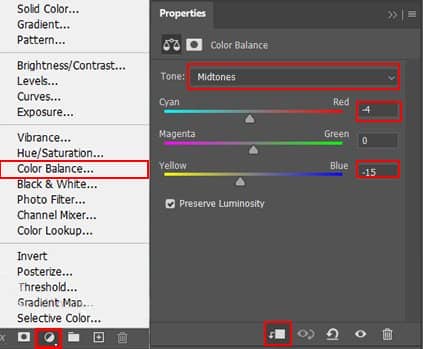
Add Adjustment Layer "Color Balance"
Step 18
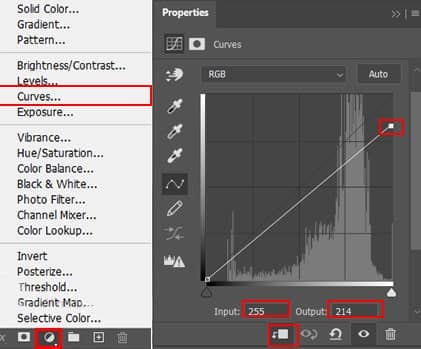
Add Adjustment Layer “Curves” and press Ctrl/Cmd + I to invert. Then use Brush Tool(B) Soft Round with foreground color white and paint on Dark parts.

Step 19
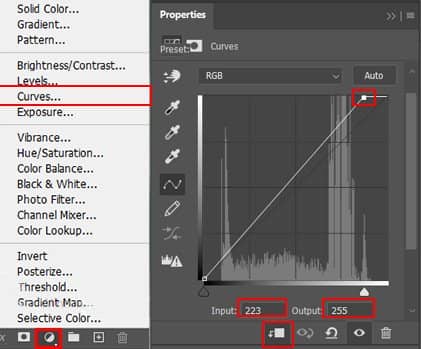
Add Adjustment Layer “Curves” and press Ctrl/Cmd + I to invert. Then use Brush Tool(B) Soft Round with foreground color white and paint on Highlight parts.

Step 20
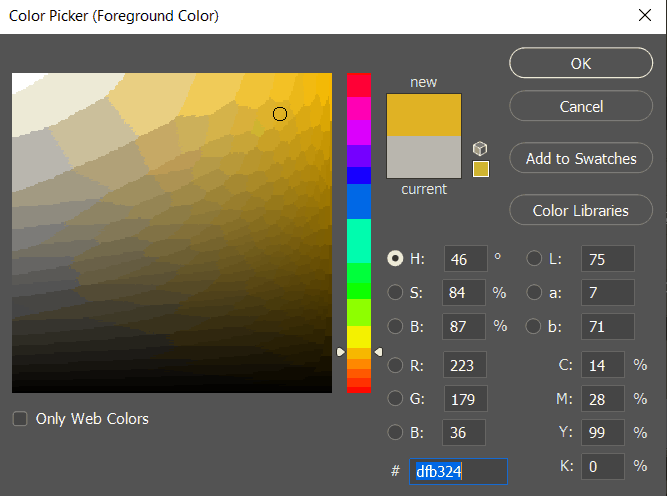
Next, add more dramatic light. Create a new layer and Blend mode change to Linear Dodge (Add) then use Brush Tool(B) Soft round with foreground color Yellow #dfb324 and paint.

Step 21
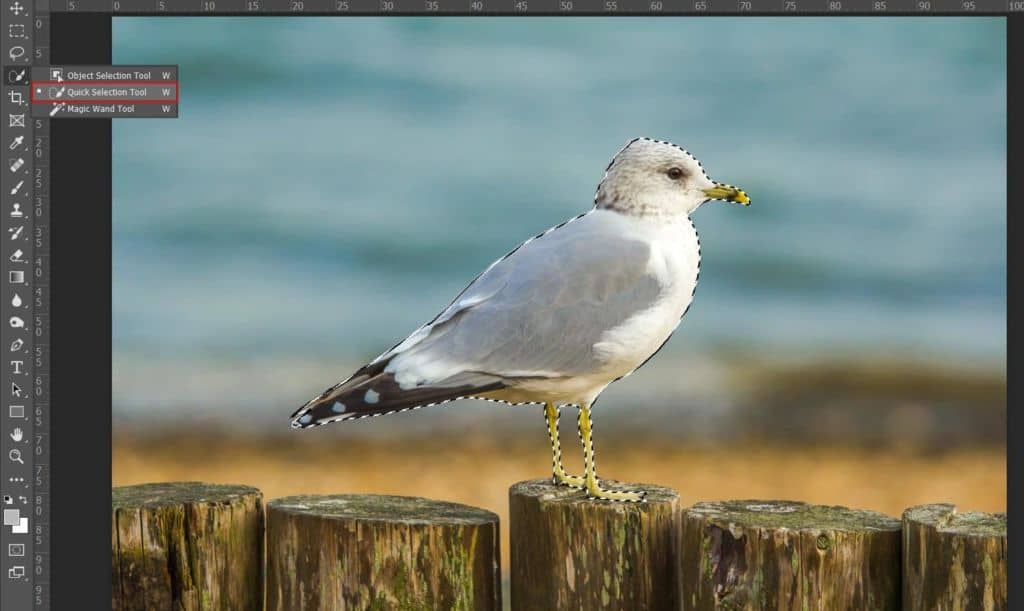
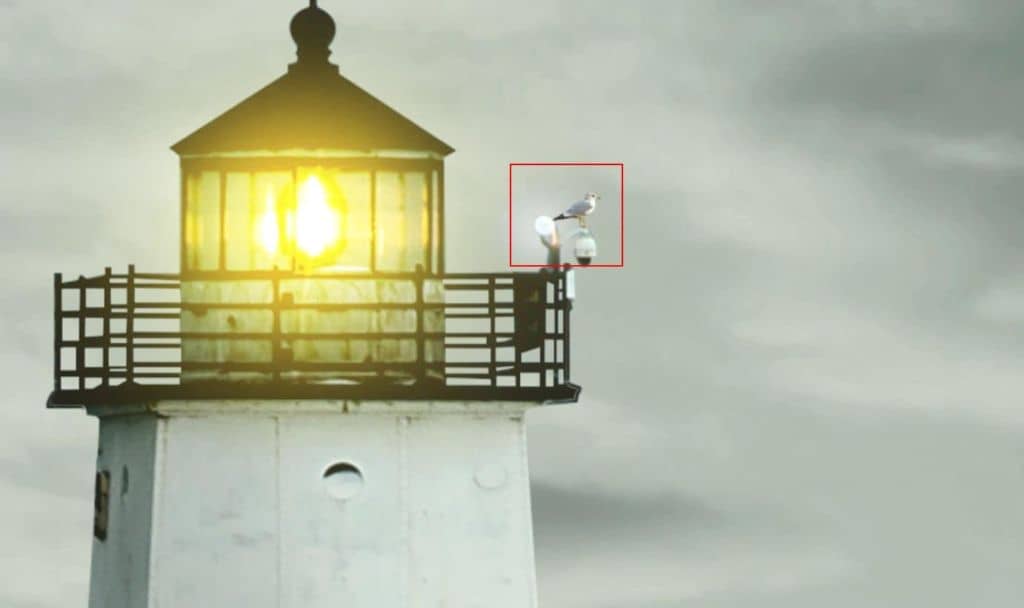
Next open Seagull, after you open the image, use Quick Selection Tool(W) and start selecting. After the selection area has been created, simply copy (Ctrl / Cmd + C) and Paste (Ctrl / Cmd + V) it to our work canvas. Then position the image with the transform tool (Ctrl / Cmd + T). Hold Alt + Shift and resterize like image below. In Photoshop CC only hold Alt to resterize al sides together.
Step 22
Add Adjustment Layer"Curves" and press Ctrl/Cmd + I to invert. Then use Brush Tool(B) Soft Round with foreground color white and paint on Dark parts.


One comment on “Create a Light House on Cloud Photomanipulation Tutorial”
Nice tutorial.