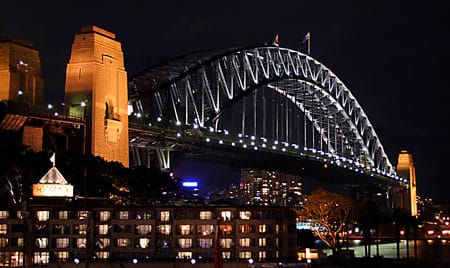
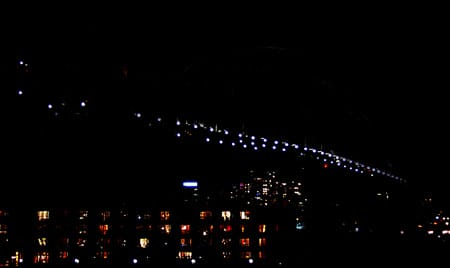
Make night scenes more glamorous with this Photoshop effect that generates dazzling star effects from light sources. In this Photoshop tutorial, you will learn how to separate the light sources from the photo and use the separated light sources to create a 4 point star filter.
Update: This tutorial has been refreshed for Photoshop CC. Check it out here.
Before and After Star Filter Photoshop Effect
Original Image

Star Filter Photoshop Tutorial

The Process with Photoshop
To create this star filter effect with Photoshop, we need to first find the light source to create the star effect from. Once it is created, the light source is blurred diagonally to create the first half of the star. Then, a copy of the light source is duplicated and blurred the opposite direction to complete the star. Once done, it is blended into the photo and tweaked for sharper flares.

Step 1
Open a photo into Photoshop. This is the image that will be used for this tutorial:

Step 2
First, we need to create a layer with just the light sources. Press Ctrl+J to duplicate the layer or go into the Layer menu and select Duplicate Layer. Double click on the text of the new layer and rename this layer to Lights.

Step 3
To find the light sources, we’ll simply use the levels tool to filter out everything except for the brightness areas in the photo. Press Ctrl+L to access the Levels tool or open the Image> Adjustments menu and select Levels. In the Levels tool, drag the middle input slider to the very right so that the image becomes posterized.

Step 4
Most of the areas that are not light sources are gone, but we still need to manually erase the areas that are not light sources. Select the brush tool and set the foreground color to black. Then, paint over all the areas that are not light sources. This is what the image used in this tutorial looks like now:

Step 5
Duplicate the layer and change the blending mode to screen. This layer will be used to create the first half of the star.

Step 6
Open the Filter> Blur menu and select Motion Blur. In the Motion Blur window, change the angle to 45º and adjust the distance to your preference of how large you would like the star to be.
8 responses to “Star Filter”
-
I use this tutorial all the time in my airplane photography, particularly to highlight the beacons. My only issue is that sometimes the rays are a bit thick. What I do, is to to the individual offending highlight and 1.) black out a significant portion of the highlight which allows for sharper, more realistic rays, and 2.) Make sure the the highlight is the color I want. Aircraft beacons flash red, BUT the core is yellow, so I will paint the core in the color (red in this case) I want the rays to be. When you SCREEN all the layers you don’t lose the yellow core of the beacon, but the rays will be red! I also use it for street lights, and other highlights that may have two or more colors!
I MAY have an idea for the rainbow (laser etched) effect
-
Can you share your idea for the rainbow/laser effect?
I add a rainbow gradient and clip it to the flare layers to give it a holographic look but I have troubles making the flares thin without going in by hand and shrinking every large blob.
-
-
how can you give off a gradient effect to the star? like a rainbow
-
I just tried this out and it works perfectly! Thank you!
-
In step 7, there is no Auto Adjust in Image>Adjustments. Perhaps you meant in Levels?
I was unable to see any change when doing step 6 thus was unable to adjust the size of the star. I had to reach step 7 and use Levels>Auto Adjust before I could see the radiants.
After finishing my star bursts were blunt, not tapered to a point like yours.
-
Yes sorry this might have been removed in an update.
You can use Levels and click on the auto adjustment or just press Shift+Ctrl/Cmd+L.
If it’s not as tapered, make sure you’ve applied the motion blur several times. If you only do it once, it won’t have the sharp pointy edge.
Hope this helps!
-
-
^^
-
nice


Leave a Reply