
Give your photos a unique look with this retro effect that’s super easy and fun. This effect is a great way to enhance the look of photos with a dark background. It will also only take you two minutes to complete because it only uses two layers.
Preview of Final Results

Step 1
Start off by opening any photo into Photoshop. This effect works best with isolated objects on black backgrounds such as the image below which I created with these Smoke brushes. There’s also the Particle Smoke brushes that will work too.

Step 2
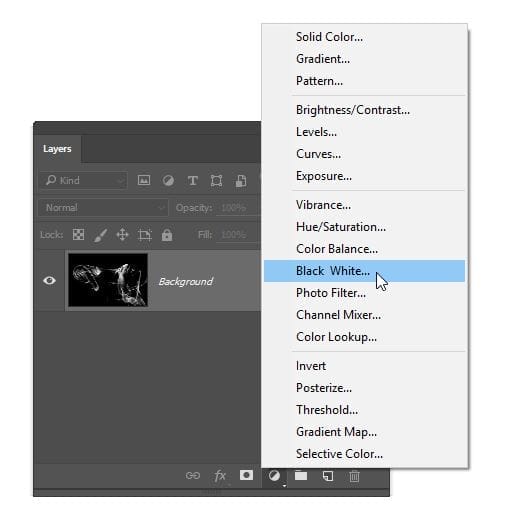
To begin, we’ll desaturate the image. This step is only needed if your image isn’t already black & white. In the Layers palette, click on the New Adjustment Layer button then choose Hue/Saturation.
Step 3
Now we’ll create a new layer. This is the layer where we will be painting the colors on. Click on the New Layer button in the Layers palette. Rename this layer to “Rainbow Color”. Change the blending mode to Color.

Step 4
The primary colors that we’ll be using are yellow, magenta, and cyan. Before we start painting, we’ll use the Swatches palette so that we can quickly select those three colors. In the Swatches palette (Window > Swatches), click on the panel menu (top-right of the panel) then choose any of the CMYK swatches.

When it asks if you want to replace or append the swatch, choose replace. Your swatch palette will now have yellow, magenta, and cyan as the first three colors. Now you can select one of these three colors quickly.

Step 5
Select the Brush too. Right mouse click on the image and the brush options will appear. Select a soft round brush with a hardness of 0%. Don’t worry about the master diameter setting yet.

Step 6
Begin by selecting either yellow, magenta, or cyan from the Swatches palette and painting anywhere in the image with a large brush size. You can adjust the brush size by pressing the [ or ] key on your keyboard. Select a different color and paint the rest of the image. You can then set your brush opacity to 50% and continue painting until you get the results you like.
13 responses to “Surprisingly Easy Rainbow Light Painting Effect in 2 Minutes”
-

any to teach m pls
-
really easy thanks for the good tutorial
-
I really loved it thanks alot
-
I really it thanks alot
-
Por que no explican en español,gracias
-
Love it! Thanks. Changing my profile pic thanks to this tutorial.
-
Fb is being censored. Text hidden. Serious problem.
-
Love it
-
Isabel Ko
-
What the, where’s the actual article content?
-
Thank you!, amazing effect. Very useful.
-
I like it, thanks a lot
-
easy, brilliant, cool !
Leave a Reply to ayaCancel reply