In this tutorial, we will create an abstract photo artwork of a girl portrait with a disintegration effect on it. We will learn to create a disintegration effect in a handy and practical technique, adorn the photo with stunning lightning and then complete it with color adjustment. Throughout the tutorial, we will have fun learning simple and handy tricks to create photo artwork in photoshop.
What you’ll be creating
In this tutorial we will create an abstract scene of a girl with a disintegration effect on face and body. We will use some essential techniques for doing photo manipulation. We will work with paths, brush tools, some filters, color adjustments, and textures all through the steps in this tutorial. This tutorial is done with Photoshop CS3. Don’t forget a glass of coffee and optionally a pack of cigarettes for your companion. Ready..?

Tutorial Resources
- Girl – Pixabay
Step 1
Well, start by opening the girl image in photoshop. Grab the Magic Wand tool (W) located in the tool panel on the left side of the photoshop. Set the value of tolerance to 32.

Click the white background of the girl image to make a selection on it indicated by blinking small dots around the white background.
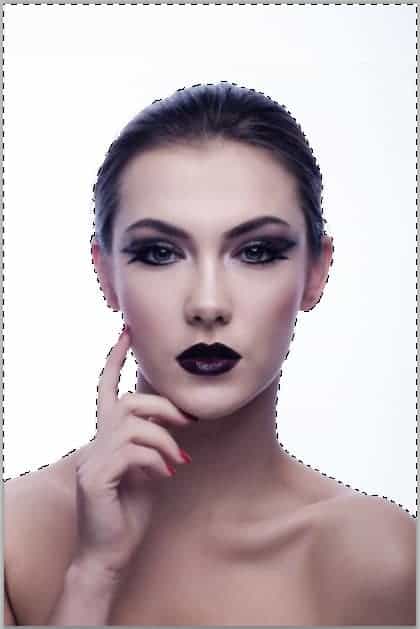
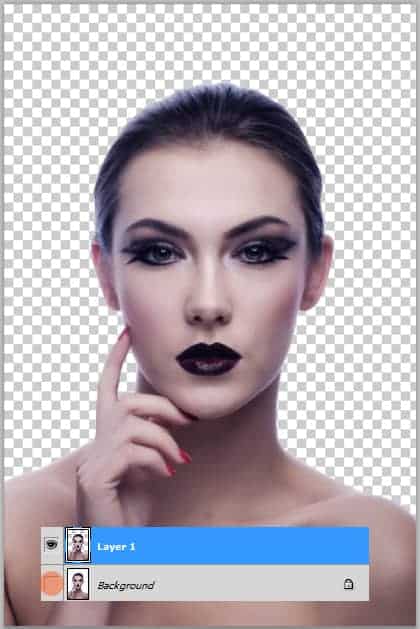
Let’s inverse the selection by hitting Shift+Ctrl+I. Now hit Ctrl+ J to duplicate the girl. Hide the original image by clicking the eye icon beside it.

Step 2
We will alter the tone of the girl’s skin by giving it some new layer adjustments. Firstly, while being active on layer 1 (the extracted girl image), go to layer > new adjustment layers > brightness/contrast. Set this adjustment layer to these values:

Give more two other adjustment layers: curves and selective color.
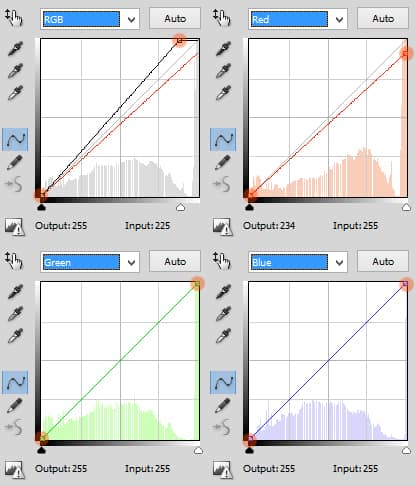

Given the tree adjustment layers, the look of the image should like the one in the screenshot below. Select layer 1 and the tree adjustment layers, hit Ctrl+E to merge them into a new single layer. Name this layer, say, girl.

Step 3
Now let’s start creating the main canvas for the scene we are going to create. Hit Ctrl+N to create it. Set the canvas/document to the size given below:
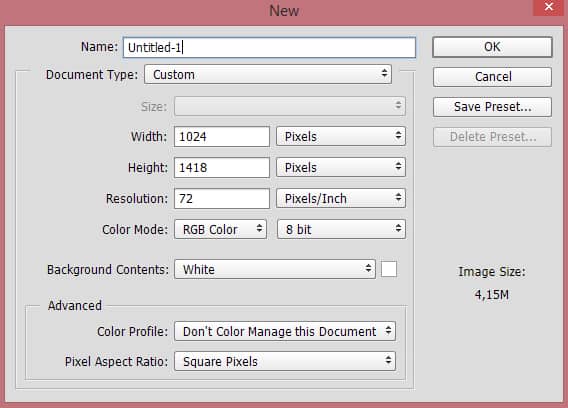
Next, open the girl image to the main document and convert it into a smart object layer by going to layer > smart objects > convert to smart object. Use the Free Transform tool (Ctrl+T) and scale down the size of the image to fit the size of the new canvas. Here is the position and size of the girl for your reference:
14 responses to “Create an Abstract Portrait in Photoshop”
-

The steps listed don’t seem to be the ones actually used. It’s not working out at all, for example coloring over the eyes makes the eyes no longer visible.
-
WOW!!! that’s a really informative article, I am very much inspired. Your tutorial helps me as like my mentor, i am looking forward to more informative article form you.
-
I am stuck on the first step.
-
This is great, but It isn’t working for me because of the way I am drawing the texture? Are you using a tablet?
-
Having these types of skills would be very valuable!
-
I have only started using photoshop for things other than photo retouching. It is amazing how much you can do with the program once you get into it and start to use the tools the proper ways.
-
Kayanya ini orang indonesia bukan ya mas Wid, salam photoshoper mas hehe
-
This is a very cool effect, but I can’t create it in Photoshop CS5 or Photoshop CS6 or Photoshop CC2015. Do you not have an updated version?
-
I have wanted to make something like this for a project I have in school. This tutorial should do the trick!
-
This is really helpful and so easy to understand for anyone.Thanks you!!
-
Wow. This is stunning! Great job here. And thanks for sharing the steps on how you achieved this, will give it a shot when I have some spare time.
-
Nice one Dek!
-
Good one
-
One of the best portrait I have ever seen.
Leave a Reply