Turn any photo into a dot grid artwork with these Photoshop actions. You'll get great results with dots that change size. They get larger in brighter areas and smaller in darker areas. Free download available.
In this tutorial, you'll learn how to create a beautiful scene for the angel by manipulating different stock images. You will create an angel by working on the blend mode, shadows & lighting, colour matching techniques and push your manipulations skills to a new level in Photoshop.
You will learn how you can create this Angel Manipulation in photoshop.We'll first combine different stock images to create a nice scene and then use texture to give it a vignette effect. Then add model to the scene and work with shadows,lights,deal with hair and add wings to her create an angel. Blend the angel to the scene with variety of blendings techniques.Then add the leaves to the scene and finish it up with applying final adjustment layer.At the end I will show a simple way to make the aura or circle for an angel. You'll need Photoshop CS6 or newer to follow this tutorial.
Tutorial Resources
- Sand Beach - Freeimages.com
- Sky - SalsolaStock
- Nebula by - JennyLe
- Rain texture by - Koko-Stock
- Beach by - Fotophi
- Model by - Mjranum Stock
- Hair stocks by - CindysArt
Wing by - Wolverine(Alternative)- Leaves by - MaureenOslder
- Debris brush by - Zigabooooo
Step 1
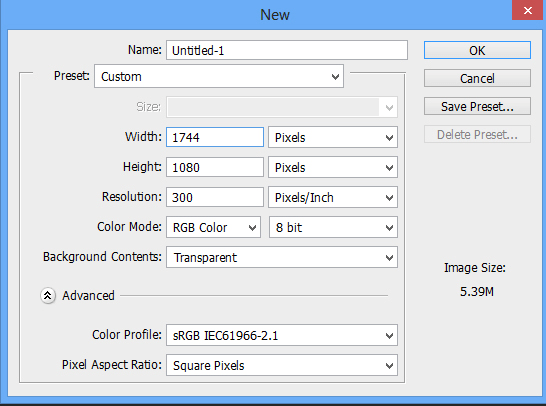
Start by creating a new document.Goto file>new and set the setting as shown in the image below.
Step 2
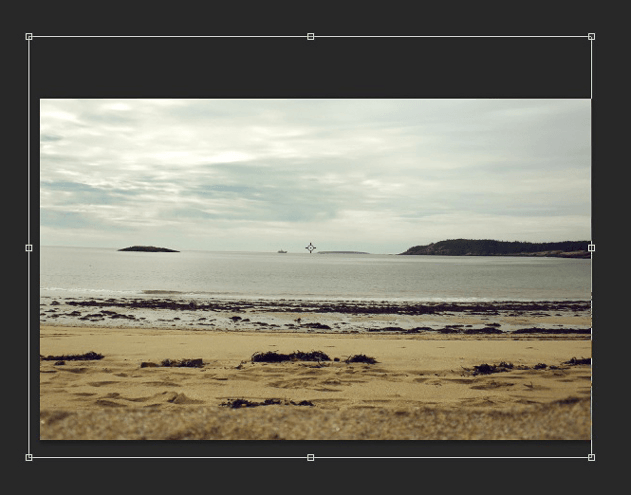
Now place the sand beach image to the main canvas by selecting File>place then locate the sand beach image and name it base.We use place command because photoshop automatically place the image as smart object.
Step 3
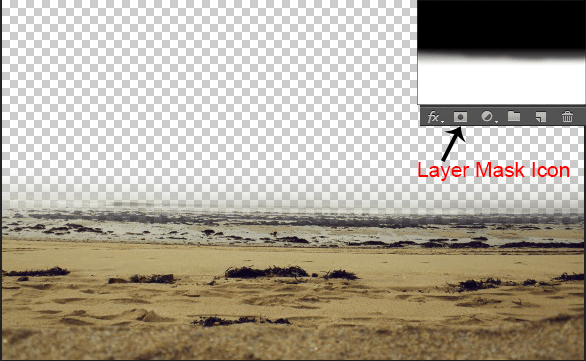
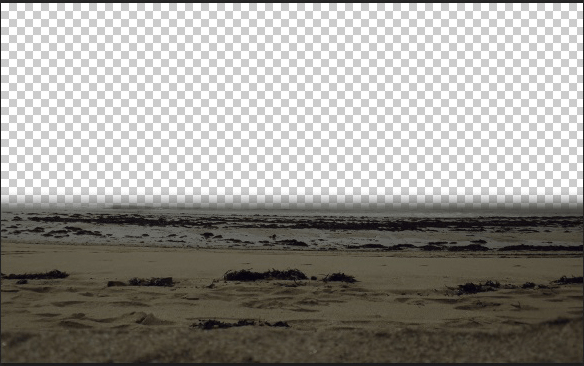
Now add a layer mask to the base image by selecting second button on layer panel or see the below image.Then pick the brush tool by pressing (B) on keyboard and gently paint with soft round black brush on the layer mask. You can see the result below.
Step 4
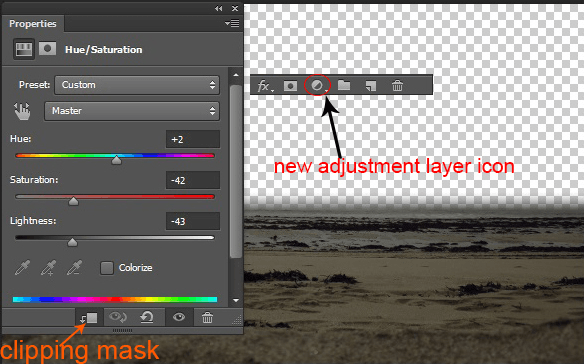
Now, add a Hue/Saturation(layer>new adjustment layer>hue/saturation or see the image below)adjustment layer then click the button shown in the image to create a clipping mask.By Creating Clipping mask this layer(Hue/Saturation) will only effect the layer which is clip to it not to the rest of the layers.Set the setting of the Hue/Saturation as shown in the image below.
Here are the results.
Step 5
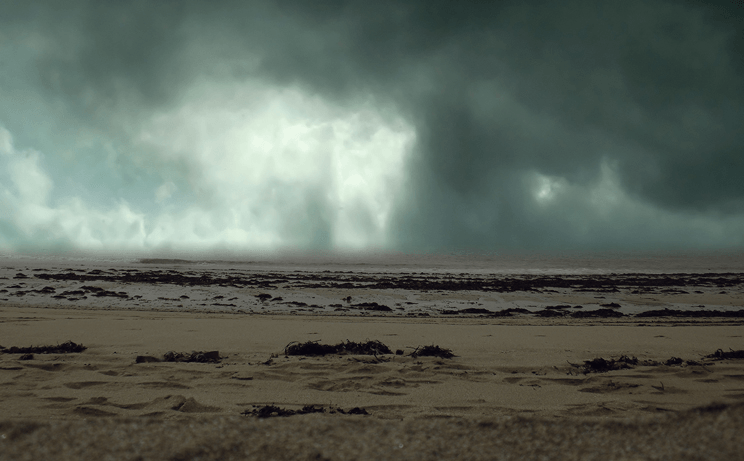
Now, Place the sky image below the base layer.
Step 6
Now,Add a Curves and Brightness/Contrast adjustment layer to sky and set the setting as shown in the image.
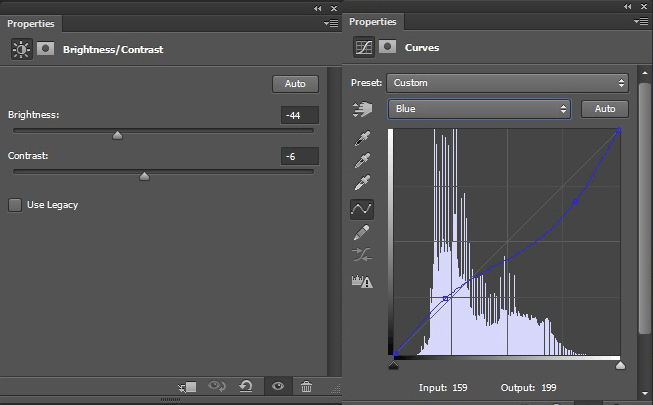
Here are the results.


13 comments on “How to Create a Beautiful and Emotional Angel Photo Manipulation in Photoshop”
very nice thank you for sharing your photoshop tutorial
I was excited to start this tutorial but "Wing by – Wolverine" stock image is missing
Fixed!
The wings stock photo is no longer available.
Nice tuts! Thank you for sharing!
Awesome
Cool tutorial, it's especially a good review on adjustment layers.
nice
Nice Work
Great tutorial!
Enjoyed thatl
Nice
nice work!