Luminar AI lets you turn your ideas into reality with powerful, intelligent AI. Download the photo editor and see how you can completely transform your photos in a few clicks.
Learn how to create abstract 3D shapes, stunning star flares, and more! This Photoshop tutorial will show you how to create a high-res poster in detailed steps from start to finish. You’ll need Photoshop CS5 Extended to follow this tutorial.
Preview of Final Results
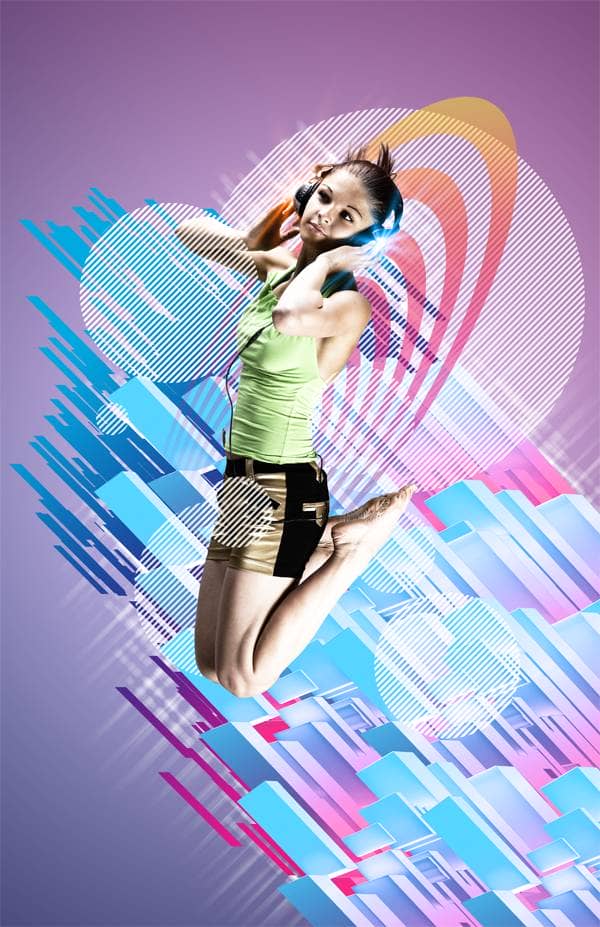
Download the PSD
Electrifying Music Posters.zip | 294.8 MB
Download from FileSonic
Download from Website
Video Tutorial
Electrifying Music Poster with Geometrical Shapes Photoshop Tutorial
Tutorial Resources
Step 1
Create a new 11x17 inch document. To do this, go to File > New, select U.S. Paper as the preset, then choose Tabloid as the size.
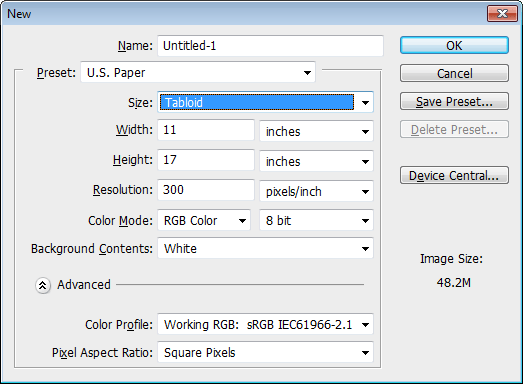
Step 2
Create a new Gradient Fill layer by going to Layer > New Fill Layer > Gradient. Apply the settings shown in the image below.
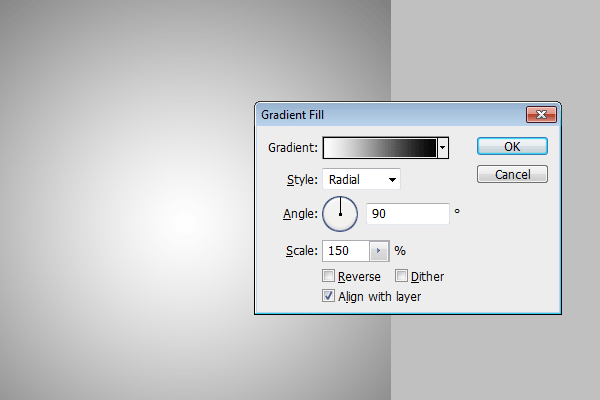
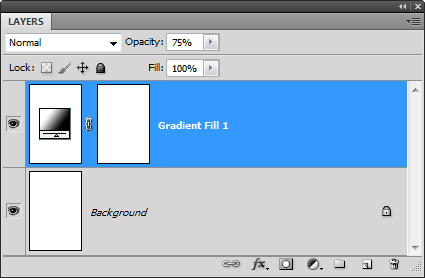
You’ll get a new layer above your Background layer.
Step 3
Create another Gradient Fill layer by going to Layer > New Fill Layer > Gradient. Create a Gradient like shown below. Click on the gradient to change it.
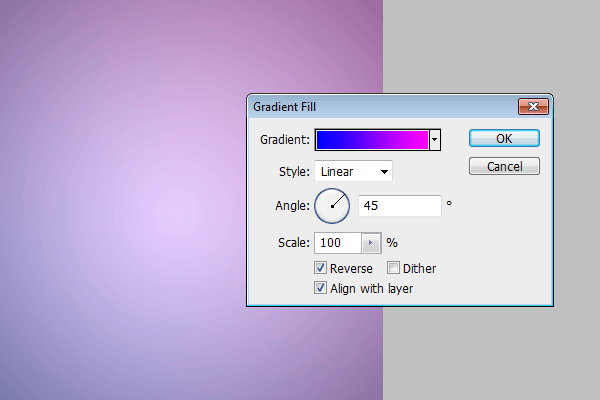
Start by selecting the default Black and White gradient. Click on the bottom left input slider then change the color to #FF00FF. Click on the bottom right input slider then change the color to #0000FF.
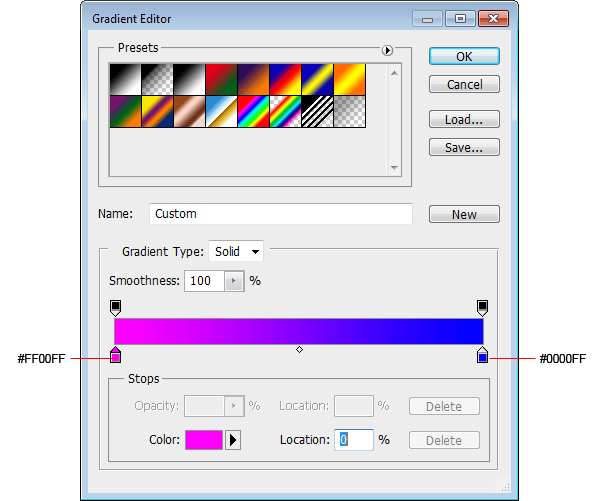
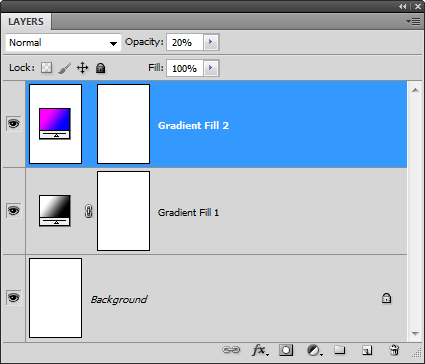
This layer should appear above the Gradient Fill layer.
Step 4
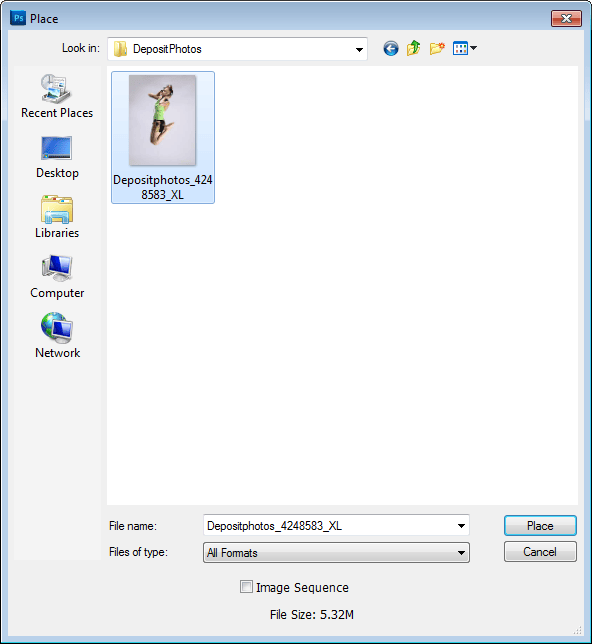
Go to File > Place, browse for the photo of the girl then click OK.
Scale the image then press Enter on your keyboard to apply the transformation.
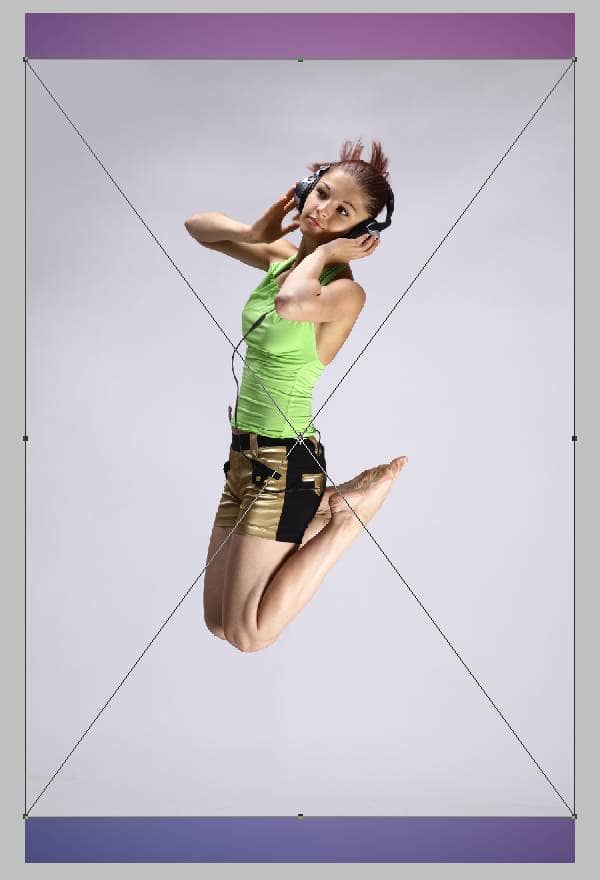
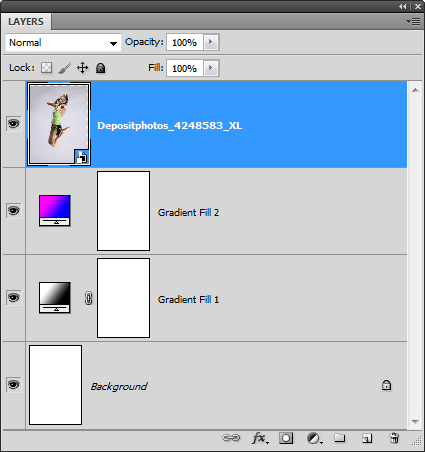
You’ll get a new layer which should appear as your top layer. You’ll notice that there is a icon on the bottom right of the thumbnail. This simply indicates that the layer is a Smart Object which means it retains the original image data so that you can manipulate the image as much as you like without degrading the image quality. The downside to using Smart Objects is that certain tools and filters won’t work. We won’t be manipulating the photo enough to make use of Smart Objects, but it is always good practice to use Smart Objects whenever you can.
Step 5
Create a selection of the girl. There are many ways to create a selection and the best technique depends on the photo you’re using. For our photo, the background is very simple so we’re just going to use the Magic Wand tool. Start by creating a selection of the background.

Choose Select > Inverse to inverse the selection.

Select the Rectangular Marquee tool then while holding down the Alt or Option key on a Mac, drag a rectangle selection to deselect the top area. Repeat this for the bottom area. You should now have a selection of just the dancer.

Step 6
Click on the Refine Edge button to enhance the selection. You can find this button in the option bar when you have any selection tool selected.

If you look in the hair, you’ll notice that the selection doesn’t look very good. First, change the View Mode to Overlay. Click on the the Refine Radius tool button then paint over the hair. Note that the Refine Radius tool is only available in Photoshop CS5 or newer. You can adjust your brush size by pressing the square bracket keys on your keyboard.

This is what your selection should look like after you’ve painted over the hair. Click OK to apply the adjustments.

Step 7
In the Layers palette (Window > Layers), click on the Add Layer Mask button. This will create a layer mask using the selection you just created.

Step 8
Now we’re going to create the diagonal bar brush. Create a new layer (Layer > New Layer or Ctrl/Command+Shift+N). This layer should be positioned as the top layer. Note that this is only a temporary layer for us to create the brush and will be deleted later.

Select the Rectangular Marquee tool then create a selection roughly the same size as the image below.

Fill the selected area with black. You can do this by going to Edit > Fill, set the contents to Black, then click OK.

Go to Edit > Transform > Skew. Drag the top middle input slider the right so that it is skewed like shown in the image below. Don’t deactivate the selection yet.

Now go to Edit > Transform > Rotate. Move your cursor outside the bounding box then drag to rotate. If you hold the Shift key while rotating, it’ll snap the rotation to 15° increments. Rotate like shown in the image below then press Enter on your keyboard to apply the changes.

Step 9
Go to Edit > Define Brush. You can name it anything you like. I’m going to name it “Diagonal Bar”. Click OK then deactivate the current selection by going to Select > Deselect or pressing Ctrl/Command+D.

Step 10
Delete the current layer by going to Layer > Delete > Layer.

Create a new layer (Layer > New Layer or Ctrl/Command+Shift+N) and position it below the layer with the girl. Rename this layer to “Diagonal Bars”.

Step 11
Select the Brush tool then select the Diagonal Bar brush that we just made. You can change the brush by right-clicking anywhere in the document window.

Go to Window > Brushes to bring up the Brushes palette. Checkmark the Shape Dynamics option then set the Size Jitter to 100%.

Checkmark the Scattering option then set the Scatter to 100%.

Step 12
Make sure your foreground color is black. You can reset your foreground and background colors by pressing D on your keyboard. With the Brush tool selected, paint on the current layer so that you get something like this.

Here’s what the Layers Palette looks like.

Step 13
Go to Layer > Layer Style > Gradient Overlay. Load the Spectrums set of gradients.

Select the Spectrum gradient. Set the angle to –45° and scale to 150%. Don’t click OK yet.

In the document window, adjust the gradient position by dragging it towards the bottom right until you get a blue/pink gradient like shown in the image below.

Step 14
Now we’ll create the 3D diagonal bars. This is where you need Photoshop Extended to use the 3D tools. Create a new layer (Layer > New Layer or Ctrl/Command+Shift+N) and position it as the top layer. Rename this layer to “3D Diagonal Bars”.

Set your foreground color to white. Select the Brush tool then paint some diagonal bars using the diagonal bar brush just like what you did earlier. Don’t make it too big because or else it may be too complicated for Photoshop to process. If it’s too complicated, Photoshop will let you know when you try to convert it to a 3D layer.

Hold down the Ctrl/Command key on your keyboard then click on the thumbnail of the 3D Diagonal Bars layer. This will create a selection of the layer.

You can create a 3D object out of a selection, but the edges will be jagged. To get the sharp edges, we’ll create a vector path. In the Paths palette (Window > Paths), click on the Make work path from selection button. This will create a vector path using the selection.

You’ll now have a new vector path of the selection.

Step 15
Go to 3D > Repoussé > Selected Path. You’ll need Photoshop Extended (not the regular version) to get access to this menu. The 3D Object Rotate Tool should already be selected. Just click and drag in the document window to rotate the Diagonal bars like shown in the image below.

Set the Lights to CAD Optimized then adjust the Depth to reduce the thickness so that you get something like the next image below.

Here’s what the diagonal bars look like after applying the settings above.

Step 16
Go to Layer > Layer Style > Gradient Overlay. Set the Blend Mode to Overlay, Gradient to Spectrum, and Scale to 150%. Don’t click OK yet.

Adjust the Angle setting so that your gradient is aligned with the direction of the diagonal bars like shown in the image below.

Click and drag directly on the image to reposition the gradient so that your gradient goes from blue to pink.

Click on the Color Overlay option to enable it. Set the Blend Mode to Overlay and color to pink (#FF7F7F). Click OK to apply the changes.

Step 17
Now we’re going to rasterize the 3D object to speed up Photoshop’s performance for the edits we’ll be doing next. Before we rasterize the layer, set the render quality to Ray Traced Final. You can do this by going to Window > 3D to bring up the 3D palette then changing the Quality to Ray Traced Final. This will improve the edges of the 3D.

You’ll see a blue grid scanning across the image. This is Photoshoph rendering the 3D scene and may take a few minutes or more before it starts to look good. You can stop it when it looks fine enough for you. If you click or do anything inside Photoshop while it is rendering, the rendering will pause. To resume it, just go to 3D > Resume Progressive Render.

After rendering, your 3D object should have sharp lines and smooth shading like this:

Go to 3D > Rasterize to rasterize the layer then, in the Layers palette, move the layer below the girl.

Step 18
Press Ctrl+G or Command+G on a Mac. This will put the current layer into a group. While holding down the Alt or Option key on a Mac, click and drag like shown in the video below to duplicate and reposition the 3D diagonal bars.
You’ll get a bunch of layers inside a group. Rename this group to “3D Diagonal Bars”.

Make sure you have the 3D Diagonal Bars group selected. Select the Move tool then position the 3D diagonal bars to anywhere you like. Here’s where I placed mine:

Step 19
Next, we’re going to adjust the brightness and contrast of the 3D diagonal lines. As you might have guessed, we can do this with the Brightness/Contrast tool. But there’s a problem; it would be tedious to apply it to each layer inside the group and merging them together isn’t the best idea. Instead, we’re going to convert it to a Smart Object. That way, we can use the layer as a clipping mask for the Brightness/Contrast adjustment layer. You’ll see how this works in a second.
Make sure you have the 3D Diagonal Bars group selected then go to Layer > Smart Objects > Convert to Smart Object.

Now go to Layer > New Adjustment Layer > Brightness/Contrast. A New Layer window will appear. If you don’t see this, make sure that you are creating the new adjustment layer from the menus and not from the Layers or Adjustments Palette. Checkmark the “Use Previous Layer to Create Clipping Mask” option then click OK.

You should now have a Brightness/Contrast adjustment layer above your 3D Diagonal Bars layer. Notice how the adjustment layer has an arrow pointing to the layer below? This means that it is only affecting the layer below. It does this by using that layers transparency as a layer mask.

In the Brightness/Contrast settings, checkmark the “Use Legacy” option then set the Brightness and Contrast to 50. If you don’t see this, go to Window > Adjustments.

Change the blending mode of this layer to Luminosity. This blending mode prevents the Brightness/Contrast layer from altering the colors.

Here’s what the image looks like so far.

Step 20
Now we’re going to create the interlaced circles. Before we can do this, we’ll need to create an interlaced pattern. Start by creating a new 100x100 pixels document.

Select the Rectangular Marquee tool then, in the Options bar, set the style to “Fixed Size”, width to 100%, and height to 25px.

Click to create a selection like shown in the image below.

Create a new layer (Layer > New > Layer or Ctrl/Cmd+Shift+N). Fill the selected area with black. You can do this by going to Edit > Fill, setting the contents to black, then clicking OK.

Step 21
Duplicate the layer (Layer > Duplicate Layer or Ctrl/Cmd+J).

Go to Filter > Other > Offset. This filter is a great tool whenever you want to move an object precisely. We’re going to move it by 50 pixels down so set the Vertical setting to +50 then click OK.

Step 22
We’re going to rotate the image 45 using the crop tool. Before we do this, go to the View menu and make sure that you have the “Snap” and “Snap To > Document Bounds” option selected.

Select the Crop tool then create a crop are of the entire image. To do this, just drag from the top left corner to the bottom right corner.

Rotate it by 45°. To do this, position your cursor outside the bounding box then drag. As you drag, hold down the Shift key so that Photoshop rotates it in 15° increments.

Drag the outer four handles towards the center. It should snap to the document edge.

Step 23
Go to Edit > Define Pattern. Set the name to “Diagonal Interlace” then click OK.

Now that we’re done creating this pattern, close this file (File > Close) without saving and switch back to the original project.

Step 24
First, make sure you have the top layer selected. Now select the Ellipse tool and, in the Options bar, click on the Shape layers button and set the style to “Default Style (None)”. Click on the drop down arrow to bring up then Ellipse Options then select Circle.

Start by drawing a circle somewhere where you want to add an interlaced circle to.

You’ll get a new Solid Color layer as the top layer.

Go to Layer > Layer Style > Blending Options. Set the Fill Opacity to 0%. Don’t click OK yet.

Select the Pattern Overlay layer style. Set the blend mode to Screen and pattern to the “Diagonal Interlace” pattern we just created. Adjust the Scale option to get the results that you like. Click OK to apply the changes.

Here’s what my interlace looks like at 50%. This will vary depending on your documents image size.

Step 25
Rename this layer to Interlaced Circles. Make sure you have the vector mask selected. It should have a black and white outline around the thumbnail to indicate that it is selected.

Select the Ellipse tool. In the Options bar, click on the “Add to Shape Area (+)” button. This will let you add more circles to the vector mask.

Draw a few more circles. If you make a mistake with a circle, just press Ctrl/Cmd+Z to undo then try again. Don’t create too many because we’ll be adding more later. The ones you’re drawing now will appear in front of the girl. The ones you’ll be drawing next will appear behind her. Here’s how I added the circles.

Step 26
Duplicate the “Interlaced Circles” layer by pressing Ctrl/Cmd+J or going to Layer > Duplicate Layer. Move this layer below the layer of the girl.

Add more circles just like what you did earlier. Make sure you have the vector mask of this layer selected then use the Ellipse tool to add more circles. Here’s what the image looks like so far.

Step 27
Reduce the opacity of the two “Interlaced Circles" layer slightly to give them some transparency. I reduced both layers to 80%.

Step 28
Now we’re going to add some star filters to enhance the background a little. Create a new layer (Layer > New > Layer or Ctrl/Cmd+Shift+N). Name this layer “Star Filter” and position it above the two Gradient Fill layers.

Change the blending mode to Screen then fill this layer with black by going to Edit > Fill. Set the contents to black then click OK.

Step 29
Select the Brush tool and change your brush to the Hard Round brush.

Adjust the brush size so that it is about this size:

Step 30
In the Brush palette (Window > Brush), enable the Shape Dynamics option and set the Size Jitter to 100%.

Enable the Scattering option then set the Scatter to 1000%.

Set your foreground color to white then paint in the areas where you want the star filter effect to appear. Here’s how I painted mine:

Step 31
Duplicate the layer by pressing Ctrl/Cmd+J or going to Layer > Duplicate Layer.

Go to Filter > Blur > Motion Blur. Set the angle to 45°. Zoom out of the preview area by holding down the Alt/Option key and clicking in the preview area. Adjust the settings so that you get a motion blur like shown below. Click OK to apply the changes.

Go to Filter > Motion Blur or press Ctrl/Cmd+F to repeat the filter.

Step 32
Select the other Star Filter layer then go to Filter > Blur > Motion Blur. We’re going to apply the same settings except for the angle which should be set to -45°. Click OK to apply the Motion Blur filter.

Go to Filter > Motion Blur or press Ctrl/Cmd+F to repeat the filter.

Step 33
Hold down the Ctrl/Cmd key and select both of the Star Filter layers. Go to Layer > Merge Layers.

Rename this layer back to “Star Filter” and set the blend mode back to Screen.

Go to Filter > Sharpen > Unsharp Mask. Set the Amount to 200% then adjust the Radius so that your star filter effect looks sharper like the image below.

Here’s what the image looks like with the star filter effect.

Step 34
Next, we’re going to add an radial wave graphic. Start by creating a new Photoshop document (File > New) with a width and height of 10,000 pixels.

Step 35
Select the Rectangular Marquee tool then, in the option bar, set the Style to Fixed Size, Width to 100%, and Height to 500px.

Create a selection on the top edge of the document. If it is not snapping to the edge, make sure you have View > Snap and View > Snap To > Document Bounds enabled.

Create a new layer (Layer > New > Layer or Ctrl/Cmd+Shift+N). Fill the selected area with black. To do this, go to Edit > Fill, select Black as the contents, then click OK. Deselect the selection by pressing Ctrl/Cmd+D or going to Select > Deselect.

Step 36
Go to Edit > Free Transform. Click on the “Use relative position for reference point” button then set the Y axis to 1000 px. Press Enter on your keyboard to apply the changes.

Go to Edit > Step Backwards to undo the move. Press Ctrl+Alt+Shift+T or Cmd+Option+Shift+T keys on a Mac nine times. You’ll get an image like below.

Step 37
Go to Filter > Distort > Polar Coordinates. Set the mode to Rectangular to Polar then click OK.

Go to Select > All to make a selection of the entire document area then go to Edit > Copy. Switch back to the other document then go to Edit > Paste. You can close the other Photoshop document without saving.

Step 38
Zoom out then go to Edit > Transform > Skew. Drag the top right handle towards the left like shown in the image below. Don’t press Enter or click the checkmark yet.

Go to Edit > Transform > Scale. Drag the bottom right handle to the bottom right corner of the Photoshop document.

Position your cursor outside the bounding box then drag to rotate like shown in the image below. Click inside the bounding box to move it.

Drag the handles to make the radial wave graphic smaller.

Step 39
Position this layer below the layer of the girl. Set the Opacity to 50%.

Step 40
Go to Layer > Layer Style > Gradient Overlay. Set the Gradient to Spectrum, Angle to 90°, and Scale to 150%. Don’t click OK yet.

In the Photoshop document window, drag the gradient to reposition it to a color that you like. Here’s where I positioned the gradient. Click OK to apply the changes.

Step 41
Add a layer mask to the current layer by going to Layer > Layer Mask > Reveal All.

Select the Gradient tool, then in the options bar, apply the settings shown below:


Drag from the top to bottom to make the gradient fade.

Step 42
Rename the layer to “Radial Circle”.

Step 42
We’re almost done! Now we’re going to add a star flare to each side of the headphone. Start by creating a new layer as the top layer (Layer > New > Layer or Ctrl/Cmd+Shift+N). Name this layer “Star Flare” then fill it with black. To fill the layer with black, go to Edit > Fill, set the contents to black, then click OK.

Step 43
Go to Filter > Render > Lens Flare. Position the lens flare in the middle then set the Brightness to 100% and Lens Type to Movie Prime. Click OK.

Go to Filter > Blur > Gaussian Blur. Adjust the Radius so that the blue lines disappears.

Step 44
Go to Edit > Free Transform. In the options bar, set the height to 10%. Press Enter to apply the transformation.

Here’s what the lens flare looks like so far.

Go to Edit > Free Transform again then set the angle to 30°. Press Enter to apply the transformation.

Your flare will rotate like this.

Step 46
In the Layers palette, change the blending mode of the current layer to Screen.

Press Ctrl+Alt+Shift+T or Cmd+Option+Shift+T keys on a Mac five times. You’ll get a bunch of layers. Hold the Ctrl/Cmd key then select all of the Star Flare layers. Go to Layer > Merge Layers. Change the blending mode back to Screen then rename the layer back to Star Flare.

Here’s what the lens flare looks like.

Step 47
Select the Move tool then move the lens flare over the right side of the headphone.

Go to Edit > Transform > Skew. Drag the bottom right corner towards the center like shown in the image below.

Step 48
Go to Image > Adjustments > Hue/Saturation. Checkmark the Colorize option then set the Hue to 200 and Saturation to 100. Click OK to apply the changes.

Step 49
Duplicate the Star Flare layer by pressing Ctrl+J or going to Layer > Duplicate Layer.

Select the Move tool then move the lens flare over the other side of the headphone.

Go to Image > Adjustments > Hue/Saturation. Set the Hue to 180 then click OK.

Step 50
Add a layer mask to the current layer by going to Layer > Layer Mask > Reveal All.

Make sure you have the layer mask selected. Select the Eraser tool then right click anywhere in the document window to bring up the brush settings. Set the hardness to 80%. Reset your foreground/background color by pressing D on your keyboard.

Erase on the headphone like shown in the image below.

Here’s what the image looks like so far:

Step 51
To complete the image, we’re going to add a photo effect to the girl. Select the layer with the girl then go to Layer > New Adjustment Layer > Black & White. Checkmark the “Use Previous Layer to Create Clipping Mask” option then click OK. If you don’t see this window, make sure you added the adjustment layer through the menu and not from the Layers or Adjustments palettes.

Change the blending mode to Overlay.

Step 52
Go to Layer > New Adjustment Layer > Brightness/Contrast. Checkmark the “Use Previous Layer to Create Clipping Mask” option then click OK.

In the Adjustments palette (Window > Adjustments), set the Brightness to 25 and Contrast to –50. Make sure the “Use Legacy” option is unchecked.

Final Results

Play around with the layers and settings to see what other effects you can get. Here’s a variation of this Photoshop tutorial.

Download the PSD
Electrifying Music Posters.zip | 294.8 MB