“Mushrooms were the roses in the garden of that unseen world because the real mushroom plant was underground. The parts you could see – what most people called a mushroom – was just a brief apparition. A cloud flower.” In this Photoshop tutorial, we learn how to turn a day scene into a night scene and add some lights and glow. For Final Adjustment, we used Camera Raw Filter.
Preview of Final Image

Tutorial Resources
Step 1
Now, let’s start open a Background image. Go to File > Open and select background photo. Press right click on mouse and in new pop-out window select “Convert to Smart Object”.


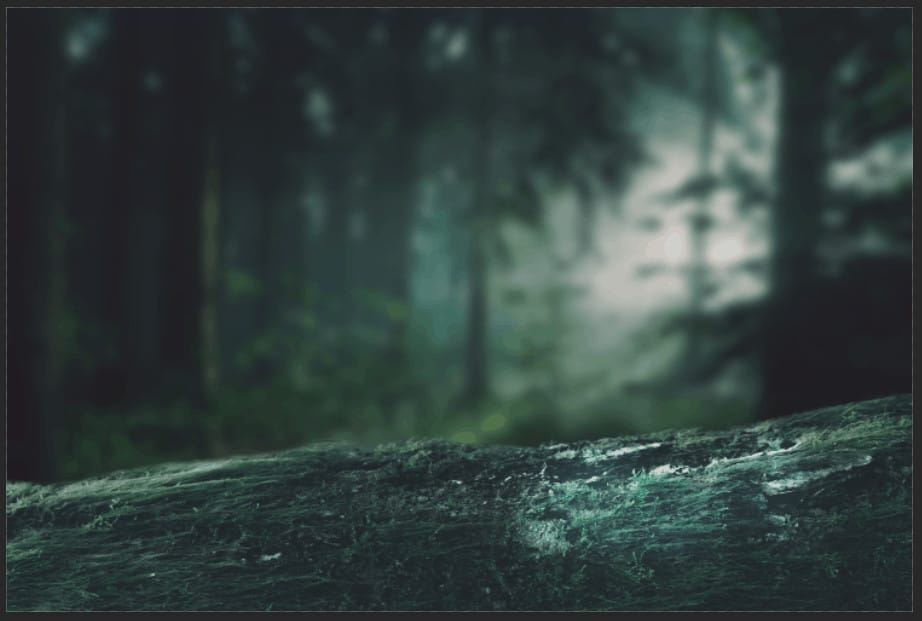
Then go to Filter > Blur > Gaussian Blur and set Radius to 41px.

Step 2
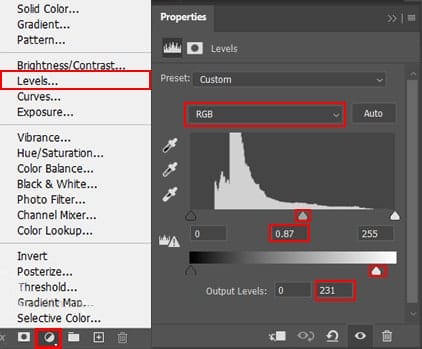
Add Adjustment Layer “Levels”

Step 3
Add Adjustment Layer “Hue/Saturation”

Step 4
Add Adjustment Layer “Color Balance”

Step 5
Next we will openBranch. After you open the image, use Quick Selection Tool(W) and start selecting the Branch. After the selection area has been created, simply copy (Ctrl / Cmd + C) and Paste (Ctrl / Cmd + V) it to our work canvas. Then position the image with the transform tool (Ctrl / Cmd + T). Hold Alt + Shift and resterize like image below. In Photoshop CC only hold Alt to resterize al sides together.


Step 6
Add Adjustment Layer “Levels”

Step 7
Now we will openMushroom. After you open the image, use Quick Selection Tool(W) and start selecting Largest Mushroom. After the selection area has been created, simply copy (Ctrl / Cmd + C) and Paste (Ctrl / Cmd + V) it to our work canvas. Then position the image with the transform tool (Ctrl / Cmd + T). Hold Alt + Shift and resterize like image below. In Photoshop CC only hold Alt to resterize al sides together.
Quick tip:
Make a selection with the Quick Selection tool
Select the Quick Selection tool in the Tools panel.
Add a checkmark to the Auto-Enhance option in the Options bar.
Click and drag over an area you want to select. The tool automatically selects similar tones and stops when it finds image edges.
Add to the selection
To add to the initial selection, just click and drag over another area. The Quick Selection tool automatically changes to the Add to selection option.
4 responses to “Create a Surreal Mushroom Forest Night Scene in Photoshop”
-
Nice Work
-
Thank you! Inspiriing.
-
You have ten steps and twenty layers to spare, you complicate your life in an incredible way. To publish in Adobe you have to do so much foolishness ???
-
Good job with effective and easy comment.

Leave a Reply