Make your artwork look like they're from an alternate universe. These Cyberpunk presets work with Photoshop (via the Camera Raw filter) and Lightroom. Download all 788 presets for 90% off.
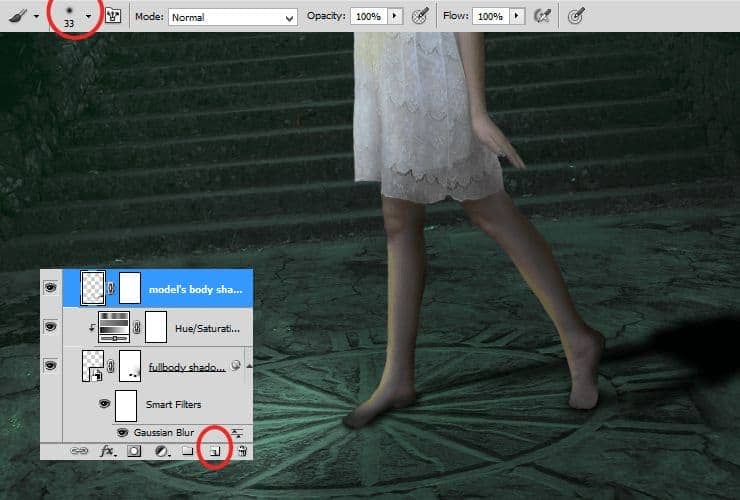
Step 32
Add layer mask - click on marked shortcut. Then, choose huge soft round brush and erase right side of layer. For smoother effect, you can decrease opacity of this layer to 48%.
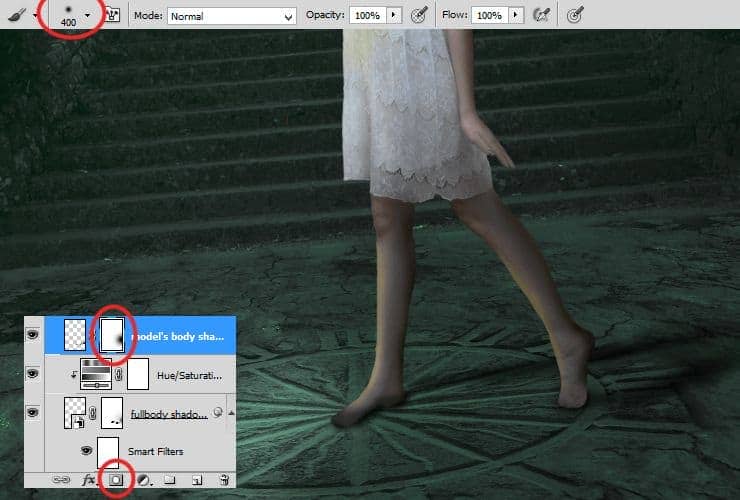
Step 33
Add new layer (Layer > New > Layer or Shift + Ctrl + N). Use black soft, round brush with smaller opacity and draw blured shadow.
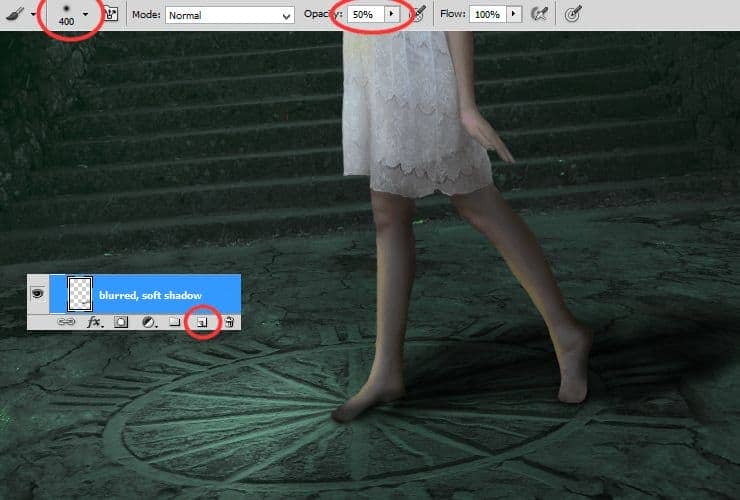
Decrease opacity to around 60%.
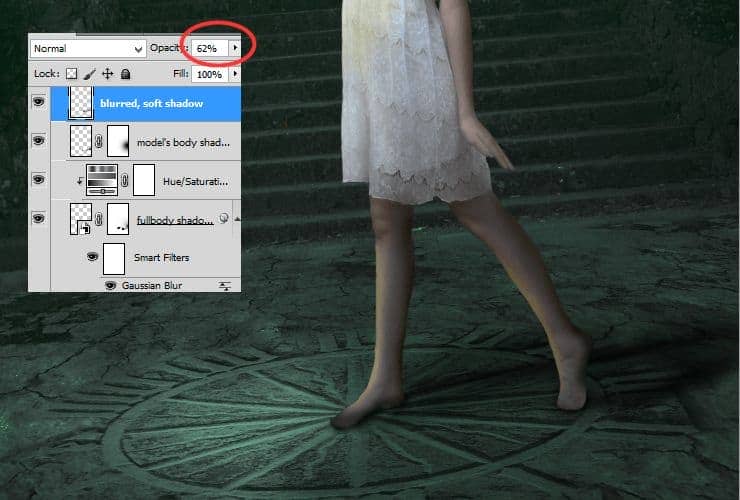
Step 34
Add new layer (Layer > New > Layer or Shift + Ctrl + N). Pick soft round brush with opacity around 30%. Set its size to 20px. Draw shadows below feet.
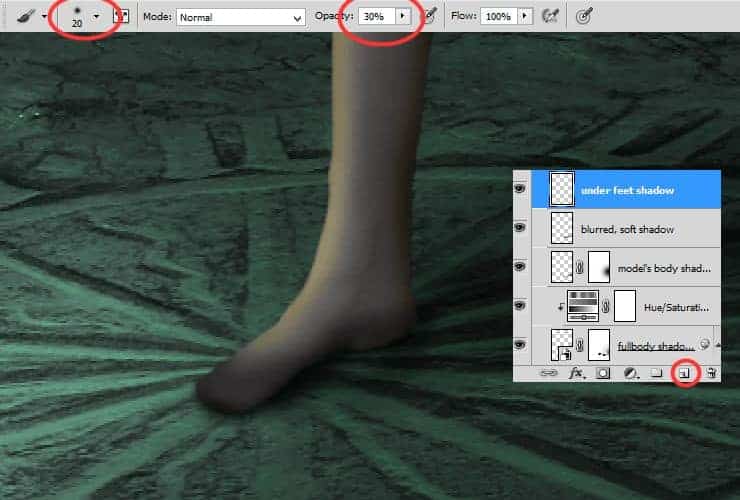
Step 35
Again add new layer (Layer > New > Layer or Shift + Ctrl + N). Pick soft round brush with opacity around 30%. Set its size to 120px. Draw shadows below second feet.
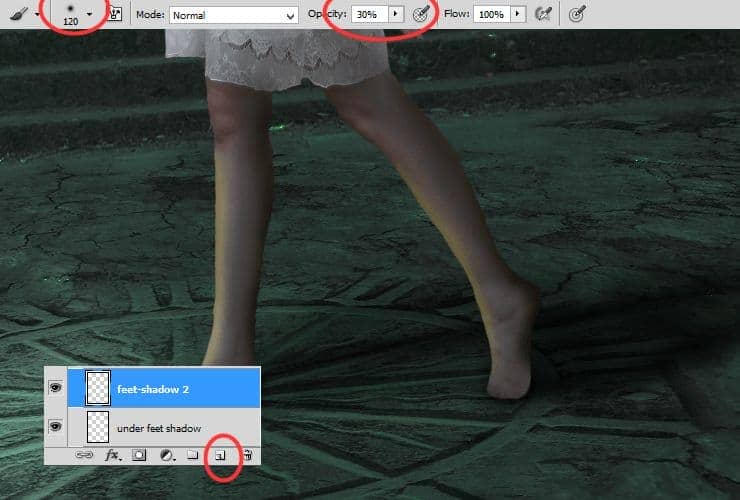
Step 36
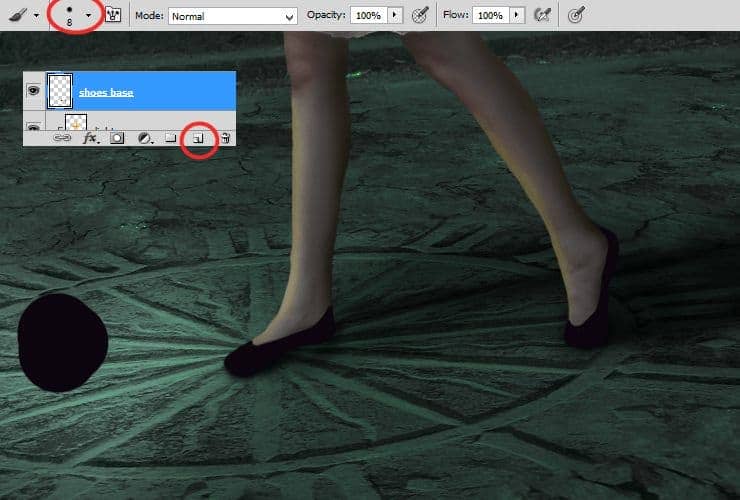
This step is optional. Go above all layers. Add new layer (Layer > New > Layer or Shift + Ctrl + N). Make base for shoes. I used hard round brush, #0d050e color (dark purple), with dynamic size.
Add new layer (Layer > New > Layer or Shift + Ctrl + N). Then, right-click on it and choose "Create clipping mask" (Alt+Ctrl+G or Layer > Create Clipping Mask). Choose soft round brush around 15 px. Use #7a5d54 color. Draw lights from fire, which you'll place.
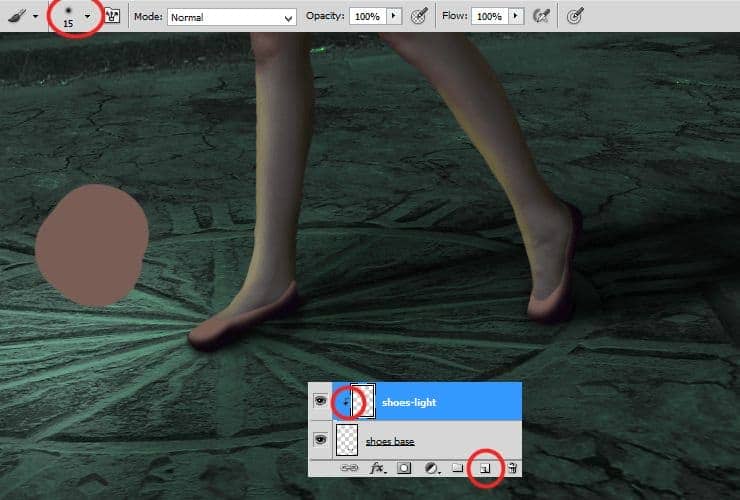
Decrease its opacity to 36%.
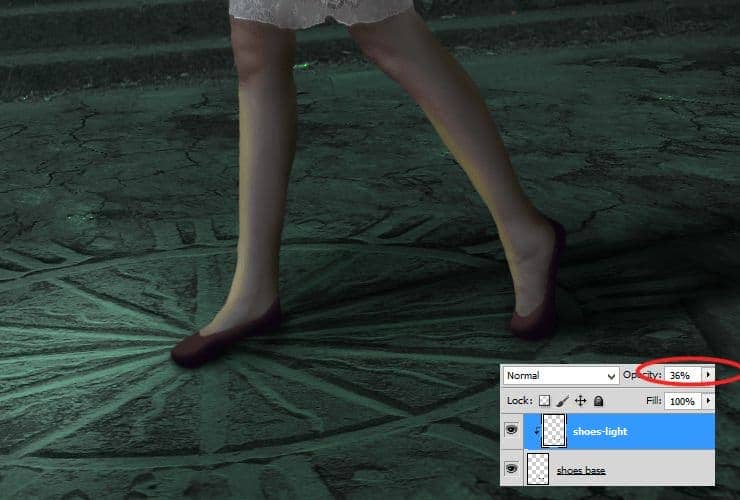
Add new layer (Layer > New > Layer or Shift + Ctrl + N). Then, right-click on it and choose "Create clipping mask" (Alt+Ctrl+G or Layer > Create Clipping Mask). Choose soft round brush around 6 px. Use #fe8e23 and #fbd888 color. Draw highlight on shoe.
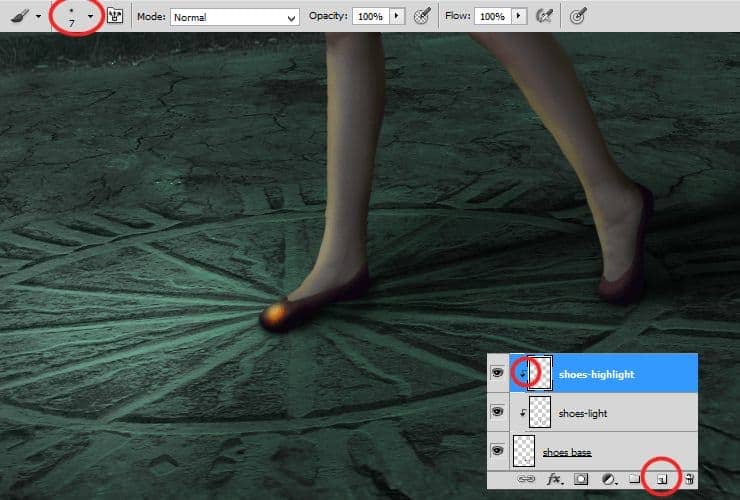
Decrease its opacity to around 25%.
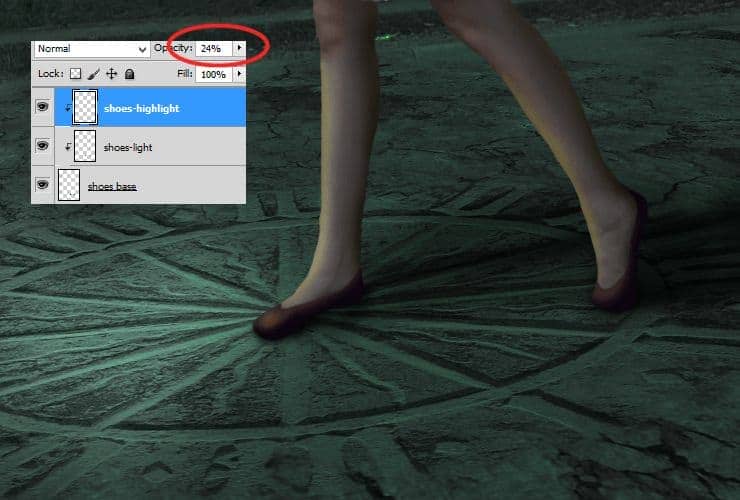
Step 37
Place "Fire" stock to your file. Drag it from folder and drop to your file. Change its blending mode to Screen. Choose 50px soft round brush and erase parts, which doesn't fit.
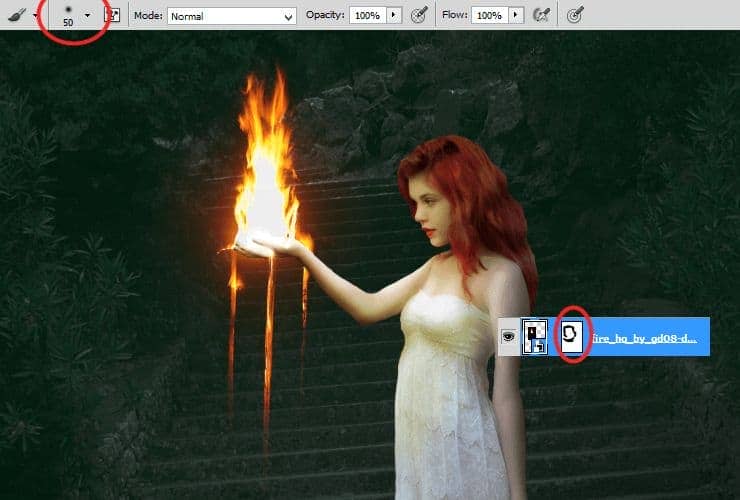
Step 38
Change blending mode of layer with fire to "Normal", add new layer. Then, right-click on it and choose "Create clipping mask" (Alt+Ctrl+G or Layer > Create Clipping Mask). Use Clone stamp tool and fix some fire.
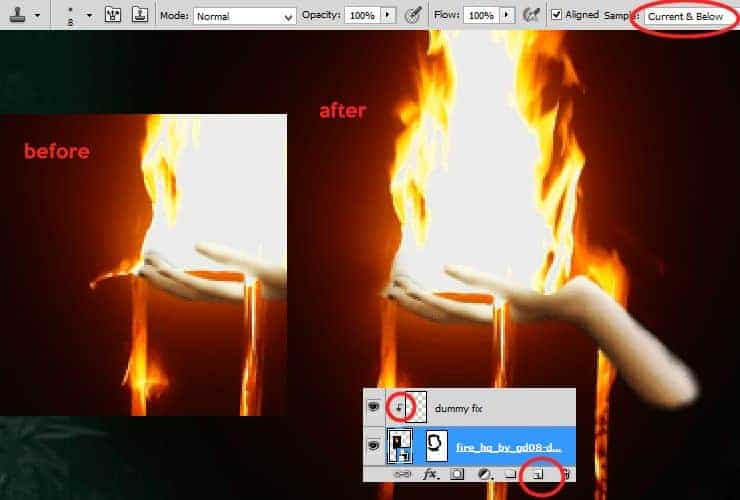
Now, change blending mode of layer with fire to "Screen" again.
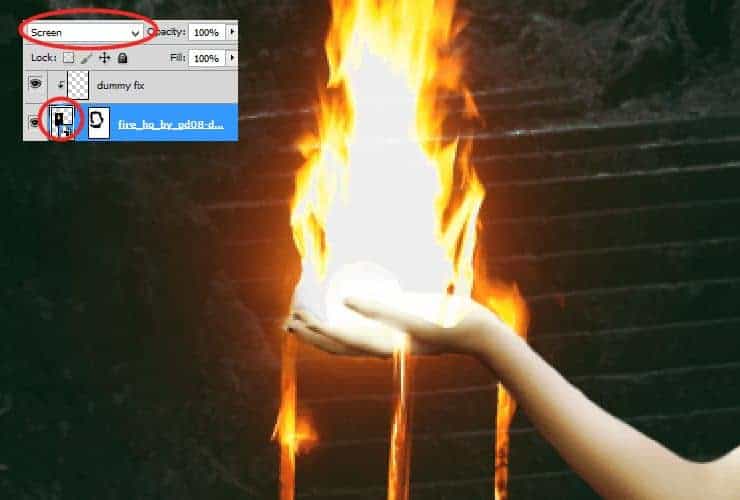
Step 39
Add new layer (Layer > New > Layer or Shift + Ctrl + N). Then, right-click on it and choose "Create clipping mask" (Alt+Ctrl+G or Layer > Create Clipping Mask). Choose soft round brush 6 px. Use #fe8e23 and #fbd888 color. Draw something drop-like on falling fire.


8 comments on “How to Create a Fantasy Photo Manipulation with Fire”
thanks for an awesome tutorial. wish i could post what i made of it on here :(
The end result is nice, but waaaay too many layers!
So sick of making layers... Need to find better methods.
Thanks.
why u dont use Photoshop cs6 for this tutorial? It's hardly to understand while Im using CS6
Link of ''Grunge map'' had died. I dont understand step 4, how to do it ??
Diego Armando
link to Grunge maps Weird 0001 2 (L) cgitextures is broken. Tree sidebar PNG is a pay file. Love your tutorial. Thank you
amazing
Nice