Make your artwork look like they're from an alternate universe. These Cyberpunk presets work with Photoshop (via the Camera Raw filter) and Lightroom. Download all 788 presets for 90% off.
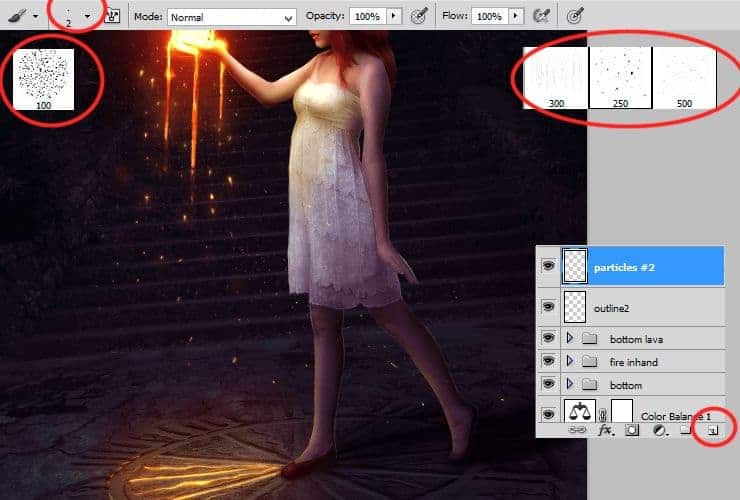
Right click on this layer and choose "Blending options...".
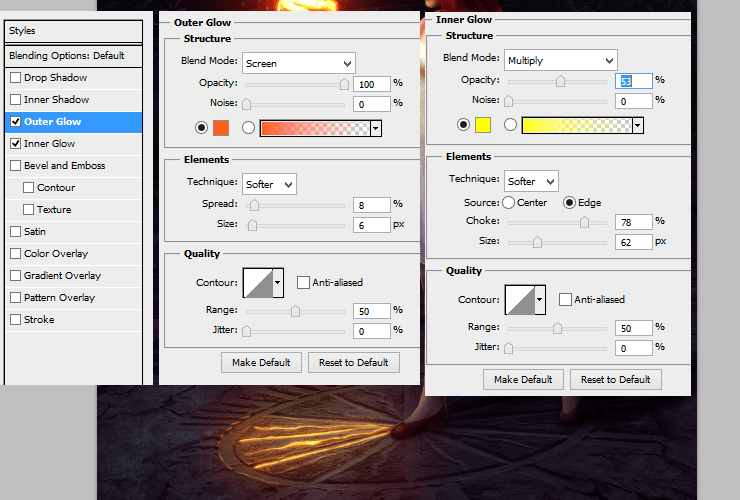
Step 65
It will take much time. Add new layer (Shift+Ctrl+N or shortcut). Create violet outline on background, by using 1px soft round brush.
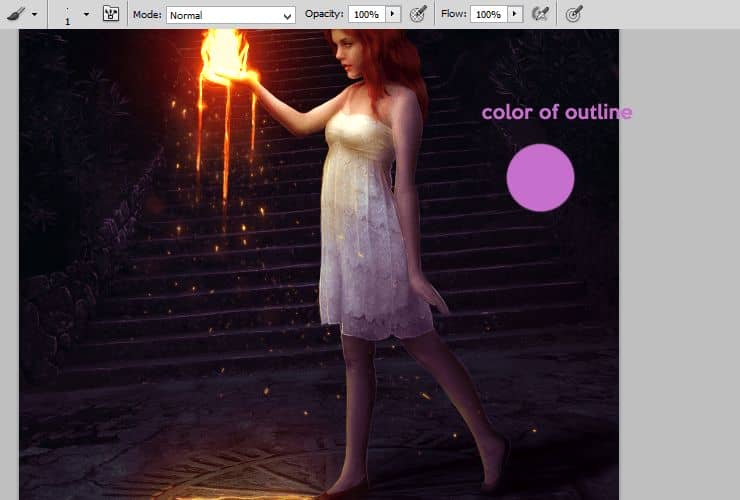
Step 66
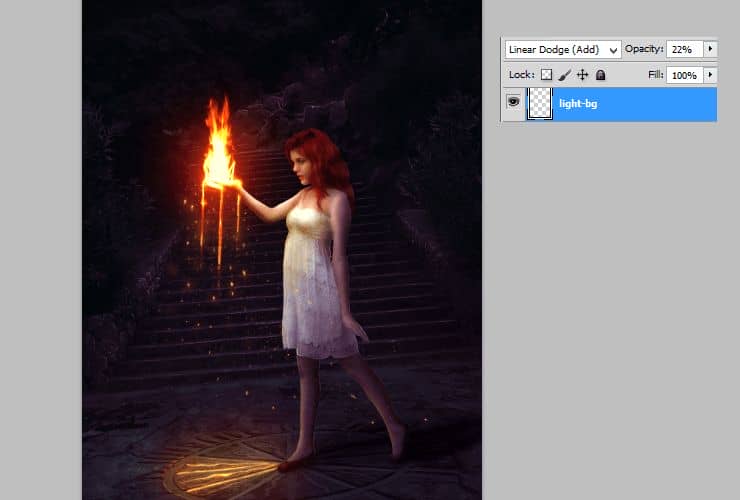
Add new layer (Shift+Ctrl+N or shortcut). For making the effect of depth, draw some lights on background. Use soft round brush, around 50px with the same color.
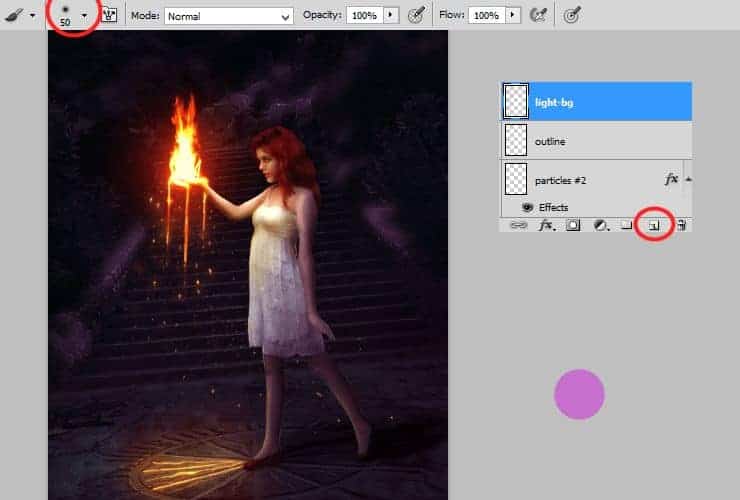
Change blending option to "Linear dodge (Add)". Decrease opacity to 22%.
Step 67
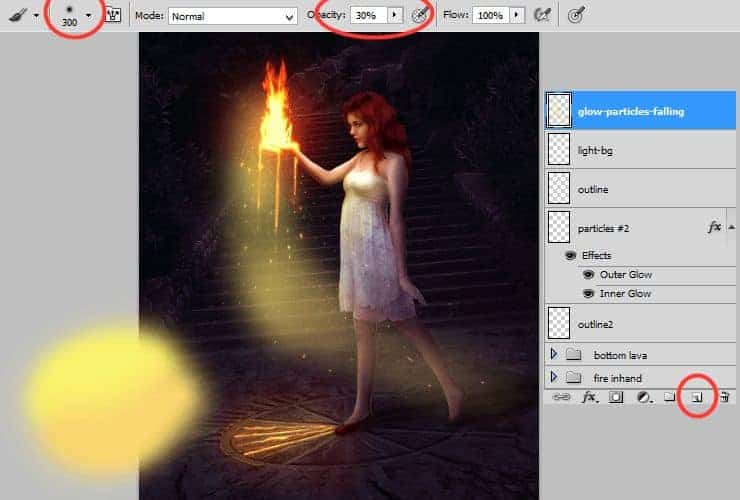
Add new layer (Shift+Ctrl+N or shortcut). You'll make something swoosh-like from particles. Use big, soft round brush with opacity around 30%. Use colors from #f9f26c to #f9d16f. Draw arc.
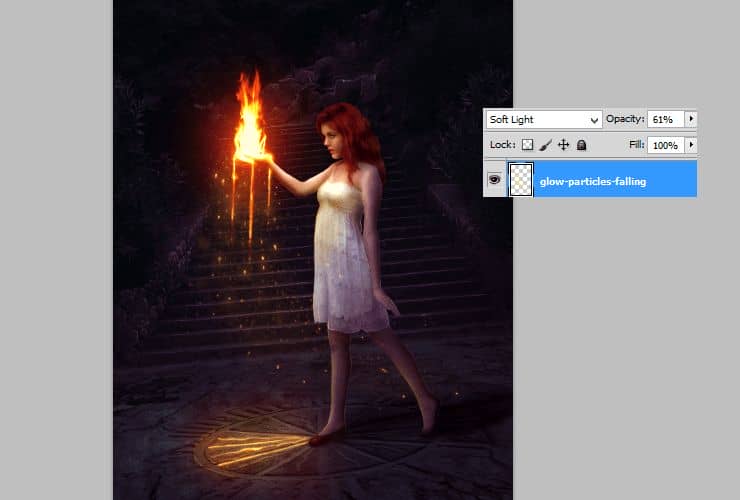
Change blending options - Soft light, opacity to 61%.
Step 68
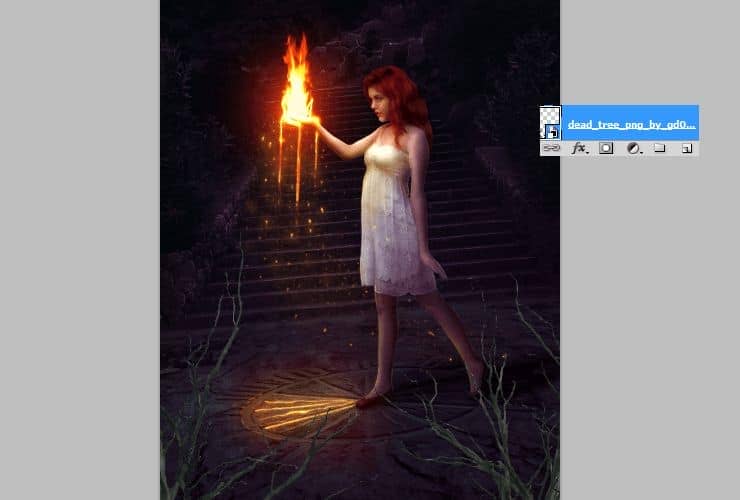
Place "Dead tree png" stock to your file. Duplicate it (drag and drop on "New layer" symbol or go to Layer > Duplicate layer...) and go to Edit > Transform > Flip horizontal. Set it as is shown. Then, mark "Dead tree" layers by holding ctrl and then, right click on it. Choose "Convert to Smart Object".
Step 69
Things on first plan should be blurred, to get depth of field effect. Go to Filter > Blur > Gaussian blur.
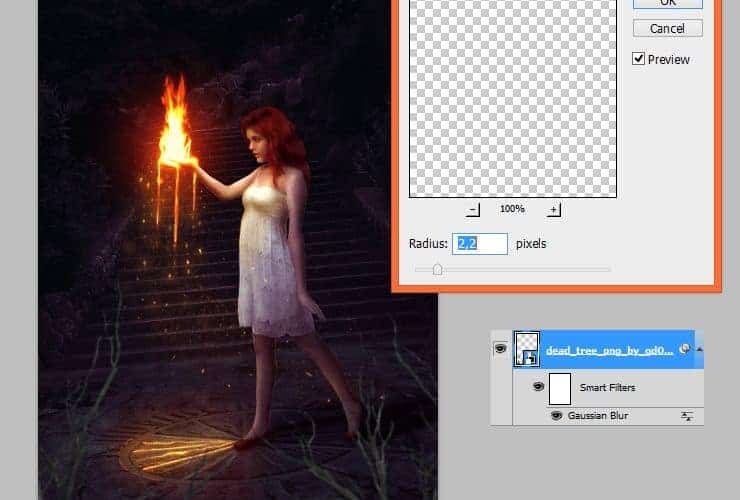
Step 70
Add adjustment layer with color fill - #0e0912. Right-click on adjustment layer and choose "Create clipping mask" (Alt+Ctrl+G or Layer > Create Clipping Mask)
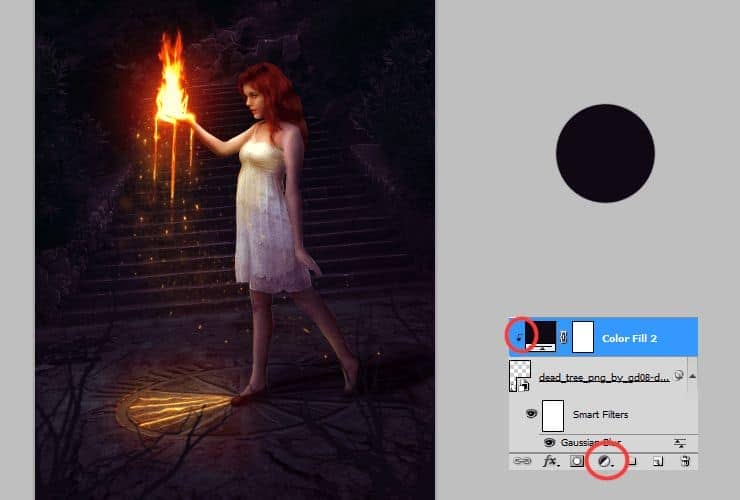
Add new layer (Shift+Ctrl+N or shortcut). Right-click on this layer and choose "Create clipping mask" (Alt+Ctrl+G or Layer > Create Clipping Mask). Change blending mode of this layer to "Multiply". Pick soft round brush around 10px and choose the same color as before - #0e0912. Draw shadows on branches.
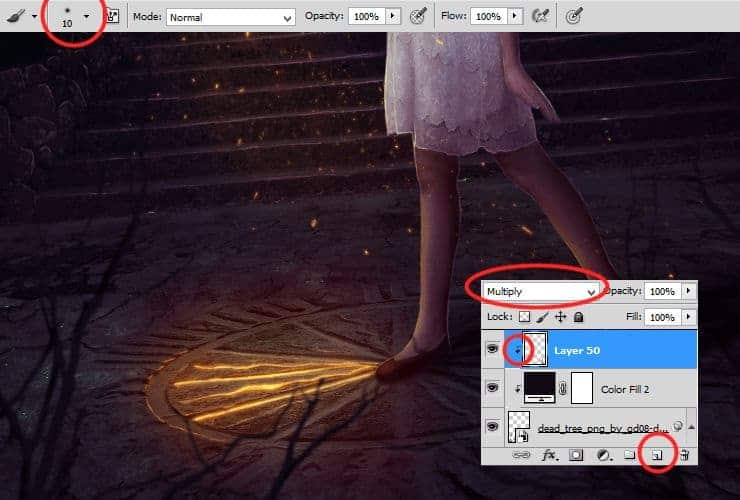
Now it's time to make lights on trees. Add new layer (Shift+Ctrl+N or shortcut). Right-click on this layer and choose "Create clipping mask" (Alt+Ctrl+G or Layer > Create Clipping Mask). Use the same brush, with dynamic opacity. Draw lights with #ffaa23 (orange) color.
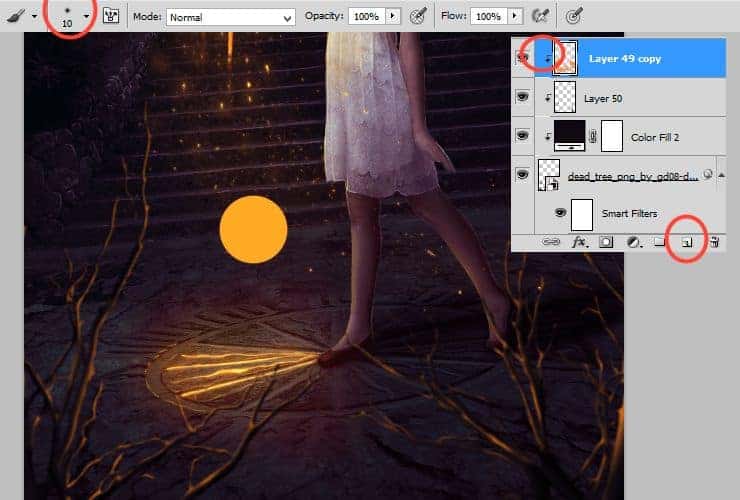
If it's needed, add layer mask. Click on marked shortcut. Use big, soft round brush and erase unwanted parts.
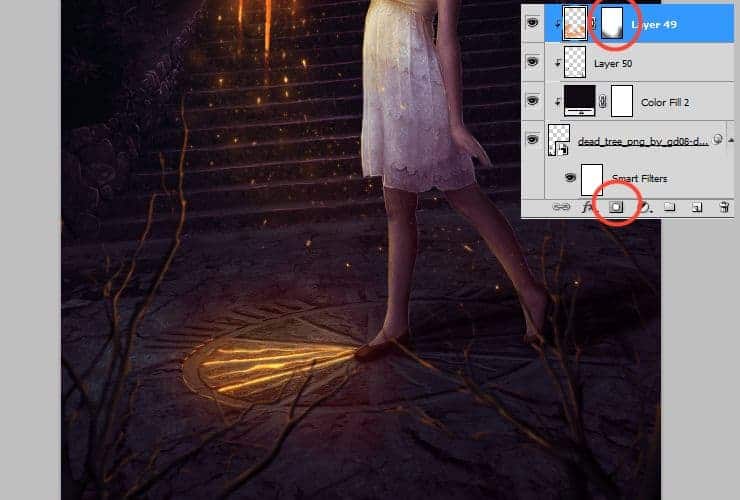
Step 71
Make the same steps with stock image "Tree sidebar png". Blur it. At first - color fill (step 70), then I added Hue/Saturation adjustment layer (Hue: 266, Saturation: 44), then, I drew lights with the same color and way as in step 70b.
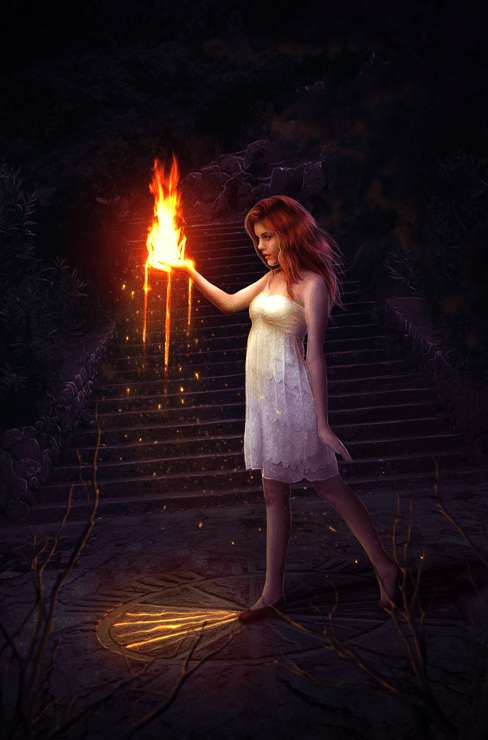

8 comments on “How to Create a Fantasy Photo Manipulation with Fire”
thanks for an awesome tutorial. wish i could post what i made of it on here :(
The end result is nice, but waaaay too many layers!
So sick of making layers... Need to find better methods.
Thanks.
why u dont use Photoshop cs6 for this tutorial? It's hardly to understand while Im using CS6
Link of ''Grunge map'' had died. I dont understand step 4, how to do it ??
Diego Armando
link to Grunge maps Weird 0001 2 (L) cgitextures is broken. Tree sidebar PNG is a pay file. Love your tutorial. Thank you
amazing
Nice