Make skin look perfect in one-click with these AI-powered Photoshop actions.
Grab the Brush Tool (B), select some soft round brush and set the Opacity on about 15%. Press Alt on your keyboard to activate the Eye Dropper Tool (I) and pick some very dark blue color from the picture. Then paint shadow similarly as the one shown on the following picture.
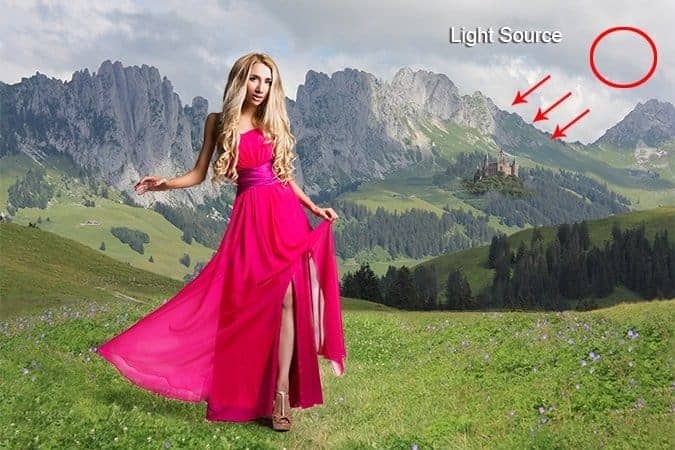
Step 5 - Blending the Dress
As I mentioned before in this step you'll blend the dress better. From my experience if you try to blend sheer clothing where the structure of it should remain the best way to do it is by using Channels instead of classic Brush Tool (B). On the following picture you can compare results of both techniques.
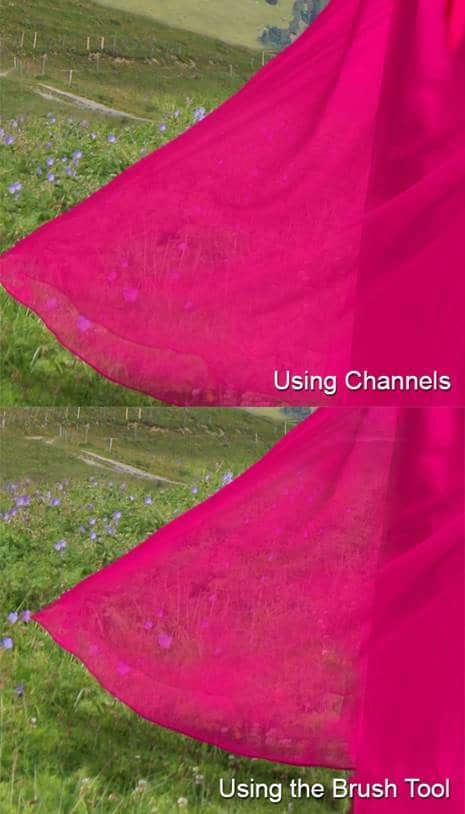
So how to do it?
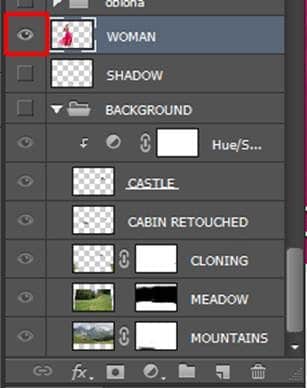
First add layer mask to WOMAN. Make all layers except WOMAN invisible by clicking on the eye icon on the left side of each layer.
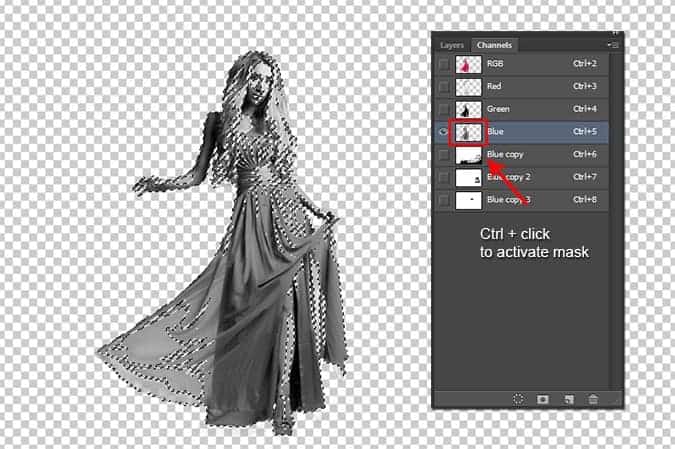
Go to Window > Channels to make the Channels palette visible. As you can see there are four layers. The first represent the image when all three RGB channels are visible. Next three layers are separately Red, Green and Blue Channel. They're black and white which means you can use them as a mask! Select channel where the biggest contrast between lights and darks in. In this case it's Blue channel. Ctrl + click on the Blue channel to activate its mask.
Make the rest of the layers visible again. Go to Selection > Invert or press Ctrl + Shift + I to invert the selection you've made. Click on the layer mask of WOMAN. Grab the Brush Tool (B), select some soft round brush, set its Opacity on about 30% and pick black color. Paint over the sheer clothing of the dress till you get something similar to the following picture.
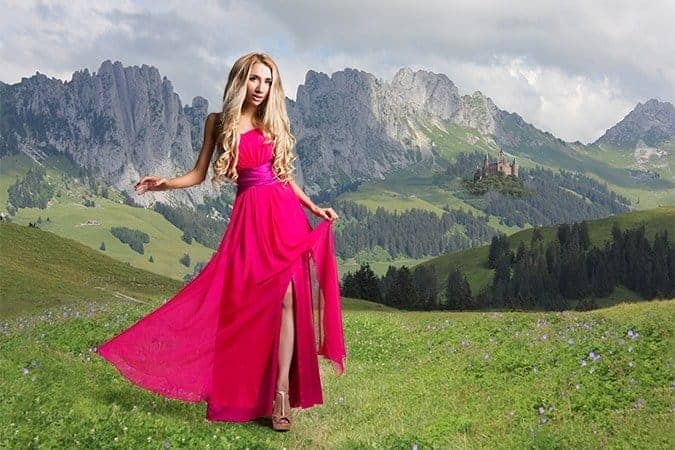
Step 6 - More Dramatic Sky
There is lack of details on the sky and it doesn't look interesting. You'll add some cloud definition in this step. Download first photo of sky listed in the beginning of this tutorial and drag it into your photo manipulation. Place it to the top left corner on the top of all layers and name it LEFT SKY. Download the second photo of sky and drag it into Photoshop. Name this new layer RIGHT SKY and place it to the right left corner.
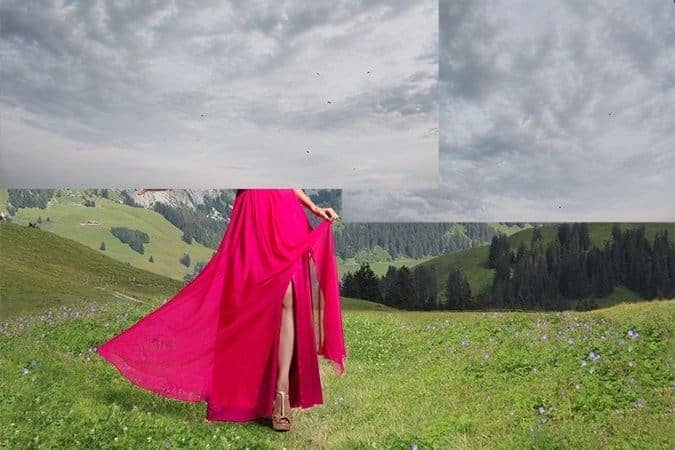
To blend it with the rest of the image change Blending mode of both layers from Normal to Multiply.


12 comments on “Create This Striking Fairy Tale Photo Manipulation in Photoshop”
you have done a good work.......
Nice technique. Really useful…thanks for the post…
Cool! Tot luv the tutorial...
Super
thanks for the tutorial
it really helped me :)
Thanks for this tutorial Jarka
Thank you for this tutorial creative well explained.
My realization:
http://www.chez-mireilled.com/article-paysage-conte-de-fee-avec-photoshop-119754637.html
hye
Estupendo, me ha gustado mucho y ya he hecho una prueba. Gracias
nice
Super tut I will have to try this
hey