Download Lightroom presets and LUTs, absolutely free. Use the presets to add creativity and style to your photos.
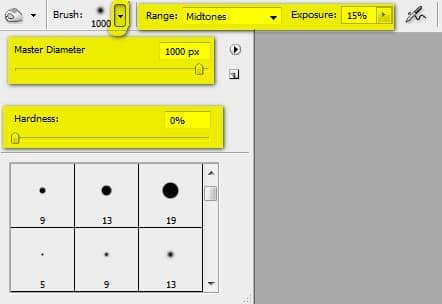
- Brush size: 1000px
- Hardness: 0%
- Range: Midtones
- Exposure: 8%
Now, let’s darken the areas shown below:
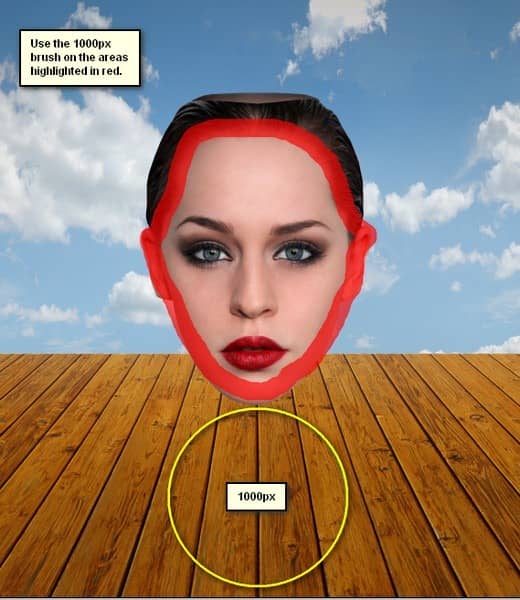
The result of that should be similar to this:

Step 19
Now, let’s create the “head” layer’s shadow. To start, create a new layer (Ctrl/Cmd + Shift + N) and name it “head shadow”. Put this layer below all the other layers that we’ve created for this step.
Activate the Brush tool (B) and input the following:
-
Brush size: 300px
-
Hardness: 0%
-
Opacity: 15%
-
Flow: 100%
-
#: 000000
Now, let’s paint:
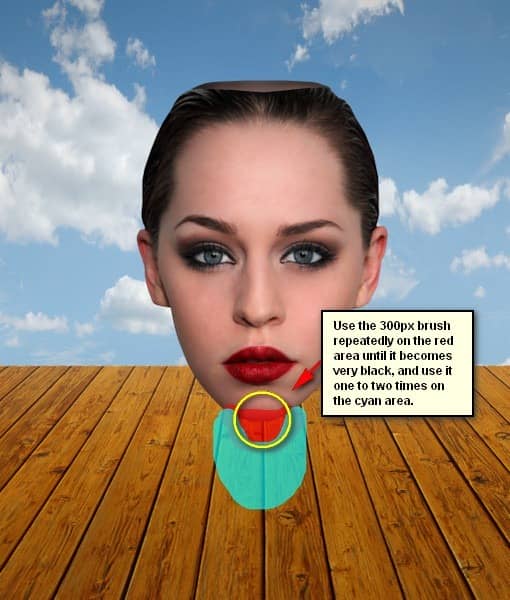
The result of that should be similar to this:

Step 20
Finally, let’s further adjust the brightness of her face to match with the shadow. To start, create a new layer (Ctrl/Cmd + Shift + N) above all the layers that we’ve created on this step; name it “darken head”. Once done, right click on this layer and choose “Create Clipping Mask”.
Activate the Brush tool (B) and input the following:
- Brush size: 800px
- Hardness: 0%
- Opacity: 8%
- Flow: 100%
- #: 000000
Now, let’s paint:
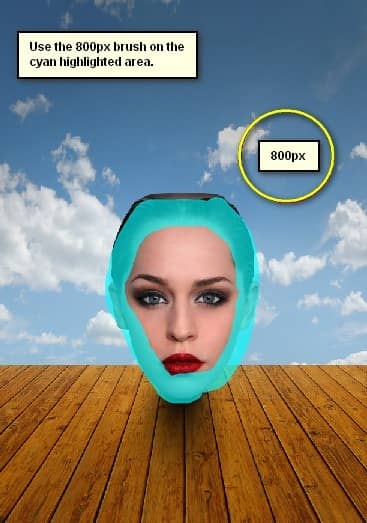
The result:

Step 21: Create the Grandfather’s Clock
From this step on, we will be adding the things that are coming out of this woman’s head. First off, let’s create the Grandfather’s Clock. To start, open “clock” by mzacha. Once open, activate the Move tool (V) and drag this newly opened image to our canvas. Rename this layer to “grandfather clock”.
Once on the canvas, position it here:
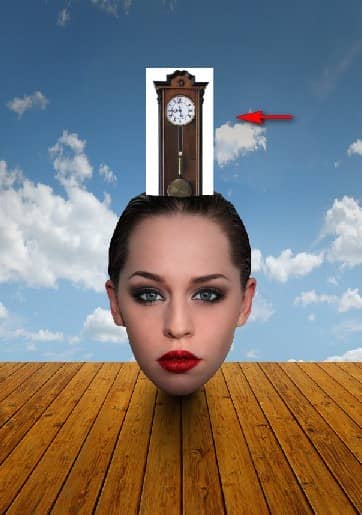
Next, activate the Magic Wand tool (W) and left-click on the white space surrounding the clock. Once clicked, the Magic Wand will automatically select all the white areas surrounding the clock, now, press Delete.
The result:

Step 22
Now, activate the Transform tool (Ctrl/Cmd + T) and resize it as shown below:

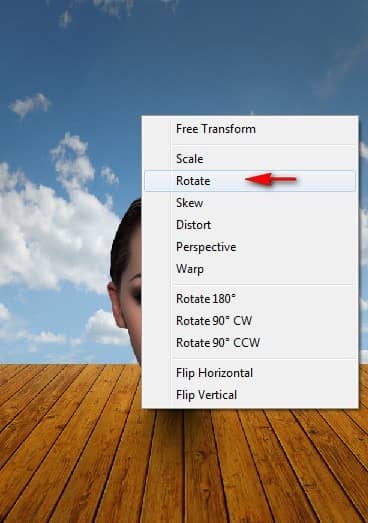
Next, activate the Transform tool once again (Ctrl/Cmd + T) and right click on the canvas to bring out the contextual menu. Once the contextual menu is open, click on Rotate.
Now, let’s rotate the “grandfather clock” as shown on the image below:
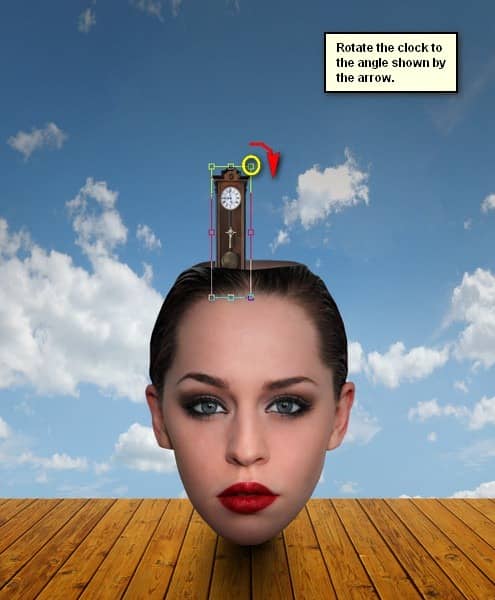
The result:

Once done, group the layer (Ctrl/Cmd + G) and name it to “Grandfather’s Clock”.
Step 23: Create the Paper Boat
Now, let’s create the paper boat coming out from the woman’s mind. To start, let’s open “paper boat” by selicula. Once open, activate the Move tool (V) and drag the paper boat image to our canvas and rename it to “paper boat”. Make sure to put this layer above the “Grandfather’s Clock” group.


2 comments on “Create This Surreal Representation of the Mind Artwork in Photoshop”
Where are the remaining steps?
These were pretty awesome. A few made me laugh. Thanks for sharing.