
Once the Color Picker box opens, input the following on the # box:
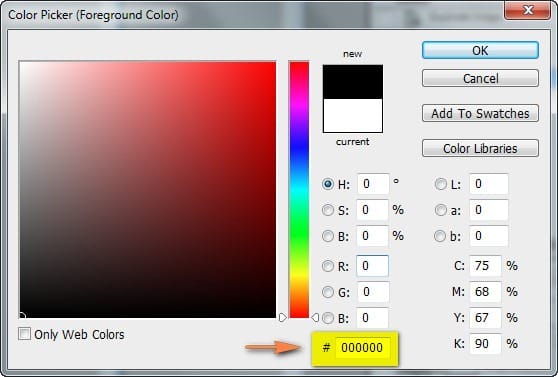
Now, we’re all set to paint, use the Brush tool on the following region on the darken sky layer:

The result of that should be similar to this:

Step 6: Create the Floor
Now, we will proceed to making the wooden floor to where the woman’s head is floating on. To start, open the stock image: “Old wood texture” by kovik. Once open, activate the Move tool (V) and drag it to our canvas. Put this layer above the “sky” layer and rename it to “floor”.
To rename a layer, simply double-click on the words: “layer 1” (you can find that on the layer window) to prompt a text box to appear.
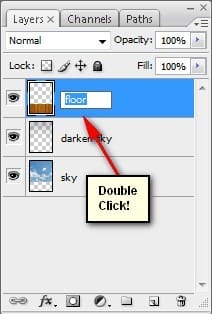
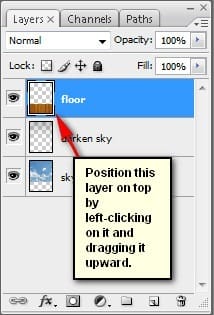
It should appear on the image like this:

Step 7
Now, we would want this floor to appear flat and not like a wall, to do that, we would need the help of the Transform tool. Activate the Transform tool (Ctrl/Cmd + T) and right click on the canvas to bring out the contextual menu. Once it is up, click on Perspective.

Let’s transform it to a floor now, see image below:

The result:

Step 8
Next, we will darken the floor to make the light more realistic. First, let’s create a new layer (Ctrl/Cmd + Shift + N) above the floor, name it “darken floor” and then activate the Brush tool (B), once open, input the following:
- Brush size: 1500px
- Hardness: 0%
- Opacity: 15%
- Flow: 100%
- #: 000000
- Now, let’s paint:
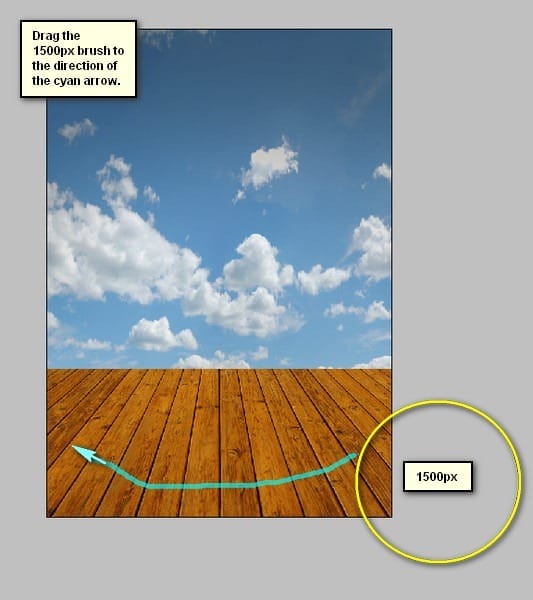
The result:

Step 9
Next, let’s enhance the light on the horizon. Create a new layer above the darken floor layer (Ctrl/Cmd + Shift + N) and then name this new layer as “horizon”.
Activate the Brush tool (B) and input the following:
- Brush size: 1300px
- Hardness: 0%
- Opacity: 25%
- Flow: 100%
- #: ffffff
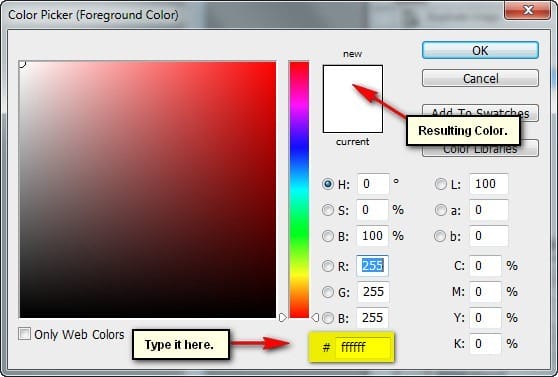
Now, let’s paint:
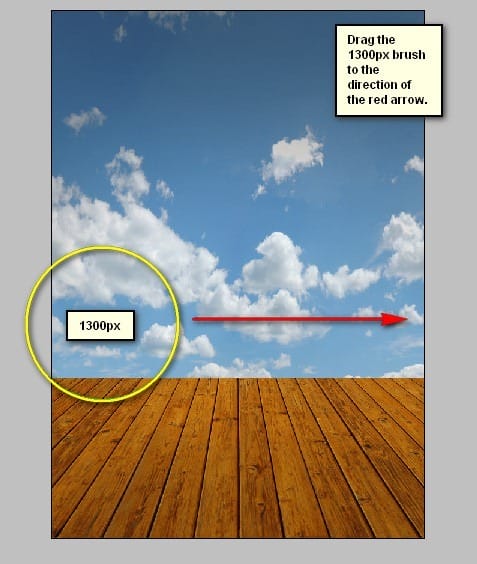
The result:

Step 10
When you’re done, select all the layers that we’ve created and press Ctrl/Cmd + G to group them. Once grouped, rename it to “Background”.

Step 11: Create the Lady’s head
In this step, we will be creating the woman’s head. To start, let’s open “Bite Me5” by faestock.
Once open, activate the Polygonal Lasso Tool (L)

Now, let’s create a selection area around the head of this woman.
Note: The Polygonal Lasso tool (L) is great in creating straight lines to form polygonal shapes, hence its name; create a selection area around the woman’s head as shown below:

Step 12
Once you’ve done that, activate the Move tool (V) and drag her head to our canvas. Put this layer above the “Background” group. Rename this layer to “head”.
2 responses to “Create This Surreal Representation of the Mind Artwork in Photoshop”
-
Where are the remaining steps?
-
These were pretty awesome. A few made me laugh. Thanks for sharing.


Leave a Reply