Luminar AI lets you turn your ideas into reality with powerful, intelligent AI. Download the photo editor and see how you can completely transform your photos in a few clicks.
Position the paper boat as shown below:

Next, activate the Magic Wand tool (W) and click on the white areas around the paper boat; delete each of these white areas.
The result:

Step 24
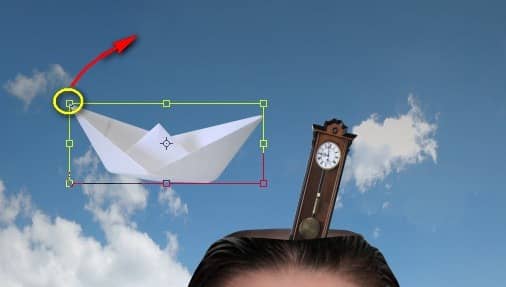
Next, activate the Transform tool (Ctrl/Cmd + T) and reduce the size of the paper boat as shown below:

Next, activate the Transform tool once again, right click on the canvas and then click on “Rotate”. Rotate the paper boat as shown below:

The result:

Step 25
Activate the Move tool (V) and drag the image down. See image below:

Step 26
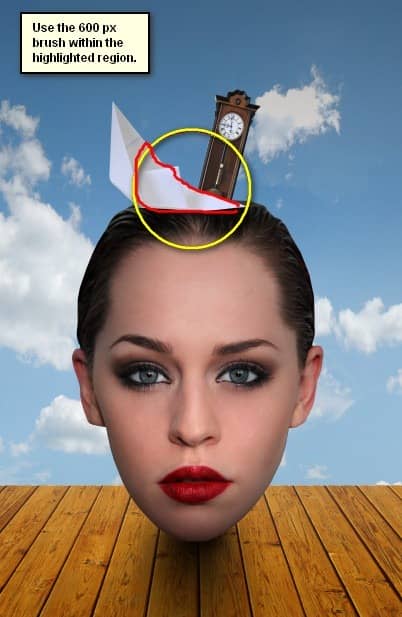
Next, create a new layer (Ctrl/Cmd + Shift + N) and put it above the “paper boat” layer. Name it as “darken boat”. Right click on this layer and then click on “Create Clipping Mask”.
Once done, activate the Brush tool (B) and input the following:
- Brush size: 600px
- Hardness: 0%
- Opacity: 15%
- Flow: 100%
- #: 000000
Now, let’s paint:

The result:

Group these layers and name it “Paper boat”.
Step 27: Create the Suit Case
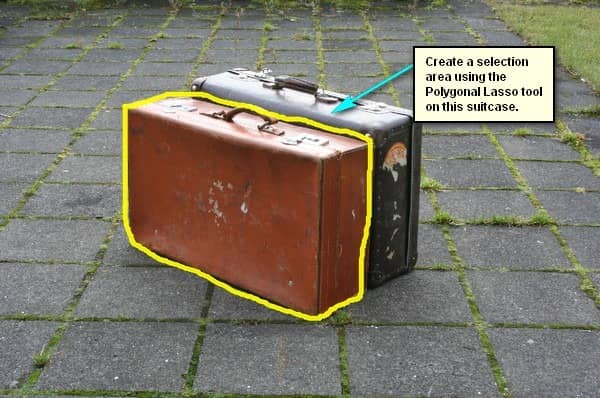
Now, let’s add the suit case coming out of her head. First, open the stock image “Suitcases” by frozt stock. Once open, activate the Polygonal Lasso Tool (L) and create a selection area around the suitcase as shown below:

Step 28
Next, activate the Move tool (V) and drag the selected suitcase to our canvas. Make sure to rename this layer to “suitcase” and then have this layer put on top of the “paper boat” group.
Position the layer as shown below:

Step 29
Activate the Transform tool (Ctrl/Cmd + T) and then resize the suitcase to the size shown below:

Step 30
Activate the Transform tool once again and right click on the canvas to bring out the contextual menu. Once the menu is open, click on “rotate”. Rotate the image to the angle shown below:

The result:

Group this layer and name it “suitcase”.
STEP 31: Create the Book
In this step, we will be adding the book, so to start, open the “dummy series” by drniels. Once open, activate the Polygonal Lasso Tool (L) and create a selection area around the book. See image below:

Step 32
Next, activate the Move tool (V) and drag the book to our canvas. Rename this layer now to “book”. Make sure that it is above the suitcase group.
With the book on the canvas, activate the Transform tool (Ctrl/Cmd + T) and resize the book as shown on the image below:


2 comments on “Create This Surreal Representation of the Mind Artwork in Photoshop”
Where are the remaining steps?
These were pretty awesome. A few made me laugh. Thanks for sharing.