Learn how to create a surreal representation of the thoughts of a creative and business minded individual. You’ll learn how to make objects come out of the womans head and place steampunk objects over the eyes.
Preview of Final Results

Download the PSD
How to Create a Surreal Representation of the Mind in Photoshop PSD.zip | 209.01 MB
Download from Website
Surreal Representation of the Mind Artwork Photoshop Tutorial
Tutorial Resources
- big blue sky stock – fahrmboy stock
- old wood texture – kovik
- bite me 5 – faestock
- clock – mzacha
- paper boat – selicula
- suitcases – frozt stock
- dummy series – drniels
- old gauge – falsemaria
- water pressure gauge – fantasy stock
- paper texture 1 – wojtar stock
- texture 119 – sirisu-sdz
Step 1: Create a Photoshop Image File
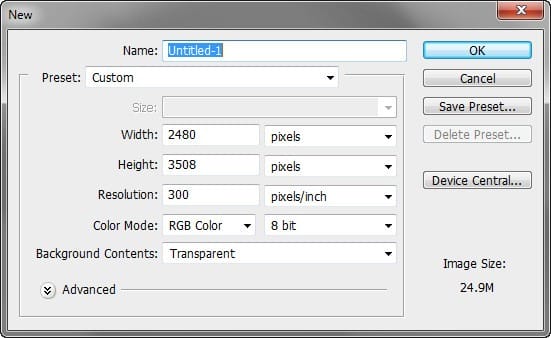
Now, let’s start by creating a new image file, go to the Menu bar and click File > New, and then input the following values on their respective fields:
- Preset: Custom
- Width: 2480 pixels
- Height: 3508 pixels
- Resolution: 300pixels/inch
- Color Mode: RGB Color
- Background Contents: Transparent
Step 2: Create the Sky
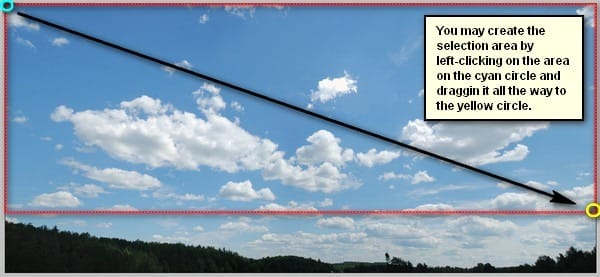
In this step, we will be creating the sky of our image. To start, open “big blue sky stock” by fahrmboy stock. Next activate the Rectangular Marquee Tool by pressing M on your keyboard.

Once activated, create a selection area around the sky as shown below:
Step 3
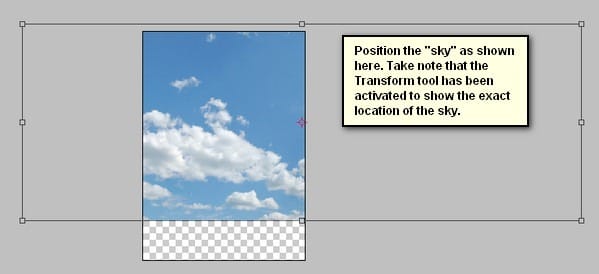
Now that you have the sky selected, left-click on it and drag that sky to our canvas using the Move tool (V). Position it as shown below:
Now, because of its size, we definitely need to reduce it to give the background a sense of depth and in order for us to resize the “sky”, we would need the Transform tool. Activate the Transform tool (Ctrl/Cmd + T) and resize the image as shown below:


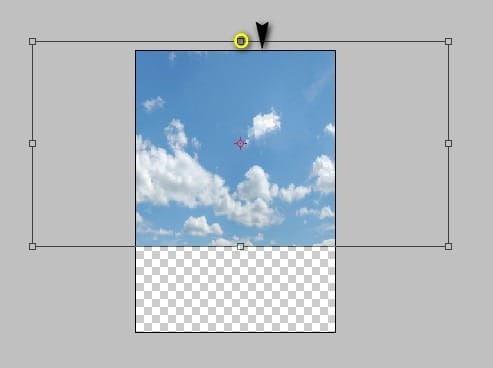
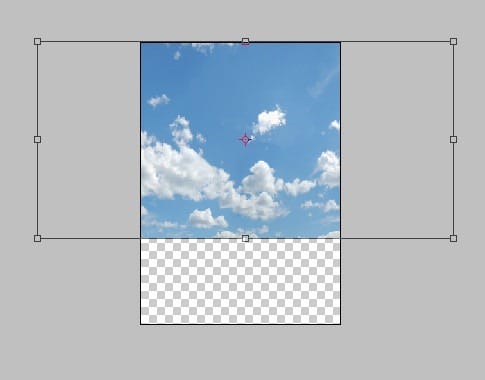
The result:

Step 4
Now, let’s darken the sky to make it look more dramatic. Start by left-clicking on the “sky” layer and then press Ctrl/Cmd + Shift + N on your keyboard to create a new layer directly above the selected layer; once the box opens, input “darken sky”.

Step 5
Once you’re done with that, let’s now activate the Brush tool (B) but before we start, make sure that the active Brushes are the default brushes. The default Photoshop brushes are shown on the image below, if that’s not what you see, then follow the instructions below:

Right click the canvas while a layer is selected and while the Brush tool (B) is activated and then click on the button highlighted below:

Then click on “Reset Brushes” from the contextual menu.
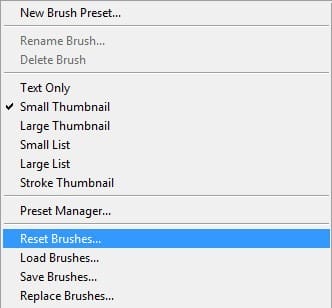
Now, that that is done input the following settings for our Brush tool (B):
- Brush size: 2500px
- Hardness: 0%
- Opacity: 15%
- Flow: 100%
- #: 000000

Note: The #: 000000 is the color of the brush. To change it to that, simply do the following:
2 responses to “Create This Surreal Representation of the Mind Artwork in Photoshop”
-
Where are the remaining steps?
-
These were pretty awesome. A few made me laugh. Thanks for sharing.


Leave a Reply