Luminar AI lets you turn your ideas into reality with powerful, intelligent AI. Download the photo editor and see how you can completely transform your photos in a few clicks.
![10[4]](https://cdn.photoshoptutorials.ws/images/stories/FashionShot_695/104.jpg?strip=all&lossy=1&quality=70&webp=70&avif=70&w=1920&ssl=1)
![11[4]](https://cdn.photoshoptutorials.ws/images/stories/FashionShot_695/114.jpg?strip=all&lossy=1&quality=70&webp=70&avif=70&w=1920&ssl=1)
![12[4]](https://cdn.photoshoptutorials.ws/images/stories/FashionShot_695/124.jpg?strip=all&lossy=1&quality=70&webp=70&avif=70&w=1920&ssl=1)
![13[4]](https://cdn.photoshoptutorials.ws/images/stories/FashionShot_695/134.jpg?strip=all&lossy=1&quality=70&webp=70&avif=70&w=1920&ssl=1)
Step 10
Next I created two more layers and used white splatter brushes, a lot of these can be found here but you can also get away with using some of the ones Photoshop has built in. Lower the opacity of these layers a lot and add a layer mask for any blending. Below you can see roughly where I put the splatters. All these details should be very faint but will build up gradually.
![14[5]](https://cdn.photoshoptutorials.ws/images/stories/FashionShot_695/145.jpg?strip=all&lossy=1&quality=70&webp=70&avif=70&w=1920&ssl=1)
{end}
Step 11
To brighten some of the splatters I added a brightness/contrast adjustment layer and used +150 for the brightness and 0 for the contrast. Select the mask and invert it as we did in step 8. Now with a soft white brush of about 125px and 100% opacity add some dots to this layer mask by just pressing in the same place about three times. You should now have something that looks like the image below.
![15[4]](https://cdn.photoshoptutorials.ws/images/stories/FashionShot_695/154.jpg?strip=all&lossy=1&quality=70&webp=70&avif=70&w=1920&ssl=1)
{articlead}
Step 12
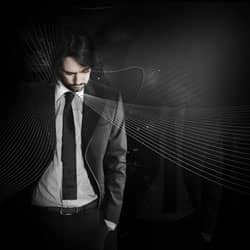
Okay, now we will create the lines that you see. For this you need Adobe Illustrator, if you don't have Illustrator you can get a similar effect by using brushes like these although you will get a better result with Illustrator. First save your image as a Jpeg but keep it open then open up Illustrator and open the Jpeg image. Now select the pen tool and set it to no fill and 1px white stroke in the main toolbar.
![16[4]](https://cdn.photoshoptutorials.ws/images/stories/FashionShot_695/164.jpg?strip=all&lossy=1&quality=70&webp=70&avif=70&w=1920&ssl=1)
Step 13
With the pen tool draw a path like so, this is same as how you would do it in Photoshop; holding and dragging at each point to smooth the curve. Note that I have tried to follow the edge of the jacket and this is why I pasted the image into Illustrator.
![17[4]](https://cdn.photoshoptutorials.ws/images/stories/FashionShot_695/174.jpg?strip=all&lossy=1&quality=70&webp=70&avif=70&w=1920&ssl=1)
Step 14
After ending the last path, create a new path following his shoulder roughly.
![18[4]](https://cdn.photoshoptutorials.ws/images/stories/FashionShot_695/184.jpg?strip=all&lossy=1&quality=70&webp=70&avif=70&w=1920&ssl=1)
Step 15
Next select the blend tool (W) and click on the first path then the second, you will now see that a new line has been added between these two but we want more lines. Hit return then use the settings shown below.
![19[4]](https://cdn.photoshoptutorials.ws/images/stories/FashionShot_695/194.jpg?strip=all&lossy=1&quality=70&webp=70&avif=70&resize=380%2C134&ssl=1)
{end}
Step 16
with this done, select the whole shape then copy it, now go back to Photoshop and make a new layer group at the top of the layer stack then paste this shape inside that group. A dialog box should pop up, if it gives an option to paste it as a smart object then do this, if not paste it as pixels. The smart object will keep it as a vector so we would be able to scale it up without losing quality if we wanted.
![20[4]](https://cdn.photoshoptutorials.ws/images/stories/FashionShot_695/204.jpg?strip=all&lossy=1&quality=70&webp=70&avif=70&w=1920&ssl=1)
{articlead}
Step 17
Now do the usual; add a layer mask then using a large, soft, low opacity, black brush blend it into the background and also remove the hard ends on all the lines. Lastly lower the opacity slightly; I used 75% for mine.


7 comments on “Fashion Shot”
nice
ببخشید شما فارسی نوشتین ! فارسی می خواین ؟؟
I have got blending clarification from this tutorial.
سلام
میشه فارسی هم بگذارید
سلام
فارسی نداریم
Ma Farsi Me Daram! :D Ma Farsi Astam!
من فارسیشو میخوام