
![1[4]](https://cdn.photoshoptutorials.ws/images/stories/FashionShot_695/14.jpg?strip=all&webp=82&avif=82&w=1920)
Step 2
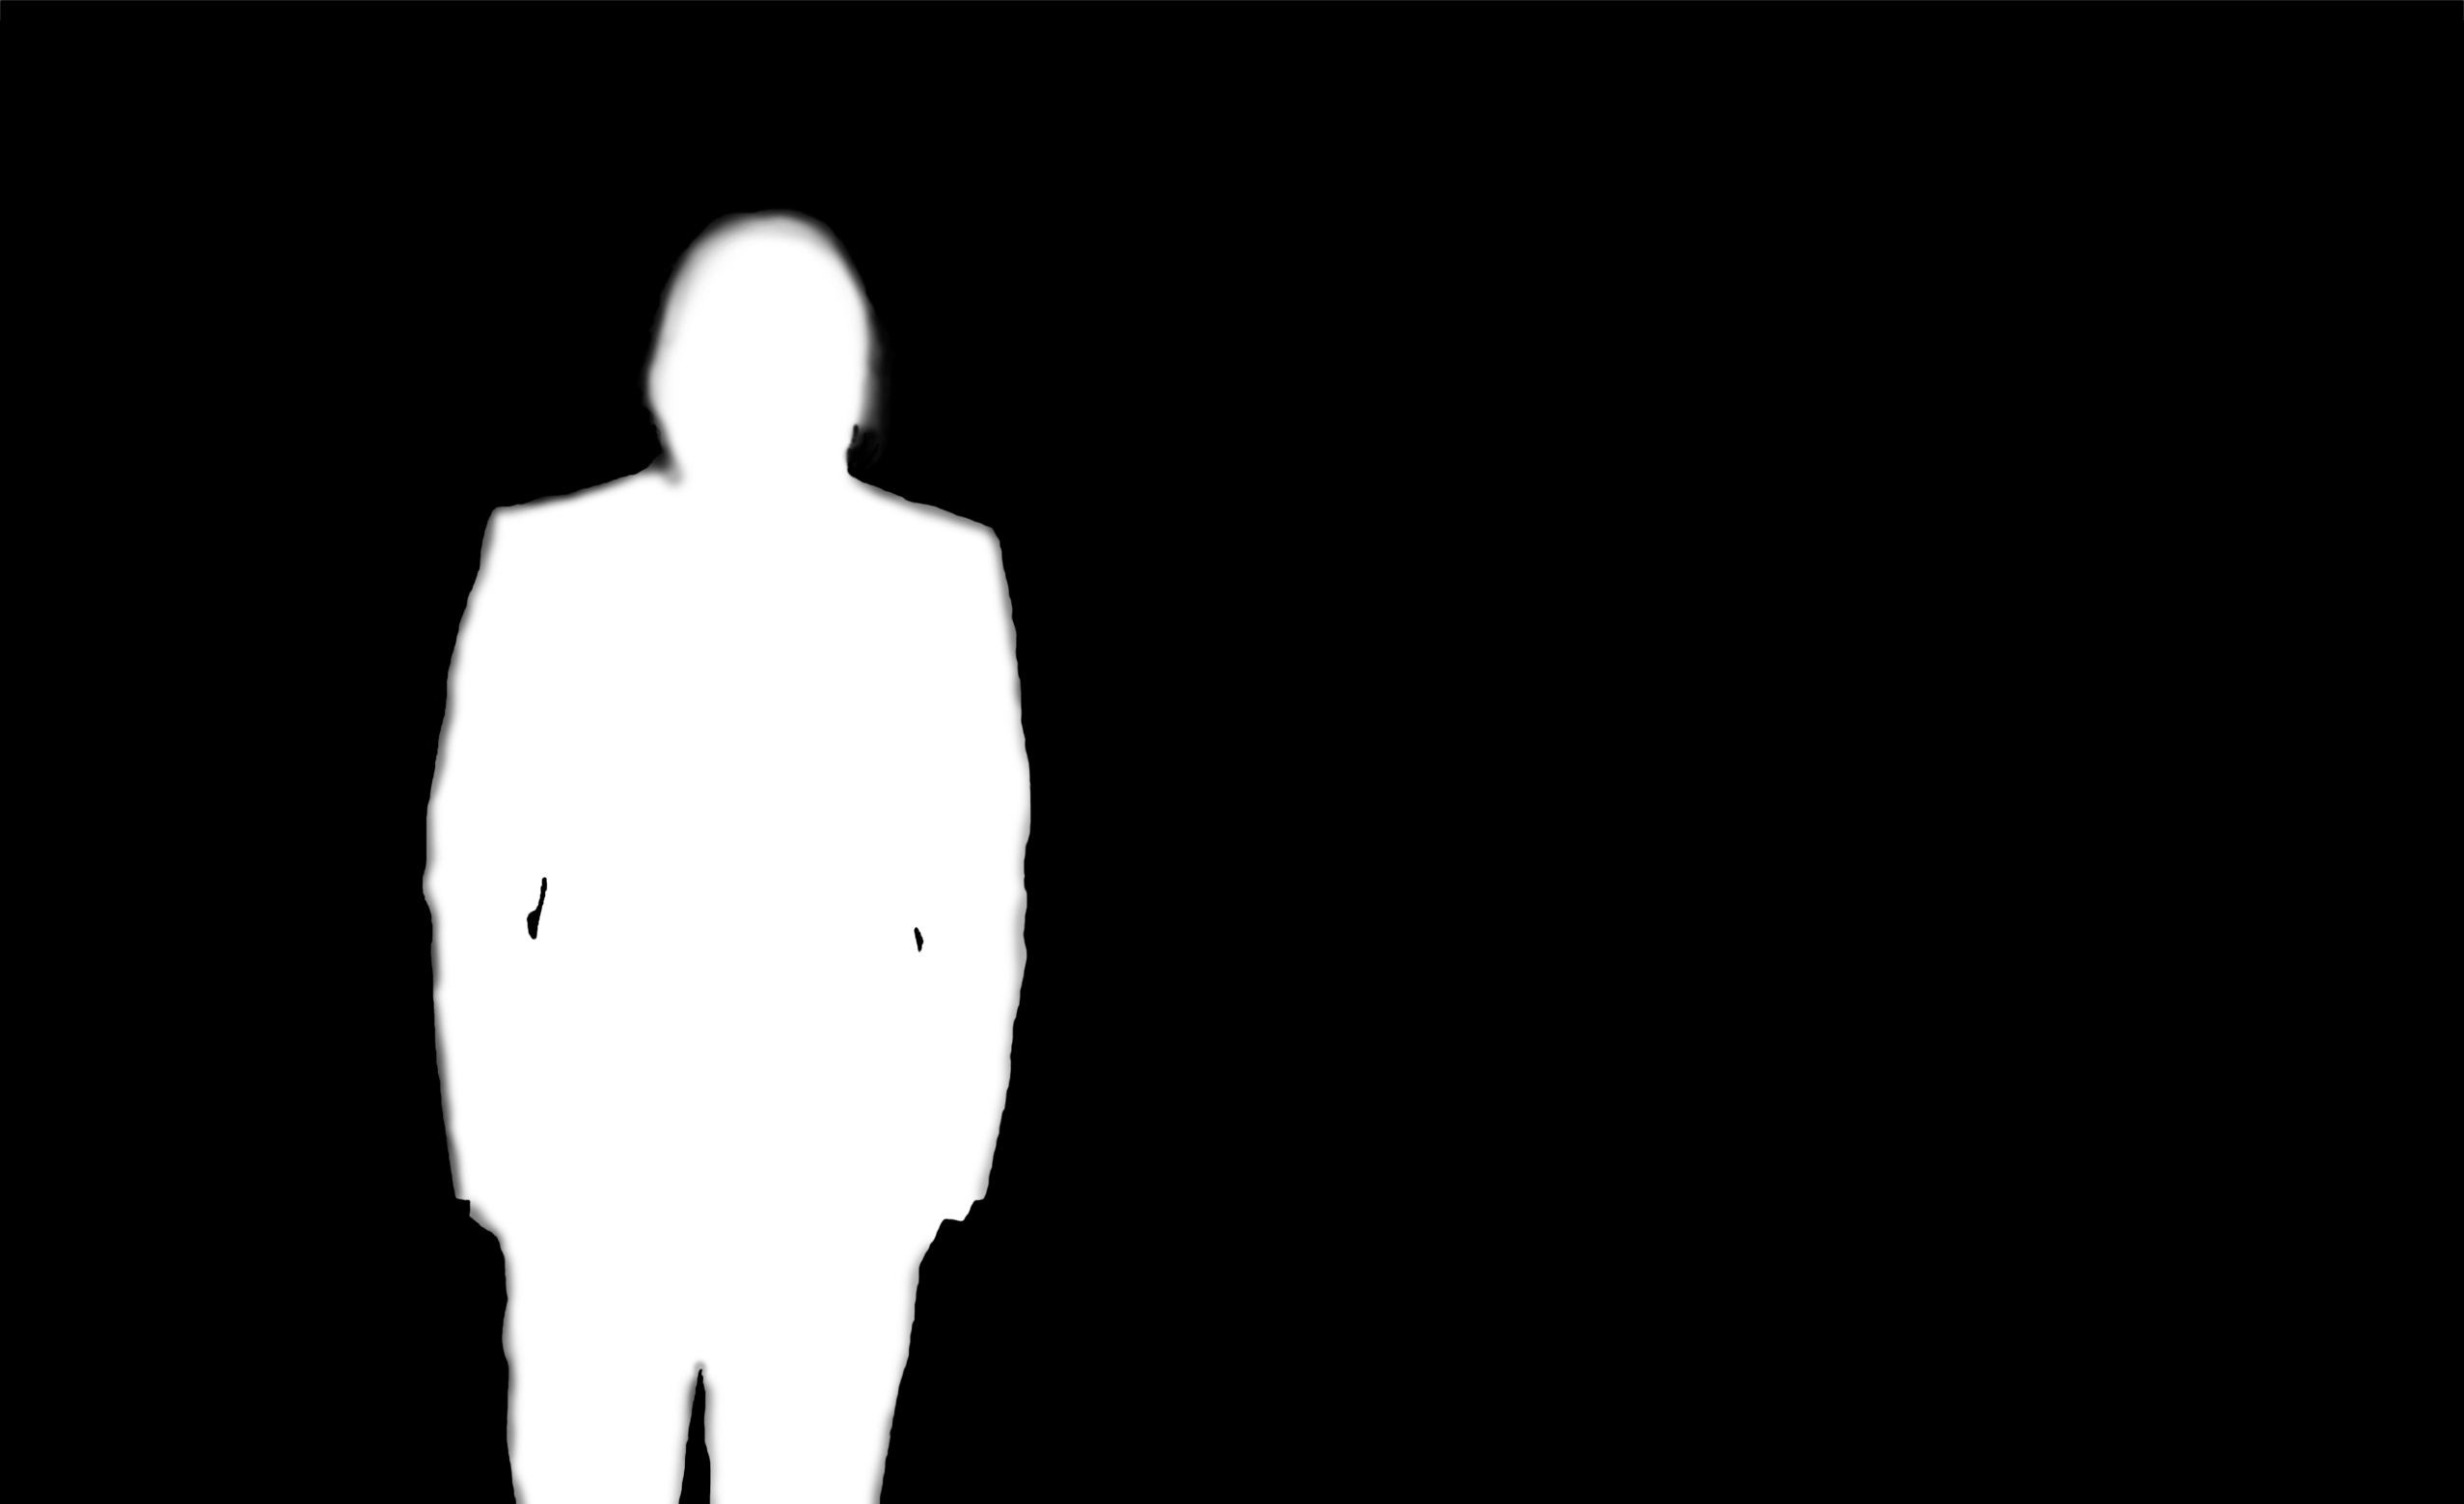
Now for the most tedious part in any photo manipulation, also one of the most important parts; the extraction of our subject. This one isn’t all that hard to extract because the outline of the man is quite simple. Sometimes when we are given a photo with a white background we can use the magic wand tool or the color range selection. However you can only really get away with this when the background you are putting it on is also a light color because here if we were to use the magic wand we would be left with a narrow gray outline that will stand out against the black background. What we will do is to create a layer mask on this layer, so select the layer with the person in it then click the layer mask button at the bottom of the layers panel. For those that have not yet encountered layer masks then basically what they do is to hide the parts of the layer where the layer mask is dark and let through the parts where the layer mask is light, for example if the layer mask was filled black then none of this layer would be visible but if it is white like ours is at the moment then everything will be visible. Click on the layer mask then select a brush of about 20px and 80% hardness with the foreground color still at black. Now draw round the outline of his clothes, you won’t need to be too accurate as the color of his suit and the background are about the same anyway. You may need to use a smaller brush for some parts so just change the size or hit the ‘[‘ button to make it smaller and the ‘]’ button to enlarge it. The hair is a bit trickier and will require you to change the opacity of the brush but only go round the basic shape of the hair and don’t worry about the strands that stick out as they won’t be seen anyway on the black background after going round the person just fill any parts out with this black. The first image shows what it should look like after masking and the second, what my layer mask looked like. Okay since this isn’t a masking tutorial I’ve decided to be nice and post my layer mask so you don’t need to extract anything. If you’re reading this and you have just extracted the image then think of it as good practice but if you skipped ahead and don’t want to spend too much time on the extraction then you can download the layer mask which I’ve put on my site here. To use this, copy it into your document then go select>color range and set fuzziness to 200 then click on the white part now go to the layer with the man on it and if you have already put a layer mask on this image then delete it and just click on the layer mask button in the layers panel.
7 responses to “Fashion Shot”
-

nice
-
ببخشید شما فارسی نوشتین ! فارسی می خواین ؟؟
-
I have got blending clarification from this tutorial.
-
سلام
میشه فارسی هم بگذارید -
سلام
فارسی نداریم-
Ma Farsi Me Daram! :D Ma Farsi Astam!
-
-
من فارسیشو میخوام
Leave a Reply