Once that is done, let us now proceed to Transforming the duplicated layer into the shadow of the father and daughter. To start, activate the Transform tool (Ctrl/Cmd + T) but make sure that the duplicated layer is active, and then follow the instructions shown below:
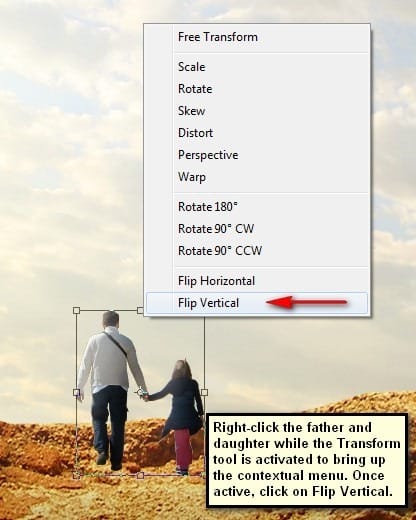
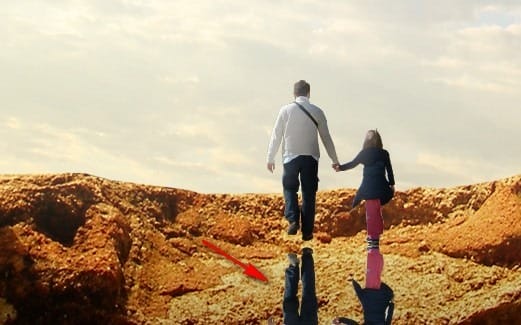
The result:

Now activate the Transform tool again (Ctrl/Cmd + T) and then right click he canvas to bring up the contextual menu; now click on Distort.
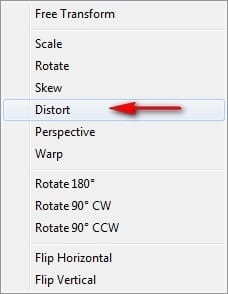
Distort the image using the instructions shown below:
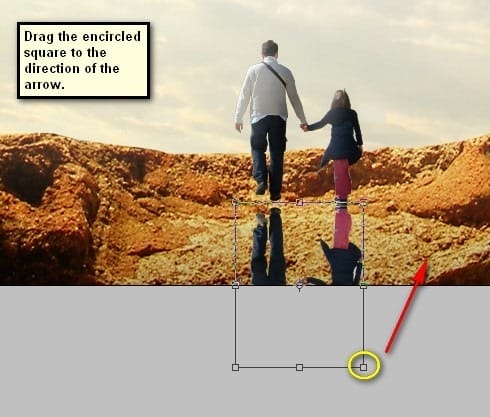
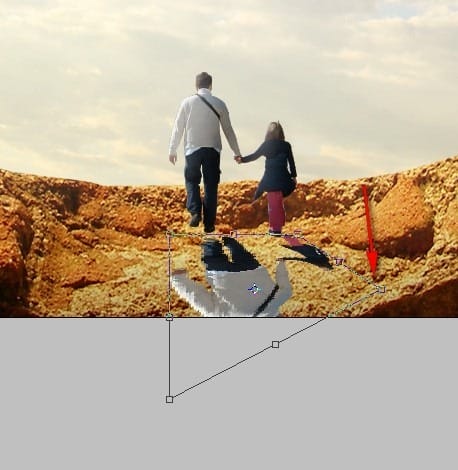
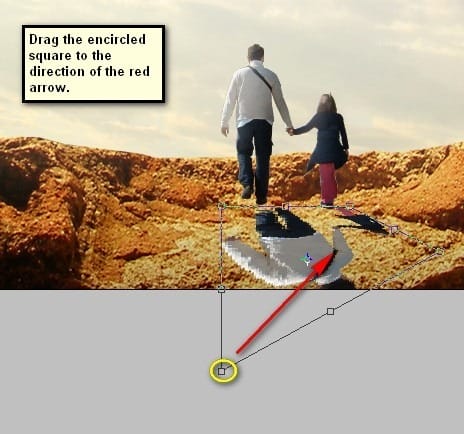
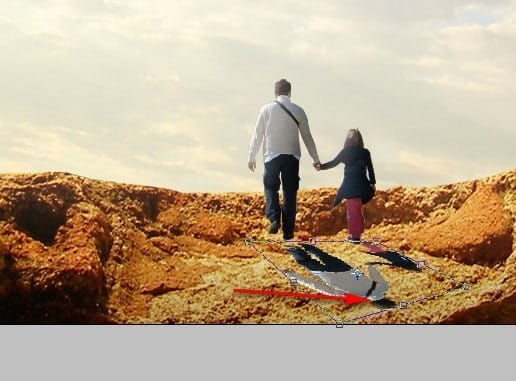
Next, we will be turning it to real shadows. While the duplicated layer is selected, go to Image > Adjustments > Brightness/Contrast and input the following once open:
- Brightness: -100
- Contrast: -100
- Use Legacy: Check
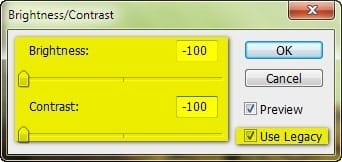
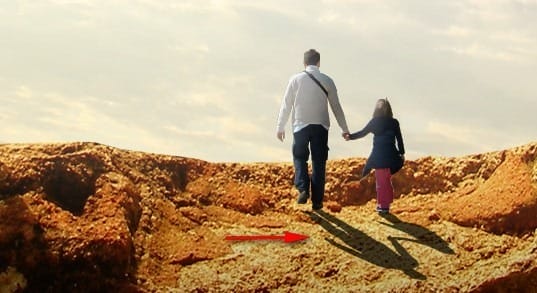
The result of that should be similar to this:

Next, change the Opacity of this layer to 70%. See image below:

The result:
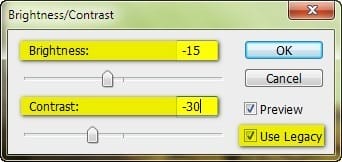
Next, let’s further enhance the lighting of the father and daughter. Let’s make them look like they’re really in the image; to do that, click on the father and daughter layer and go to Image > Adjustments > Brightness/Contrast. Once done, input the following:
- Brightness: -15
- Contrast: -30
- Use Legacy
The result of that should be similar to this:
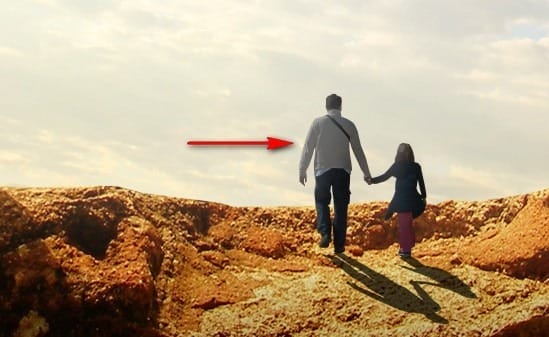
Select all the layers that we’ve created and group them (Ctrl/Cmd + G). Name this group to “Father and Daughter”.
Step 6: Add the Flying Ships
In this Step, we will be adding the flying transports for the father and daughter. To start, open the stock image “ship 12” by Alegion Stock. Once open, you’d notice that this file has a transparent background and what does this mean? This means that you wouldn’t have a tough time to remove the background of the image because you can just activate your Move tool (V) and drag this image to our canvas. Make sure to put this ship above all the groups and layers we’ve created.
Move and position the ship in this area:

Rename this layer to “ship 1”.
Now, activate the Transform tool (Ctrl/Cmd + T) and then resize it as shown below:
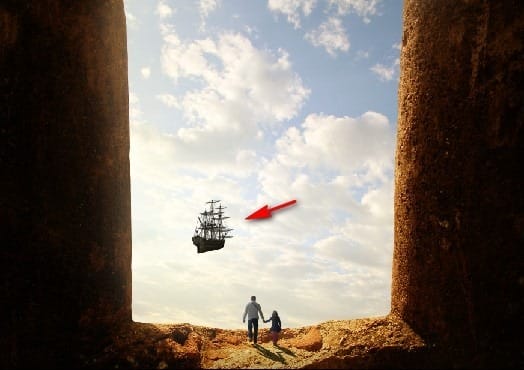
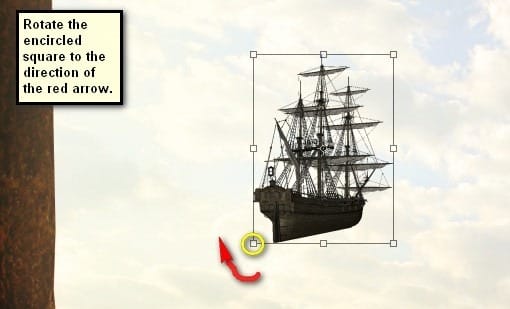
Next, activate the Transform tool once again and rotate it as shown on the image below:
The result of that should be similar to this:
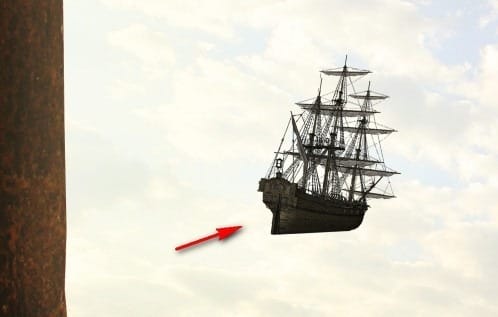
Once done, change the layer opacity to 50% to make it blend with the glaring light on the background.
6 responses to “How to Create a Fantasy Haven for Travelers in Photoshop”
-
I just got a copy of Photoshop and I cannot believe how much a person can do with it. These tutorials are amazing me each step of the way. The program is really in depth.
-
Oh man, thanks!!! I’m amateur on PS, and you create this good tutorial for our, explaining ever.
Sorry to my English, i’m from Brazil =xHave a nice Job!!! Thanks!
-
Thank you very much! It’s a really good tutorial. Here my version of it: http://chanelpoulain.deviantart.com/#/art/Fantasy-Heaven-380558934?_sid=3278bf4b
Question: How long did you practice until you were able to make pictures like this by yourself?
-
Probably years
-
-
Thank you so much for this great tutorial explaining every step without having the student loose track of what happened between step 1 and 2…
I made this picture with a picture of myself, and I really learned something about exposure and adjusting lighting in cut in objects! Thanks a lot!
If you want me to send my picture to you, just let me know.
Victoria -
What is this man ??? your are a great Teacher. Thanx alot


Leave a Reply