Make skin look perfect in one-click with these AI-powered Photoshop actions.
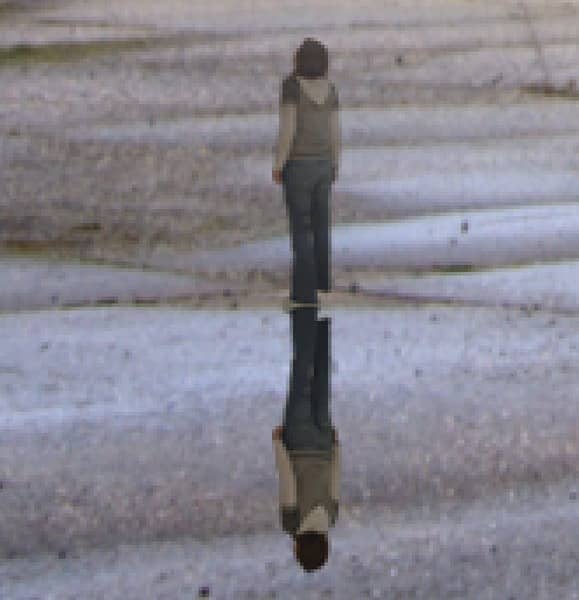
Now, activate the Transform tool (Ctrl/Cmd + T), right click on the canvas and then press Distort. Next, distort it as shown on the images below:
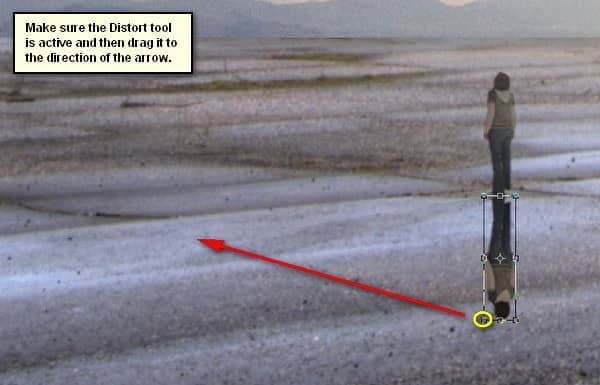
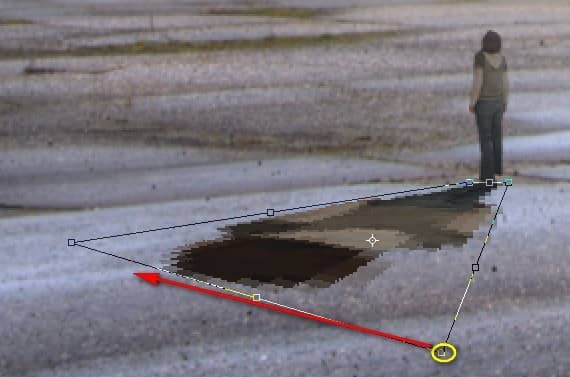
The result should be similar to this:
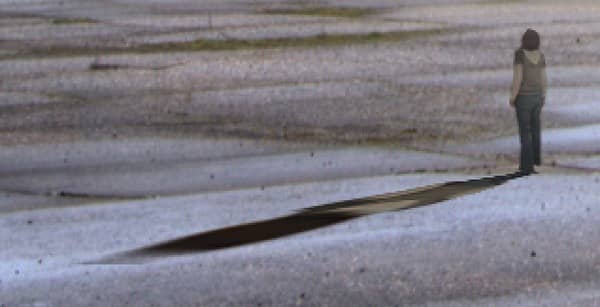
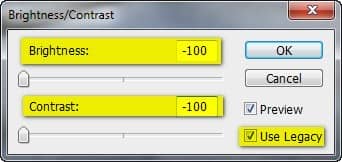
Now, we will turn it into a real shadow; first, go to Image > Adjustments > Brightness/Contrast and input the following:
- Brightness: -100
- Contrast: -100
- Use Legacy: Check
The result:
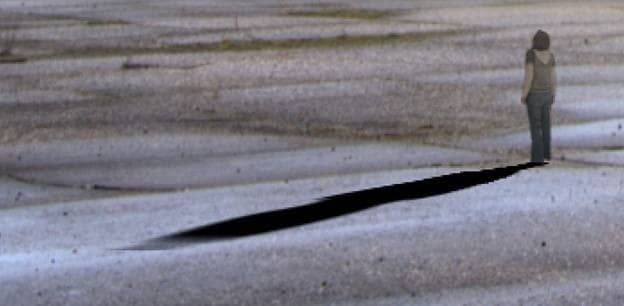
Next, we will blur this shadow to make it look real. To do that, make sure that the duplicated layer is selected and then go to Filter > Blur > Gaussian Blur. Now, when it is open, input the following:
- Radius: 1.0 pixels
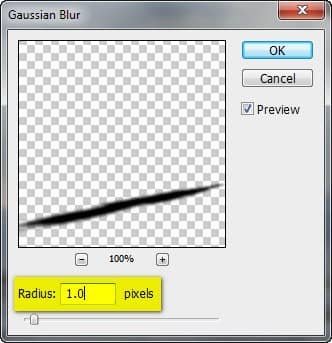
The result of that:
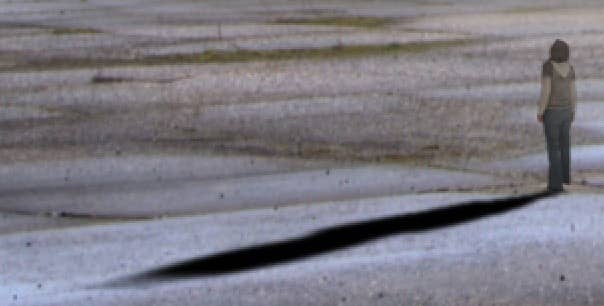
Now, we'll reduce the duplicated layer's opacity. To do that, just go to the Layer window and change the Opacity from 100% to 70%.

Next, select all the layers from Step 6 and group them (Ctrl/Cmd + G) and name the group to "Woman".
Step 8: Enhance the Overall Look of the Image
Now, let's enhance the look and feel of the image. To start, let's create a Solid Color adjustment layer from the "Create New Fill/Adjustment layer button" from the Layer window.
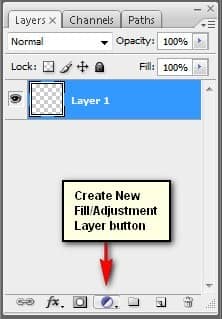
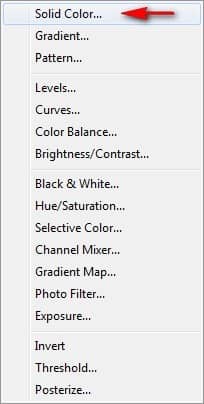
Once the contextual menu opens, click on Solid Color:
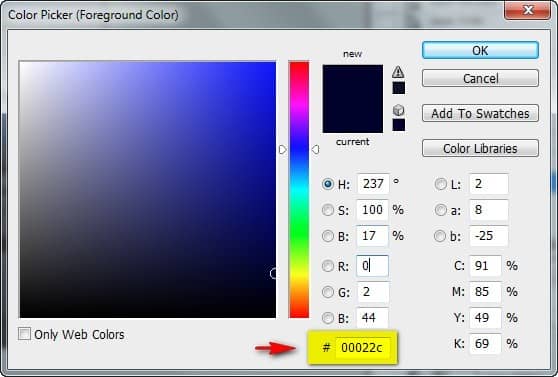
Clicking on the Solid Color option will open the Color Picker box. Now, input the following on the #: space.
- #: 00022c
Click OK and then change the Blending mode and Opacity of this solid color to the following:
Note: To change the Blending mode, simply click on the Solid Color and then go to the Layer window and find the "Normal" option. Click on that and it will open a contextual menu, once its open, click on Exclusion as shown on the image below:

- Blending mode: Exclusion
- Opacity: 50%

Make sure that you put this layer above the "woman" group. Next, let's create a Color Balance adjustment layer from the "Create New Fill/Adjustment layer button".
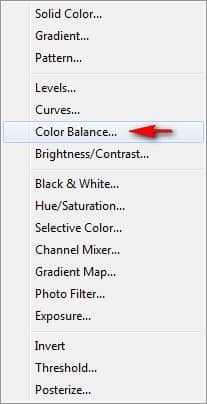
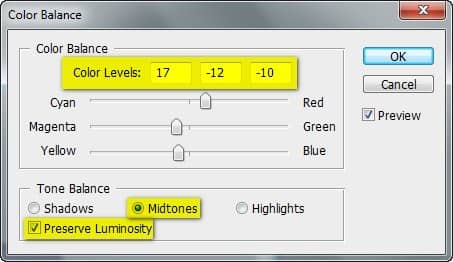
Once it is open, input the following:
- Color Levels: +17, -12, -10
- Tone Balance: Midtones
- Preserve Luminosity: Check
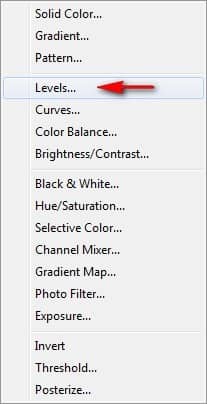
Next, let's create a Levels adjustment layer still from the "Create New Fill/Adjustment layer button".
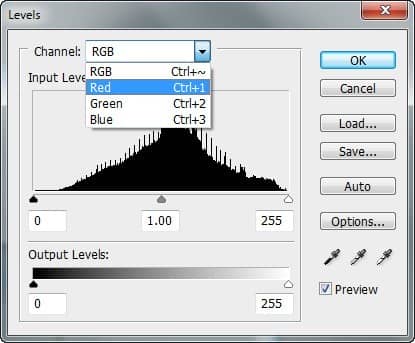
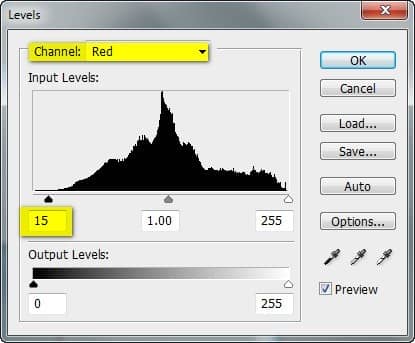
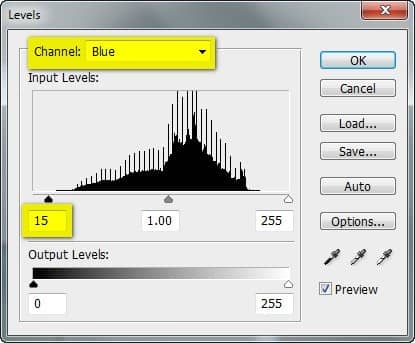
Once the Levels box opens, input the following:
- Channel: Red
- Input Levels: 15, 1.00, 255
- Output Levels: 0, 255
- Channel: Blue
- Input Levels: 15, 1.00, 255
- Output Levels: 0, 255
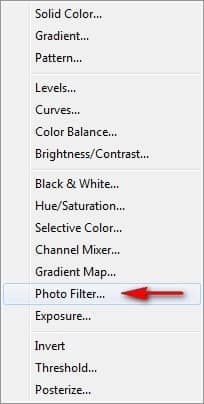
Next, let's create a Photo Filter adjustment layer still from the "Create New Fill/Adjustment layer button".
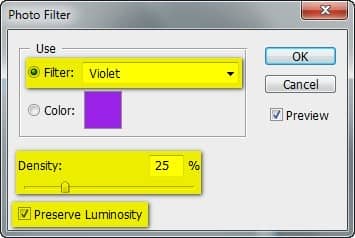
Once it opens, input the following:
- Filter: Violet
- Density: 25%
- Preserve Luminosity: Check
Next, let's create a Brightness/Contrast adjustment layer still from the "Create New Fill/Adjustment layer button".
