
Once activated, input the following settings for the Brush tool (B):
- Brush size: 1400px
- Hardness: Default
- Opacity: 100%
- Flow: 100%
- #: ffb32e

Now, let’s paint:

The result of that should be similar to this:

Next, create a new layer (Ctrl/Cmd + Shift + N) and name it “fire 3”.
Activate the Brush tool (B) and use the following fire brush:

Input the following settings now:
- Brush size: 1500px
- Hardness: Default
- Opacity: 100%
- Flow: 100%
- #: fffbb4

Now, let’s start painting:

The result of that should be like this:

Next, create a new layer once again (Ctrl/Cmd + Shift + N) and name it “fire 4”.
Activate the Brush tool (B), right click the canvas, hit the drop down menu and click on Reset Brushes because we will need to use the default circular brushes.
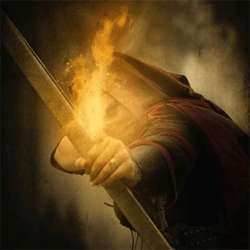
![image016[1]](https://cdn.photoshoptutorials.ws/images/stories/e58f92b17ac9_11AA4/image0161.jpg?strip=all&webp=82&avif=82&w=1920 "image016[1]")
Now that the brushes have been reset, input the following:
- Brush size: 700px
- Hardness: 0%
- Opacity: 15%
- Flow: 100%
- #: ff8400

And, let’s paint:

The result:

Create a new layer once again and name it “fire 5”. Activate the Brush tool (B). Let’s load the “assorted fire brushes” by skippy3E once again. Use this fire brush:

Input the following settings now for the Brush tool (B):
- Brush size: 2500px
- Hardness: Default
- Opacity: 15%
- Flow: 100%
- #: b76206

Now, let’s paint:

The result is this orange glow:

Next, create a new layer and name it “fire 6”.
Activate the Brush tool (B) and reset the brushes and then input the following:
- Brush size: 1000px
- Hardness: 0%
- Opacity: 15%
- Flow: 100%
- #: ffa415

Next, let’s paint:

The result:

Next, create another layer and name it “fire 7”. Activate the Brush tool and Load “Star brushes volume 1” by JonasKr. When it’s open, activate this brush:

Now, input the following settings for the brush:
- Brush size: 1100px
- Hardness: 0%
- Opacity: 100%
- Flow: 100%
- #: ffd56c

Let us now paint:

The result:

Group all the layers we’ve created here (Ctrl/Cmd + G) and name this group to “Fire”.
Step 5: Enhance the light created by the fire
Now we will be adjusting the light and shadows created by the fire arrow. To start, create a new layer (Ctrl/Cmd + Shift + N) above the “fire” group; name this layer “glow”. Activate the Brush tool (B) and reset the brushes. Next, input the following:
- Brush size: 700px
- Hardness: 0%
- Opacity: 15%
- Flow: 100%
- #: ffc262

Now, let’s start making the areas around the fire arrow glow:

The result of that should be similar to this:

Next, create a new layer and name it “Darken 1”. Activate the Brush tool (B) and input the following:
- Brush size: 600px
- Hardness: 0%
- Opacity: 25%
- Flow: 100%
- #: 000000
Now, let’s paint:

The result of that would be like this:

Next, create another layer and name it “Darken 2”.
Activate the Brush tool (B) and input the following:
3 responses to “How to Create a Photo Manipulation of an Assassin with a Flaming Arrow in Photoshop”
-

My fiance would love this! She is fascinated by bows, arrows and assassins.
-
I just used other fire brushes and it turned out just as nice
-
Fire brushes do not exist any longer =(
Leave a Reply