
Step 8: Create the Fog
In this step, we will be adding the mist/fog to give that Silent Hill feel. To start, let’s create a Solid Color Adjustment layer. To do that, simply click on the button shown on the image below:

When it opens, click on the following:

Once you’ve clicked on Solid Color, the Color Picker menu would open. When it opens, input the following color:
- #: ffffff
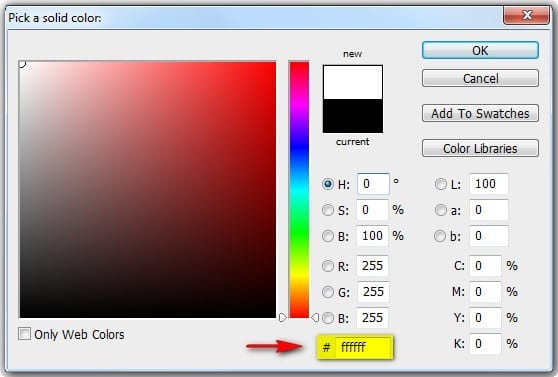
Now, your canvas is all white, but we don’t want that, so let’s reduce this layer’s Blending Mode and Opacity to the following:
- Blending Mode: Soft Light
- Opacity: 50%

The result of that would be like this:

Next, let’s create a Gradient Adjustment layer. Click the Create New Fill/Adjustment layer button and click on Gradient.

When it opens, input the following:
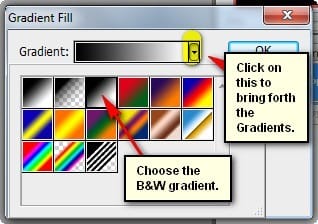

Now your canvas is filled with a black and white gradient so change the Blending mode, Opacity and Fill to the following:
- Blending mode: Soft Light
- Opacity: 40%
- Fill: 40%

Next, create a new layer (Ctrl/Cmd + Shift + N) and then name this layer to “clouds”. After that, go to Filter > Render > Clouds. After doing that you will see that the whole canvas is filled with smoke so we will need to make it blend with our image. Change its Blending mode and Opacity to the following:
- Blending mode: Soft Light
- Opacity: 30%
The result:

Next, let’s create a new Gradient adjustment layer to smoothen the effect of the “clouds”. Once its open, input the following:
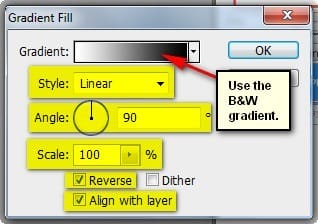
After hitting OK, right click on this Gradient adjustment layer and click on Create Clipping Mask.
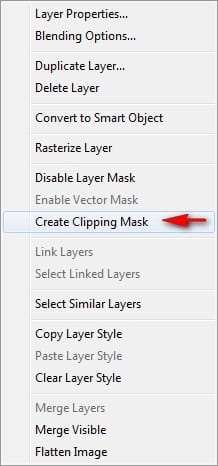
After that, change the Opacity of the Gradient adjustment layer to the following:
- Opacity: 40%
The result should be similar to the following:

Now, we’re going to add more mist to our subjects. To start, let’s create a new layer (Ctrl/Cmd + Shift + N) above the Gradient adjustment layer that we just did. Name this layer to “Fog 2”. Activate the Brush tool (B) and then Reset the brushes.
![image021[2] image021[2]](https://cdn.photoshoptutorials.ws/images/stories/fe3862fc252f_F0C/image0212.jpg?strip=all&lossy=1&webp=82&avif=82&w=1920&ssl=1)
With the brushes reset, input the following:
- Brush size: 1300px
- Hardness: 0%
- Opacity: 25%
- Flow: 100%
- #: ffffff
Now, let’s start painting!
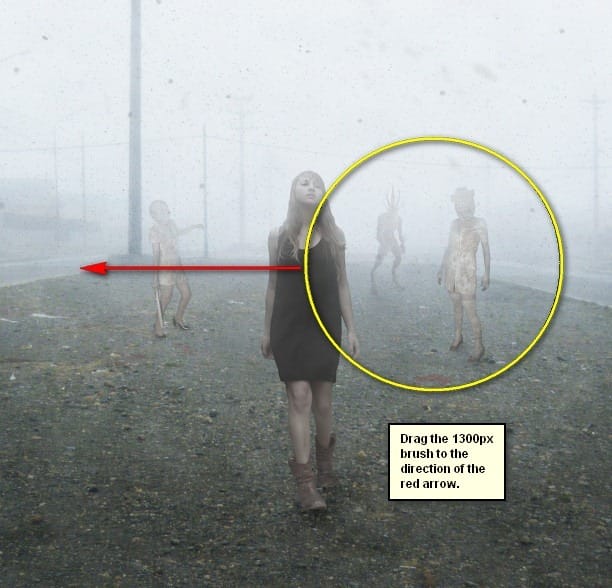
The result:

Next, let’s create Fog 3. To start, create a new layer (Ctrl/Cmd + Shift + N) and name it “Fog 3”. Activate the Brush tool (B) and then input the following:
- Brush size: 1000 px
- Hardness: 0%
- Opacity: 15%
- Flow: 100%
- #: ffffff
Now, let’s start painting:
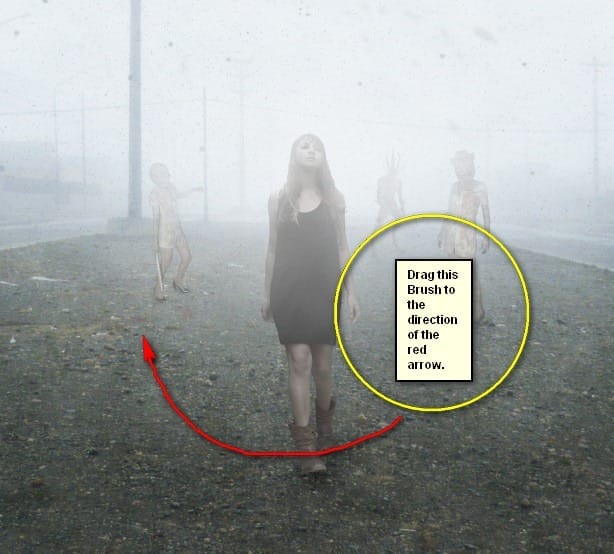
The result should be similar to the following:


Leave a Reply