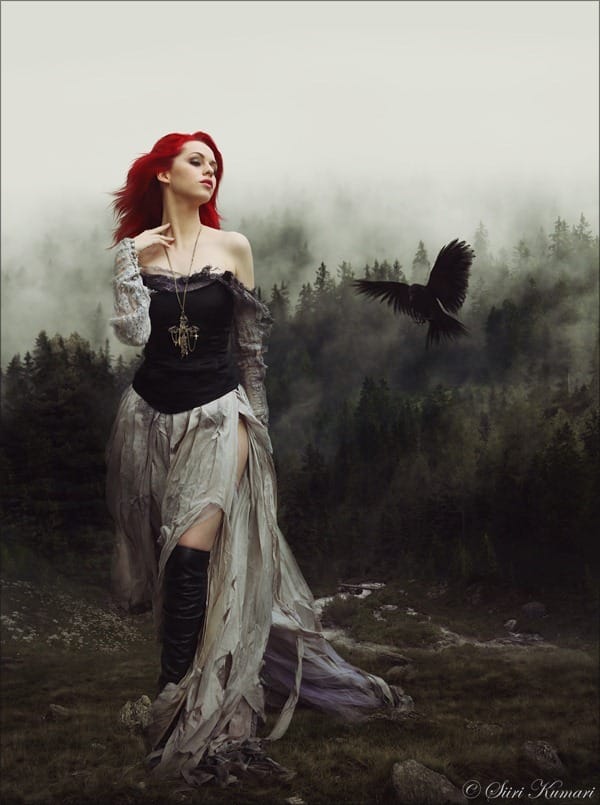
Learn how to create this photo manipulation with this detailed step-by-step walkthrough. You’ll learn how to combine a beautiful redhead model with a black raven in a mystical landscape scene.
Preview of Final Results

Download the PSD
Into the Wild.zip | 4.4 MB
Download from Website
Into the Wild Photoshop Tutorial
Tutorial Resources
- Foggy Forest – Malleni-Stock
- Redhead model – FaestockForest I – Malleni-stock
- Forest II – 10Ravens
- Lower Ground – Compot-stock
- Raven – Tasastock
Step 1
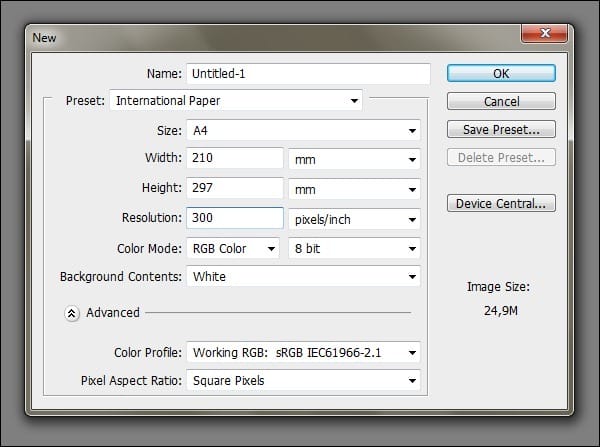
Create a new file by going to File > New and choosing the settings shown. I ended up cropping the final result a little bit, but A4 is always a nice size to start out with.

Step 2
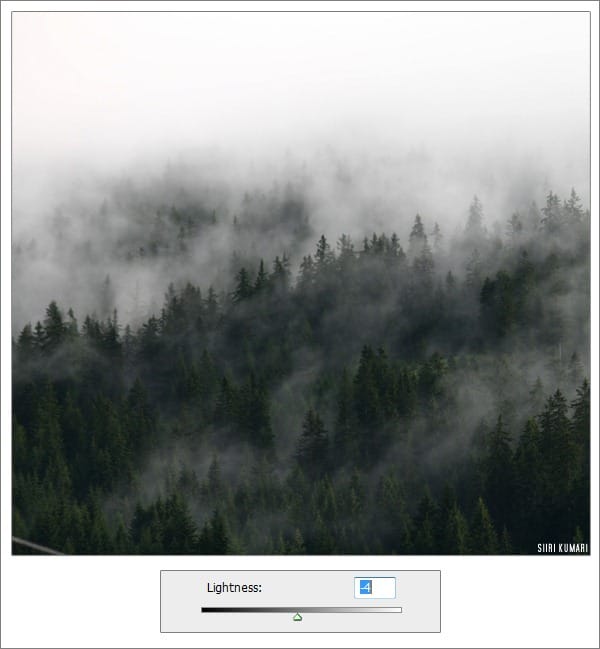
Open the foggy forest, select all (Ctrl + A), copy it (Ctrl + C) and place it (Ctrl + V) on a new layer. Darken in Image > Adjustments > Hue/Saturation. I didn’t resize it because I liked how the trees were positioned.

Step 3
Now place the other forest on top of it and resize it to fit by hitting Ctrl + T and then dragging from the corners until the size fits your original canvas. You must drag from the corners – if you don’t, your image will look stretched and ugly.

Step 4
Set the layer mode to Multiply. The bottom part of the second forest will show up strange – it will be fixed later. Leave it as is.

Go to Image > Adjustments > Curves set the Output around 140-180 and Input to 50-90, then move the Vibrance slider to -40. Then go to Color Balance and make Shadows, Midtones and Highlights more blue, +9 should be enough for all three.

Step 5
Zoom in to 100%, select Blur tool, Size 300 soft round, Strength 50% and blur the treetops on the second forest layer. Just click around.

Step 6
Grab the Magic Wand tool, set Tolerance to 50 and make sure the Contiguous box is unticked. Then hit Shift + F6 and a box pops up: set the feather to 5, click ok. Now use the eraser tool, soft round size 300 and opacity between 10-25% and erase some of the treetops to blend them better.

Step 7
Now select the bottom part with the marquee tool (shortcut M), right-click and choose “Layer via Copy” and blend it in by darkening it with Gamma Correction (Image > Adjustments > Exposure), then adding some blue colour and reducing Vibrance by 50 (Image > Adjustments > Vibrance). Also add a Blur Filter (Filter > Blur > Blur). Then blend it in with a soft round eraser on low opacity (10-30%) and I also darkened the sides with the Burn tool on low opacity. Again, this is mostly just clicking around and seeing what works the best. You can see from the .psd file how I blended it, too.
9 responses to “How to Create this “Into the Wild” Photo Manipulation in Photoshop”
-
I take my hat off , for this tutorial and fantastic work.
Great !!!👍👍👍👍👍👍❤ -
Super tuto✌
-
Fantastic work . all are great combining .
-
Sorry but where is the psd file?
-
These look fantastic! Thanks for bringing them together – what a great collection
-
it’s so nice and useful lesson
-
The raven image is currently unavailable, by the way.
-
Great tut! Inspired by it I’ve created this: http://imageshack.us/f/338/dreamer01.jpg/
-
Nice. I love PSD! very inspirational work.


Leave a Reply to Maidul IslamCancel reply