Luminar AI lets you turn your ideas into reality with powerful, intelligent AI. Download the photo editor and see how you can completely transform your photos in a few clicks.
![step-069[22] step-069[22]](https://cdn.photoshoptutorials.ws/images/stories/4f403d312465_1519/step-06922.jpg?strip=all&lossy=1&quality=70&webp=70&avif=70&w=1920&ssl=1)
Step 70
Place the second iceberg layer below iceberg01 folder. Using free transform command, adjust its size like shown in the below image. Press Enter when you're done.
![step-070[22] step-070[22]](https://cdn.photoshoptutorials.ws/images/stories/4f403d312465_1519/step-07022.jpg?strip=all&lossy=1&quality=70&webp=70&avif=70&w=1920&ssl=1)
Step 71
Press Ctrl+J to duplicate the current layer. Get back to iceberg2 layer to change its blend mode to Luminosity.
![step-071[22] step-071[22]](https://cdn.photoshoptutorials.ws/images/stories/4f403d312465_1519/step-07122.jpg?strip=all&lossy=1&quality=70&webp=70&avif=70&w=1920&ssl=1)
Step 72
Hide layer 'iceberg2 copy', then add layer mask for iceberg2 layer. Hide the upper part of iceberg2 using black soft round Brush tool with 100% opacity, the result can be seen in the below image.
![step-072[22] step-072[22]](https://cdn.photoshoptutorials.ws/images/stories/4f403d312465_1519/step-07222.jpg?strip=all&lossy=1&quality=70&webp=70&avif=70&w=1920&ssl=1)
Step 73
Show the 'iceberg2 copy' layer again then add a layer mask in that layer.This time, use black soft round Brush tool to mask (hide) the lower part of iceberg2 image. As you can see now, the iceberg2 lower part seems submerged under water.
![step-073[22] step-073[22]](https://cdn.photoshoptutorials.ws/images/stories/4f403d312465_1519/step-07322.jpg?strip=all&lossy=1&quality=70&webp=70&avif=70&w=1920&ssl=1)
Step 74
Click on the iceberg2 layer thumbnail (this is to make sure you're the one we're editing now is the layer's content, not the layer mask). Use soft round Blur tool with 50% Strength to blur some parts of the iceberg2, see image below for guidance.
![step-074[22] step-074[22]](https://cdn.photoshoptutorials.ws/images/stories/4f403d312465_1519/step-07422.jpg?strip=all&lossy=1&quality=70&webp=70&avif=70&w=1920&ssl=1)
Step 75
Create a new layer, name it 'splash' because we're gonna add water splash there. Use white spatter brush with50% opacity to draw some water splash. Click several times until you satisfied with the result (don't click and drag, because the result will be different). If you unhappy with the water splash result, delete unwanted parts or just transform it like I did.
![step-075[22] step-075[22]](https://cdn.photoshoptutorials.ws/images/stories/4f403d312465_1519/step-07522.jpg?strip=all&lossy=1&quality=70&webp=70&avif=70&w=1920&ssl=1)
Step 76
Create a new layer below iceberg2 layer, we call this layer 'shadows'. Draw a selection using Lasso tool (just a simple silhouette of the iceberg2, no need to imitate the iceberg2 shape precisely). Fill the selection with 100% Black.
![step-076[22] step-076[22]](https://cdn.photoshoptutorials.ws/images/stories/4f403d312465_1519/step-07622.jpg?strip=all&lossy=1&quality=70&webp=70&avif=70&w=1920&ssl=1)
Step 77
Go to Filter > Blur > Gaussian blur menu to blur the shadows around 25px radius. Click OK to apply blur filter.
![step-077[22] step-077[22]](https://cdn.photoshoptutorials.ws/images/stories/4f403d312465_1519/step-07722.jpg?strip=all&lossy=1&quality=70&webp=70&avif=70&w=1920&ssl=1)
Step 78
Add layer mask for the current shadows layer. Mask the shadows using soft round Brush tool with 15% opacity, see image below for guidance. This also ends the 'adding iceberg' part in this tutorial.
![step-078[22] step-078[22]](https://cdn.photoshoptutorials.ws/images/stories/4f403d312465_1519/step-07822.jpg?strip=all&lossy=1&quality=70&webp=70&avif=70&w=1920&ssl=1)
Step 79
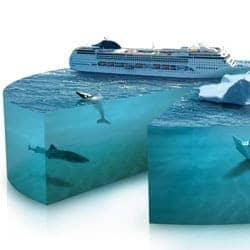
With the same technique when you submerge half of iceberg2, add another submerge object. For example, I'm sinking the cruise (you can use anything, be creative!). Don't forget to group related layers, keep organized!


14 comments on “"Piece of the Arctic” Pie Chart Photo Manipulation”
awesome work...congrats
Learning so much with this tutorial. Thanks...
thanks, loved him!
hi,
i couldnt find 3d tool in photoshop cs6.. please help
Great Work... Thank you Dear For sharing us this tutorial. :)
It's spelled arctic with a C. Get it right people.
nice work ty C:
A really big thanks for the tips
Was a nice tut until step10...
brilliant
A lot to learn.. great work dude..
excellent
Thank you so much for this, it was really helpful.
Wow Amazing....