Make your artwork look like they're from an alternate universe. These Cyberpunk presets work with Photoshop (via the Camera Raw filter) and Lightroom. Download all 788 presets for 90% off.
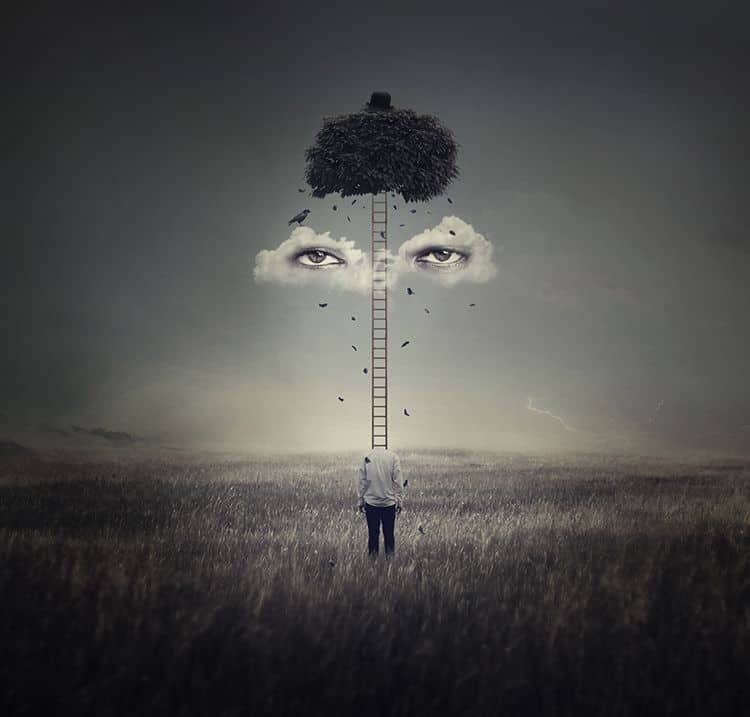
In this tutorial, I'll show you how to create a surreal piece featuring a man with a head of ladder. First, we'll build the base scene using a field and sky images. After that, we'll add the man, ladder, tree, and hat and blend them together using adjustment layers, masking, and brushes. Later, we'll import the cloud, eyes, crow and falling leaves using the same techniques. We'll use several adjustment layers to complete the final result.
Preview of the Final Result
Tutorial Resources
Step 1
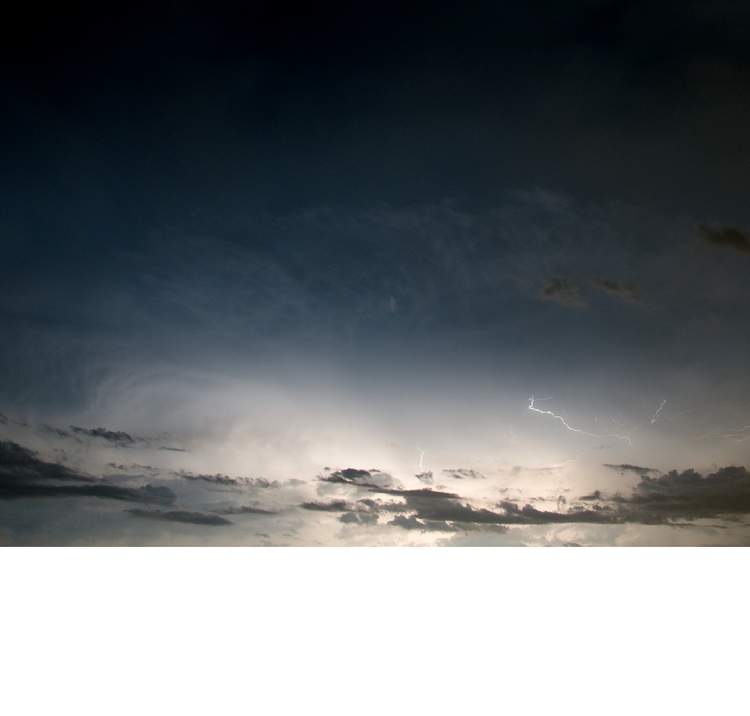
Create a new 1500x1434 px document in Photoshop and fill it with white. Open the sky image and drag it into the white canvas using the Move Tool (V). Use the Free Transform Tool (Ctrl+T) to resize it to fit the main document and place it in the upper half.
Step 1
Go to Layer > New Adjustment Layer > Curves and set it as Clipping Mask. Increase the light and hazy much to make the sky look very dreamy as shown below:
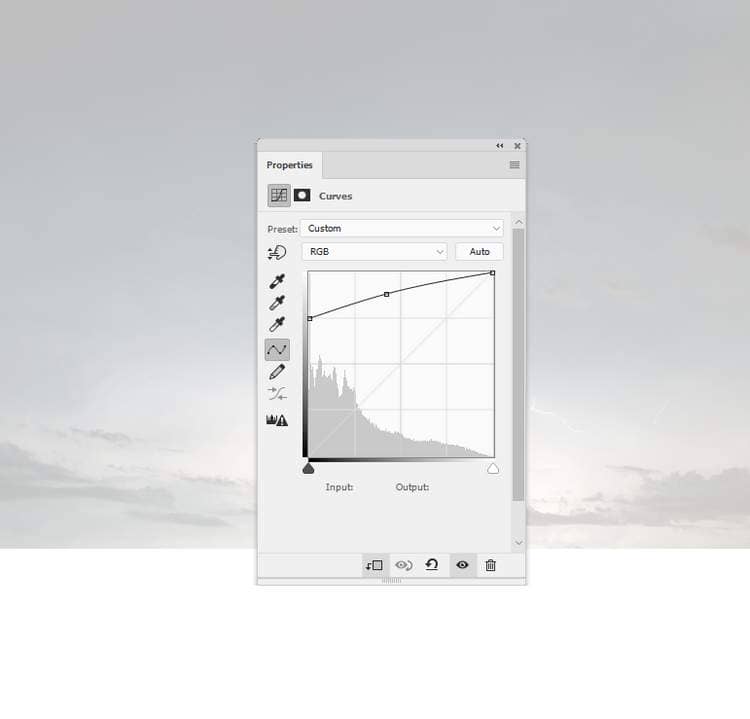
On the Curves layer mask, activate the Brush Tool (B) and select a soft round one with black color. Lower the opacity of this brush to about 5% to reduce the effect on the both sides of the sky.

Step 3
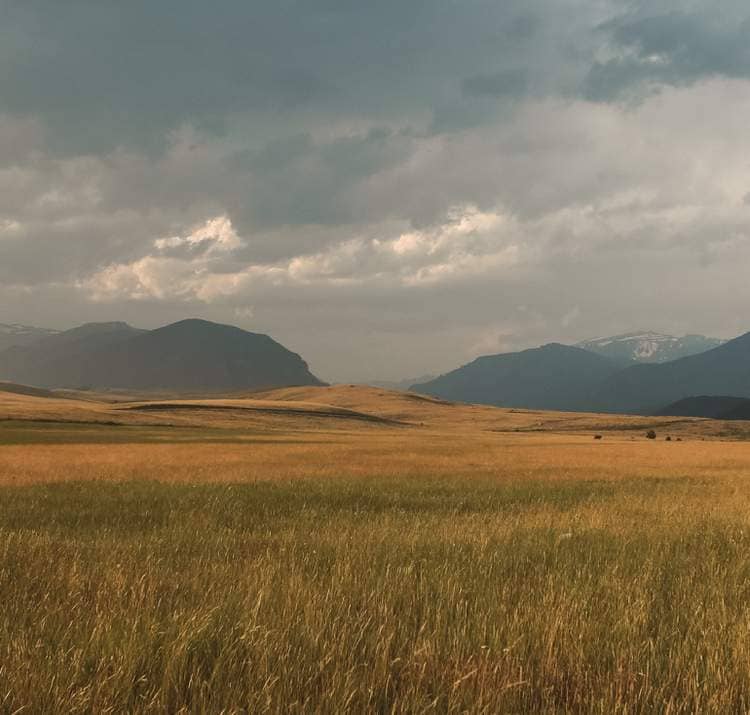
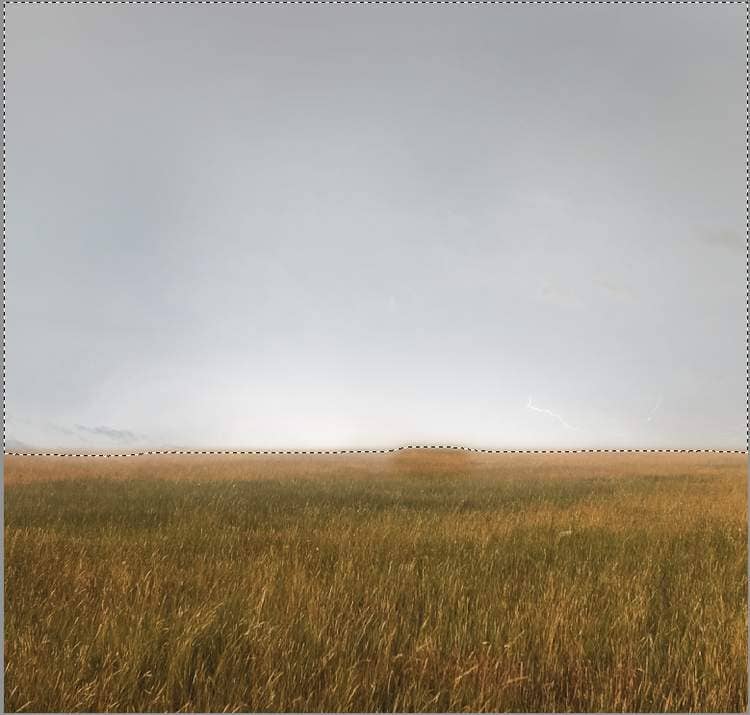
Open the field image and place it into our main canvas. Click the second icon at the bottom of the Layers panel to add a mask to this layer. Use a soft black brush to remove the upper of the field including the background and the sky. Make the edge soft and smooth to make the horizon blended better with the sky. Convert this layer to a Smart Object.
Step 4
There is an unwanted detail on the right of the field. To fix it , make a new layer above the field one and set it as Clipping Mask. Activate the Clone Tool (S) and use this tool to remove the indicated detail.

Step 5
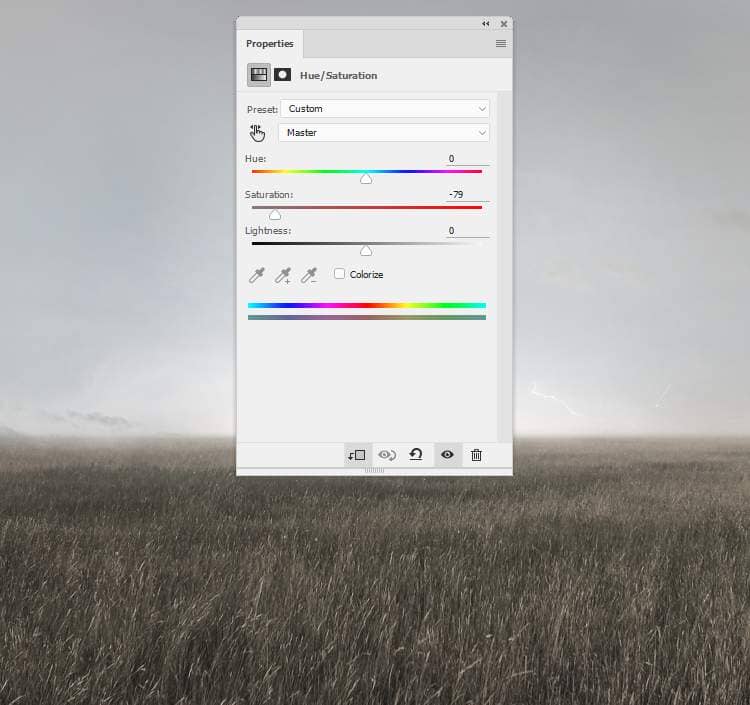
Create a Hue/Saturation adjustment layer and bring the Saturation values down to -79:
Step 6
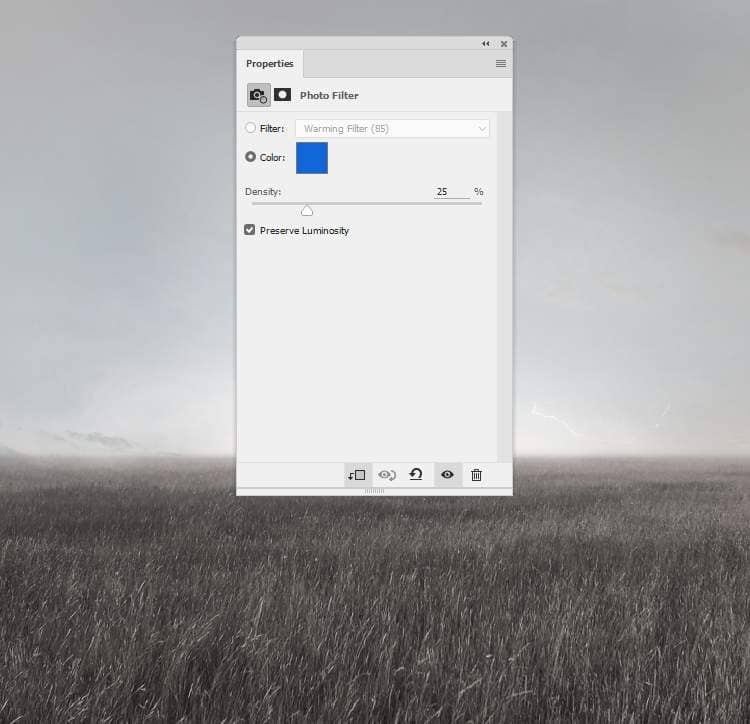
Make a Photo Filter adjustment layer and pick the color #0665da to match the field's color with the background.
Step 7
Add a Curves adjustment layer and increase the lightness. On the layer mask, use a soft black brush with the opacity about 5-10% to reduce the lightness on some areas on the field or any details you feel to bright.
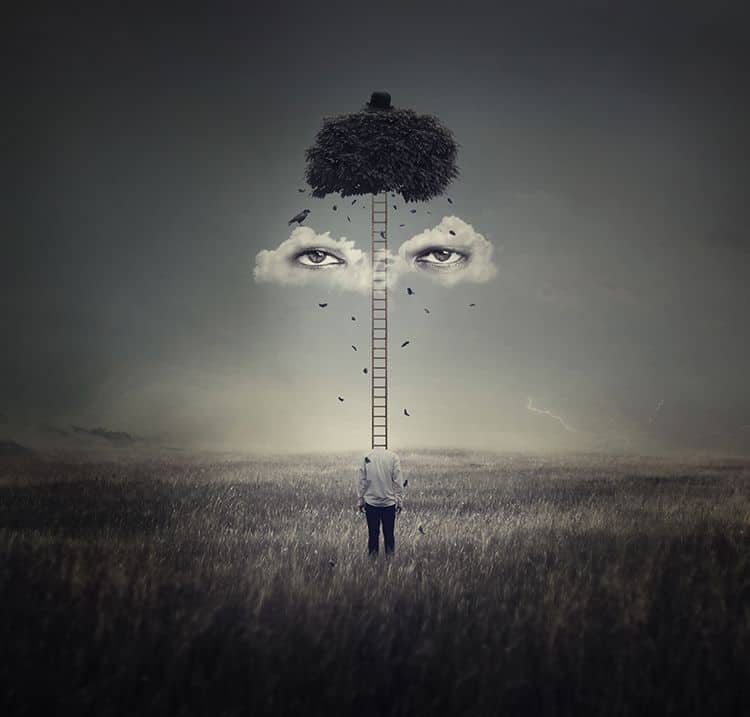
Create another Curves adjustment layer to brighten the midground. On the layer mask, use a soft black brush to paint on the background and foreground to reduce the light there.

Step 8
On the field layer, go to Filter > Blur > Gaussian Blur and set the radius to 4 px. On the filter mask, use a soft black brush to erase the background and midground, leaving the blur effect visible on the foreground only. This step is to increase the depth of the scene.


Step 9
Cut out the man without his head from the background and add him to the middle of the ground. Add a mask to this layer and use a hard black brush to remove the shirt's neck and blend the legs into the grass blades.


Step 10
Isolate the ladder using the Magic Wand Tool (W) and place it above the man's head. Set this layer below the man's one.

Duplicate this layer several times and make them stacked up as the screenshot below shows:

Add a mask to each of the ladder layers and use a small soft black brush to blend the top of the lower ladders with the bottom of the upper ones.

Step 11
On each of the ladder layers (except the top one), make a new layer, change the mode to Overlay 100% and fill with 50% gray:

Select the Dodge and Burn Tool (O) with Midtones Range, Exposure about 10-15% to lighten the bold details and strengthen the light details. You can see how I did it with Normal mode and the result with Overlay mode:

Step 12
Select all of the ladder layers and hit Ctrl+G to make a group for them. Change the group's mode to Normal 100% and add a Hue/Saturation adjustment layer to desaturate the ladder. Reduce the Saturation values to -59:

Step 13
Open the tree image and use the Lasso Tool (L) to take the leaves part only and place it on the top of the ladder.

Step 14
Create a Hue/Saturation adjustment layer and bring the Saturation values down to -86:

Step 15
Make a Color Balance adjustment layer to change the tree's color a bit. Alter the Midtones settings:

Step 16
Add a Curves adjustment layer to increase the light on the top of the tree and decrease its contrast. On this layer mask, use a soft black brush to reduce the light on the right of the tree.

Step 17
Create a new layer, change the mode to Overlay 100% and fill with 50% gray . Use the Burn Tool to reduce the highlight on some of the leaves.

Step 18
Isolate the hat from the white background and place on the top of the tree. Use Ctrl+T to resize it to be much smaller and rotate it a little.

Step 19
Make a Curves adjustment layer to brighten the top of the hat. On the layer mask, use a soft black brush to erase its bottom to keep it lightness.

Step 20
Come back to the man layer. Create a Curves adjustment layer to brighten the man and on its layer mask, paint on the hidden part of his back to so it's won't be or less be affected by this adjustment layer .

Step 21
Make a new layer on top of the layers and change the brushes to the cloud ones. Select a cloud brush, number 1252, the color #f3f0f0 to paint on middle of the ladder, below the tree.

Add a mask to this layer and a medium-soft black brush to remove the extra part on the right and the middle of the cloud.

Step 22
Create a Curves adjustment layer to brighten the left part of the cloud as it's darker than the right a bit. On this layer mask, paint on the right so it won't be brightened by this adjustment layer.

Step 23
Make a new layer, change the mode to Overlay 100% and fill with 50% gray. Use the Dodge and Burn Tool to paint more details on the clouds so it appears less flat.

Step 24
Open the eyes image and use the Lasso Tool to select two eyes and drag them into the main document using the Move Tool. Place them on the middle of the both sides of the cloud.

Step 25
Add a mask to each of the eye layers and use a soft black brush to remove the hard edges and blend the eyes with the cloud.

Step 26
On the eye layer which is on the left, make a new layer, change, change the mode to Soft Light 100% and fill with 50% gray. Use the Dodge Tool to brighten the top corner of this eye.

Step 27
Make a group for the eye layers and change the group's mode to Normal 100%. Add a Color Balance adjustment layer to alter the eyes' color to be warmer.

Step 28
Create a Curves adjustment layer to brighten the eyes as they look darker than the background now.

Step 29
Cut out the crow and add him to the top middle of the left of the cloud. Use Ctrl+T to resize him to be much smaller.

Step 30
Create a Curves adjustment layer to brighten the crow. On the layer mask, paint on the legs so they won't become too bright.

Make another Curves adjustment layer to reduce the contrast on the crow to make him blended better with the dreamy background.

Step 31
Isolate the red leaves from the background and take different leaves to add to the main document. Arrange them around the bottom of the tree to make them fall down from the tree to the ground. Use Ctrl+T with the Warp mode to tweak the leaves so they appear different. Resize them to be much smaller to fit the size of the leaves on the tree.


Step 32
Create a group for the leaves and change the group's mode to Normal 100%. Add a Hue/Saturation adjustment layer to desaturate the leaves.

Step 33
Make a Color Balance adjustment layer and change the Midtones values:

Step 34
Add a Curves adjustment layer to increase the light for the leaves. On the layer mask, paint on some of the leaves so they won't become too bright.

Step 35
Create a Gradient Map adjustment layer on top of the layers and pick the color #c598a1 and #114755. Lower the opacity of this layer to 20%.

Step 36
Make a Color Balance adjustment layer and alter the Midtones and Highlights values :


Step 37
Create a Color Fill layers and pick the color #00010e. Change this layer mode to Exclusion 100%.

Step 38
Add a Color Lookup adjustment layer and select FoggyNight.3DL. Lower the opacity of this adjustment layer to 50%.

Step 39
Make a Curves adjustment layer to increase the contrast of the whole scene.

Step 40
Create another Curves adjustment layer to darken the both sides of the whole scene to focus on the middle section. On the layer mask, paint on the middle section to reveal the lightness there.

Step 41
Create a new layer below the hat one and use a small soft brush with the color #030303, the opacity about 20% to paint shadow of the hat on the tree (I totally forgot it! :D).

Final Result

3 comments on “How to Create a Surreal Artwork of Head with Photoshop”
yessssssss
Fabulous and thanks for sharing.
Thank you, ma'm!!