“The Controller” - Create this Floating Superhero Scene with Sci-Fi Lighting Effects in Photoshop

“The Controller” - Create this Floating Superhero Scene with Sci-Fi Lighting Effects in Photoshop

Create this awesome sci-fi photo manipulation in Photoshop! You will learn how to combine stock photos and apply sci-fi lighting effects to create this artwork. This tutorial is recommended for intermediate-expert Photoshop users.

Preview of Final Results
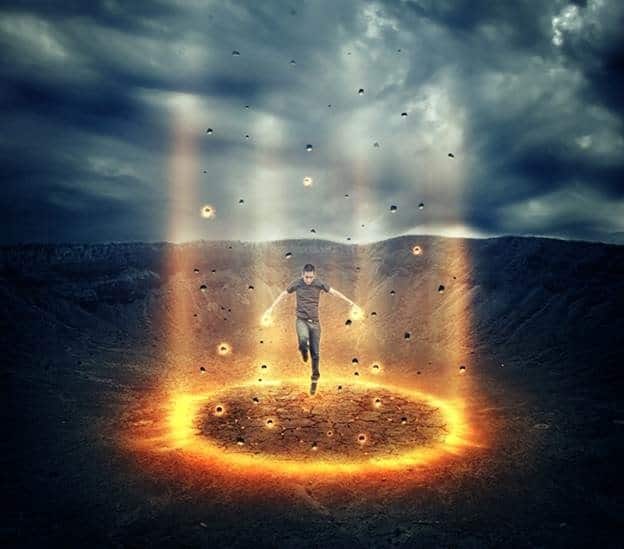
clip_image004

Tutorial Resources


Step 1

Create a new document and fill it with white. You can choose the size you want but in this tutorial I choose the width larger than the height.

Open background stock. Press C to active Crop Tool and make selection of background as shown below:
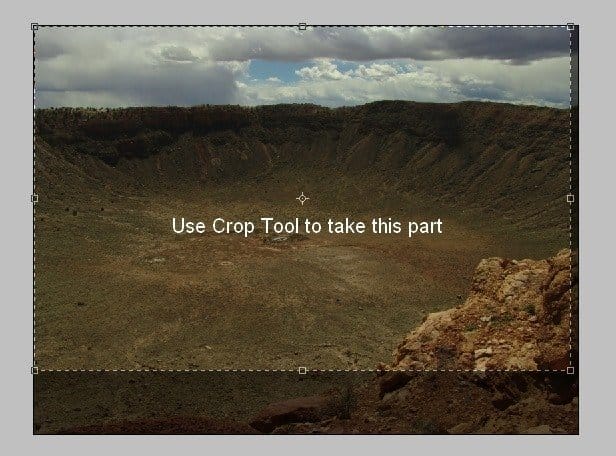
clip_image005

Right click this selection, choose Crop to complete this action:

clip_image006

Use Move Tool ( V) to drag it into white canvas, remember to resize to fit the background:
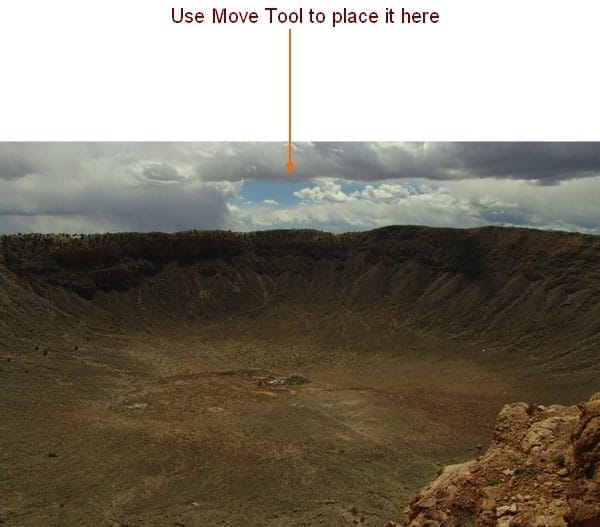
clip_image007

Name it as "land".

I want to remove the pile on the right side so on land layer, use Polygonal Lasso Tool ( hit L to active it) to make a selection on the left side with feather = 20:

clip_image008

Right click this selection, choose Layer via Copy and we have it on a new layer. Go to Edit-Transform-Flip Horizontal then move it to right side to hide the pile:
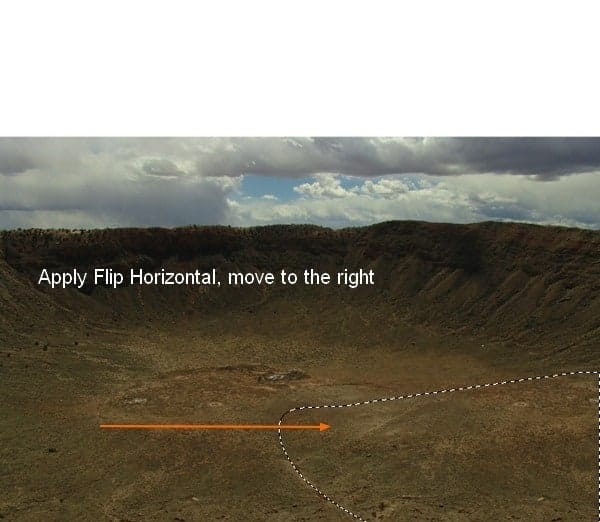
clip_image009

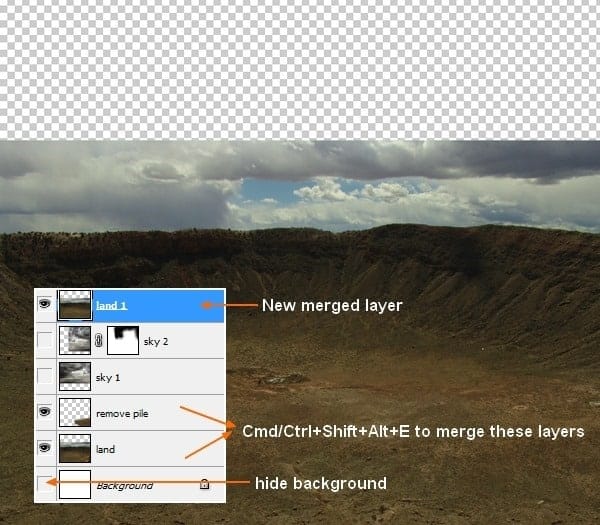
Hide background layer ( white canvas) then press Cmd/Ctrl+Shift+Alt+E) to merge all visible layers ( "land" and "remove pile" layers). Call the new layer as "land 1" or whatever you want.

clip_image010

Step 2

Open sky stock. You can use another image if you can't download this sky from Photoxpress but a dark one with dramatic look is a good choice.

Use Retangular Marquee Tool to make a selection for the part you want and set feather as 20 ( depends on the size of your picture):

clip_image012

Use Move Tool to drag it into our document, downsize and place this layer under "land 1" layer but above "land" and "remove pile" one. Name it as "sky 1":

clip_image013

On land 1 layer, add layer mask and use soft black brush to remove sky part of land:

clip_image014

Duplicate sky 1 layer, apply Flip Horizontal for it then move it to the right like the image below shows:
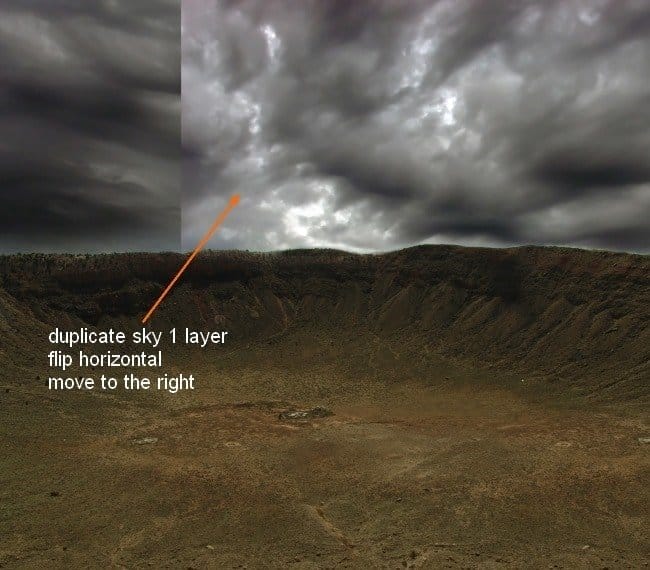
clip_image015

Name it "sky 2". Add layer mask to remove some parts to make this sky blend better with background:

clip_image016

Step 3

To make color of the land fit sky, I use a new adjustment layer for land 1 layer with Clipping Mask. On land 1 layer, go to Layer-New adjustment layer-Hue/Saturation:

clip_image018
clip_image019

Step 4

In this step I do a bit retouch for background. Create a new layer on the top. Use soft brush with color #373939 and paint on some parts of sky. I vary opacity of brush as shown below:

clip_image020

Change the mode to Multipy 80%:

clip_image021

Make a new layer ( Cmd/Ctrl+Shift+N) and I use brush with color #9f9e99. Painting on the left side of sky and some parts of background to brighten them. Set the mode of this layer to Soft light 100%:

clip_image022
clip_image023
clip_image024

To darken another parts of sky I use brush and color #373939. On a new layer, use this brush and paint on sky center. Put the mode as Multipy 50%:

clip_image025

Step 5

Open explosion stock. Use Move Tool to drag it into our canvas. Press Cmd/Ctrl+T to scale it down and transform it as shown below:

clip_image027

Change the mode to Screen 100% and add layer mask for this layer. Use soft black brush to remove the rough edges and the part within this explosion:

clip_image028

Name this layer as "burning circle".


Step 6

I use a layer with Clipping Mask to brighten this circle. Take soft brush with color #fda25c. Painting around this circle and change the mode to Hard Light 100%:

clip_image029
clip_image031

Step 7

On circle layer, use Lasso Tool to make a selection on the left side of it. Press Cmd/Ctrl+C to copy it. Make a new layer on the top. Press Cmd/Ctrl+V to paste copied part into it. Apply Flip Horizontal and move to the right. Use layer mask to remove rough edges:

clip_image033
clip_image035
clip_image037

Step 8

I want to make glowing light for this circle. Create 3 new layers under this circle. On each layer I use brush with color #fda25c painting on different parts outside it and put the mode to Soft light and Overlay with different opacities.

clip_image038
clip_image039
clip_image040

Step 9

In this step we will make the light coming up from circle. Duplicate this circle layer. Move under layer to the top:

clip_image041

Go to Filter-Blur-Motion Blur:

clip_image043

Duplicate this layer and use Move Tool to move two these layers up. Name them as "light 1", "light 2":

clip_image044

You can erase any parts you don't like on layer mask of these light layers.


Step 10

On burning circle layer, use Lasso Tool to make a selection with feather=15 as shown below then copy it ( Cmd/Ctrl+C):

clip_image046

Make a new layer on the top. Press Cmd/Ctrl+V to paste copied part onto this new layer ( as we did in step 7).

clip_image048

Name it as "ground" or whatever you like.

Add layer mask to erase the outside part of this ground to make it look like being inside the circle actually:

clip_image049

Change the mode to Multipy 70%:

clip_image050

Step 11

Open crack stock. Move it, resize and transform as we usually do in previous steps:

clip_image052

Change the mode of this layer to Soft light 100%. Add layer mask to clear rough edges:

clip_image053

Step 12

In this step I want to add some tiny burning effects on the cracked ground. Make a new layer which is set on the top. Take brush with color #fbe29d with very small size ( I use 2-3 px) and paint inside cracked parts. Set the mode to Overlay 100%:

clip_image054
clip_image055

You may not see a very obvious change after this step but don't worry. We will make it look more visible right now.

Name this layer "burning effect". On this layer, press Cmd/Ctrl+G to make group for it. Change the mode of this layer from Pass Through ( default mode for group) to Color Dodge 100%:

clip_image057

You can see a big change after this step:

clip_image058

Right click burning effect layer, choose Blending options:

clip_image059

And result:

clip_image060

Rename this group as "burning effect".


Step 13

Open man stock. Extract him with method you're familiar with, resize and place him into our main document:

clip_image061

To change color of the man I use a Hue/Saturation layer with Clipping Mask:

clip_image062

Step 14

To add glowing effect for the man, make a new layer on the top. On man layer, hold Cmd/Ctrl while clicking man thumbnail layer to load its selection:

clip_image063

Set feather for it as 1. Go to Edit-Stroke and use color #fceaa4:

clip_image065

Change the mode to Overlay 50%:

clip_image066

Name it as "glowing stroke 1".


Step 15

Create a new layer, and use brush with color #ef8d0e. Press F5 to make settings for this brush:

clip_image068

Paint carefully along the bottom of man's legs:

clip_image070
clip_image072

To make this effect more visible, right click this layer, choose Blending options:

clip_image073
clip_image075

Name it as "glowing stroke 2".


Step 16

Make a new layer and use soft brush with color #fbcb9c. Increase the size of brush to paint on model as the screenshot below shows:

clip_image077

Change the mode to Overlay 100%:

clip_image079

Call it "glowing light".


Step 17

Duplicate burning circle layer then delete its layer mask of under layer( right click layer mask, choose Delete Layer Mask). Move under one above the top. Name it "light 3"

clip_image080

Apply Motion Blur with same settings in step 9:

clip_image082

Move this light up :

clip_image084

Add layer mask and use soft brush with opacity and flow 30% to blur light effect on some parts:

clip_image085

Duplicate this layer and move it down. Name it "light 4". Use layer mask with brush 100% opacity to clear its top:

clip_image086

Step 18

Open rock stock pack, you can choose the one you like. I choose this one:

clip_image088

Go to Edit-Define Brush Preset and name it whatever you like:

clip_image090

Come back to our main document. Create a new layer and position it on the top. Choose brush tool and find the new brush we've just created. Set foreground color to black.

clip_image092

Press F5 to change settings for rock brush:

clip_image094

Paint inside the lights:

clip_image095

Step 19

Duplicate this layer and we have:

clip_image096

Add layer mask for each rock brush blur the top of them as the top get less light then the rest so less visible:

clip_image097

To make these small rocks get 3D effect, add layer style for them. Right click each rock layer, choose Blending options:

clip_image098

Choose Direction as Down because these rocks get light from underground.

clip_image099

Step 20

Open fireball image. Move it into our document, resize it as shown below:

clip_image101

Move it onto a rock and change the mode to Screen 100%. Add layer mask to erase around it:

clip_image103
clip_image105

Duplicate this layer:

clip_image107

Choose two these layers, hit Cmd/Ctrl+G to make group for them. Name this group as "fireball 1". Right click this group, choose Duplicate Group. Right click duplicated group, choose Merge Group. We have this merged group as a normal layer and remember to change the mode of it to Screen 100% :

clip_image108

Duplicate it many times and place it onto the rocks randomly. Also place them onto man's hands. Remember to resize them to fit the size of the rocks. I use 23 layers for this effect and call them from "fireball 1" to "fireball 23", make group for them to be easier to manage:

clip_image109

Step 21

To change the focus of this picture, I use Gradient effect. Make a new layer on the top. Hit G to active Gradient Tool. Choose Radial Gradient Tool with default color ( black and white). Drag a line from center to bottom:

clip_image110

Change the mode to Soft light 100%. Add layer mask to remove contrasted part on the top left and blur around burning circle:

clip_image111

Step 22

To make the lights of picture brighter and more visible, I use Dodge Tool. To do it in non-destructive way, make a new layer, set to Overlay 100% and fill with 50% gray:

clip_image113

Take Dodge Tool with Highlights Range and Exposure from 20 to 80% to brighten the lights, burning effect. Vary brush size and Exposure, and you can see how I applied this tool on the pic with Normal mode ( there are some parts that are brighter - bigger Exposure and another less:)

clip_image114

Overlay mode:

clip_image115

Step 23

To change color of picture, I use some adjustment layers. Go to Layer-New adjustment layer-Gradient Map:

clip_image117

Set this Gradient Map layer to Soft light 100%.

Selective Color:

clip_image119

Layer-New Fill Layer-Solid Color:

clip_image121

Put this Color Fill layer to Color 20%.

clip_image122

Step 24

To make picture get more contrasted, especially the light, I use a Levels layer. Go to Layer-New adjustment layers-Levels:

clip_image124
clip_image125

Step 25

In final step, I use Gradient again. Make a new layer and take Radiant Gradient as we did in step 21. Change the mode of this layer to Soft light 80%:

clip_image126

Add layer mask and use brush with opacity and flow 100% to erase the man and about 30-40% to blur some parts as shown below:

clip_image127

Final Results

clip_image128

Tutorial by Jenny Le

clip_image130Thank you for reading this tutorial. I hope you found some useful techniques in it . You can ask me anything about this tutorial or contact me via my website. Enjoy photoshopping!

- Jenny

Luminar: AI Photo Editing
Sponsored

Luminar AI lets you turn your ideas into reality with powerful, intelligent AI. Download the photo editor and see how you can completely transform your photos in a few clicks.

22 comments on ““The Controller” - Create this Floating Superhero Scene with Sci-Fi Lighting Effects in Photoshop”

  1. Thanks four your tutorial, and I wish I can make it. But something is lost, I can't find the background and crack.

  2. Wow amazing technique . I didn't understand how to create firing motion blur effect .......... can you explain it .........??

  3. Hi, I am a Sahebrao photo manipulator though I tend to focus more on a “pin-up” style of work. Great to see some I like, so I want more vedio tutorials. thanks!

  4. Hi, I am a superhero photo manipulator though I tend to focus more on a "pin-up" style of work. Great to see some quality tutorials in the field!

  5. Dearest Sir............Wonderful work done. Thanks for uploading,i hope u will be  carry on yrs work. for us .........
                                        Thanks a lot.....
                                         Learner .....   Jehan zeb Khan .....( PAK )

  6. @FazilZuhaib Thanks, buddy! I'm so busy with web work right now, but I promise I'll have some new exciting web and PS stuff soon! :)

Leave a Reply

Your email address will not be published. Required fields are marked *

cross