Step 19
Add Adjustment Layer “Color Lookup” 3DLUT Filet select “Bleach Bypass”

Step 20
Add Adjustment Layer “Selective Color”

Step 21
Add Adjustment Layer “Levels”

Step 22
Add Adjustment Layer “Brightness/Contrast”

Step 23
Add Adjustment Layer “Gradient Map” Blend mode change from Normal to Color Dodge.

Step 24
Add Adjustment Layer “Gradient Map” Blend mod change to Soft Light with Opacity 50%

Step 25
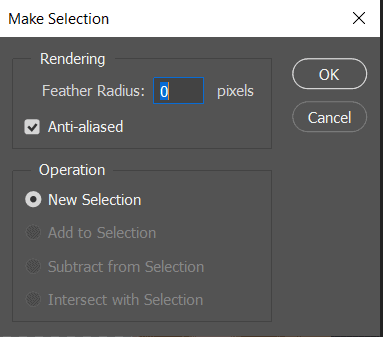
Now, go to File > Open and select Skeleton. Then use a Pen Tool(P) and start selecting. When we finish the selection press right click on mouse and “Make Selection” then create layer mask..The simplest path you can draw with the standard Pen tool is a straight line, made by clicking the Pen tool to create two anchor points. By continuing to click, you create a path made of straight line segments connected by corner points.
- Select the Pen tool.
- Position the Pen tool where you want the straight segment to begin, and click to define the first anchor point (do not drag).
- Click again where you want the segment to end
- Continue clicking to set anchor points for additional straight segments.
- The last anchor point you add always appears as a solid square, indicating that it is selected. Previously defined anchor points become hollow, and deselected, as you add more anchor points
- Complete the path by doing one of the following:
- To close the path, position the Pen tool over the first (hollow) anchor point. A small circle appears next to the Pen tool pointer
 when it is positioned correctly. Click or drag to close the path.
 - To leave the path open, Ctrl-click (Windows) or Command-click (Mac OS) anywhere away from all objects. To leave the path open, you can also select a different tool.


Feather Radius set to 0px and check Anti-alliased. After the selection area has been created, simply copy (Ctrl / Cmd + C) and Paste (Ctrl / Cmd + V) it to our work canvas below underwater layers. Then position the image with the transform tool (Ctrl / Cmd + T). Hold Alt + Shift and resterize like image below. In Photoshop CC only hold Alt to resterize al sides together.

Step 26
Now, create more lights. Create a new layer and go to Edit > Fill and Contenst: 50% Gray and press Ok.

Now use Brush Tool(B) Soft Round with foreground color white and Brush Opacity set to 10-20%. Then start painting Witch. Take a look at the example in the picture below how much you need to paint, where there is the most white color, draw the most.

Blend mode change to Overlay.
Step 27
Next we will openFishes. After you open the image, use Lasso Tool(L) and start selecting fish. After the selection area has been created, simply copy (Ctrl / Cmd + C) and Paste (Ctrl / Cmd + V) it to our work canvas. Then position the image with the transform tool (Ctrl / Cmd + T). Hold Alt + Shift and resterize like image below. In Photoshop CC only hold Alt to resterize al sides together.


Step 28
Add Adjustment Layer “Levels”

Step 29
Add Adjustment Layer “Curves” and press Ctrl/Cmd + I to invert. Then use Brush Tool(B) Soft Round with foreground color white and paint on Highlights parts.
3 responses to “How to Create a Creepy Radioactive Water Scene in Photoshop”
-
big thanks for your tuto
just a problem with link psd
-
Looks like I forgot to upload the PSD. Thanks for letting me know! The download link should be working now.
-
-
just a problem with link psd :)


Leave a Reply