
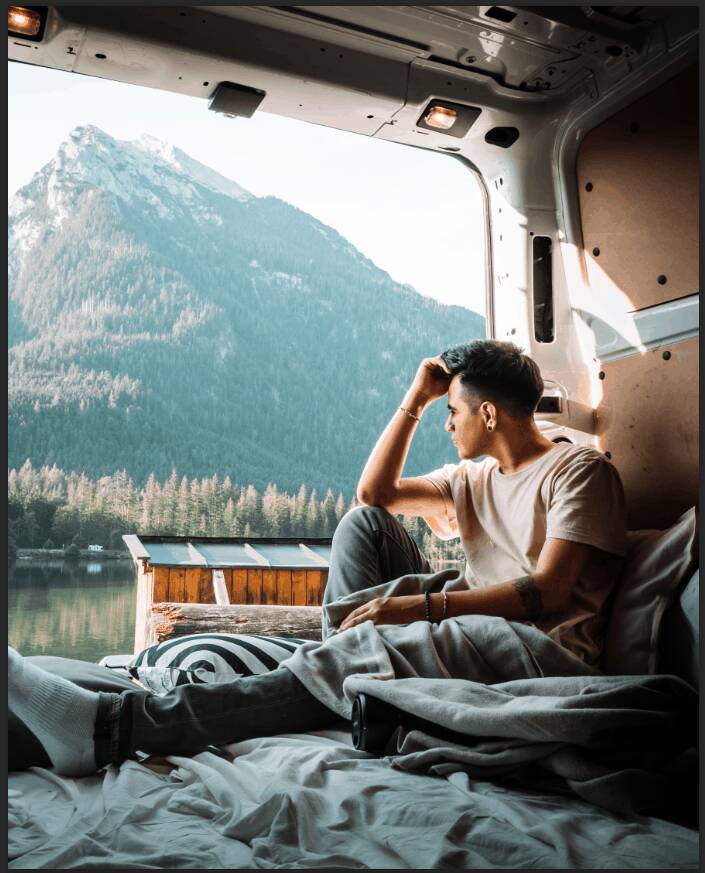
The rocket was beautiful. In conception, it had been shaped by an artist to break a chain that had bound the human race ever since we first gained consciousness of earth’s gravity and all its analogs in suffering, failure, and pain. It was at once a prayer sent heavenward and the answer to that prayer: Bear me away from this awful place. In this Photoshop tutorial, we learn how to create a realistic scene of a rocket launch. First, we added a model and add some adjustment layers, next we add a sky and planet and blended it with Adjustment layers. Finally, add fog and gradient maps. For the last effect, we added a Camera Raw filter.
Preview of Final Image

Tutorial Resources
Step 1
Now, let’s start by creating a new image file, go to the Menu bar and click File > New, and then input the following values on their respective fields
- Preset: Custom
- Width: 3080px
- Height: 3080px
- Resolution: 300
- Color Mode: RGB Color 8-bit
- Background Contents: Transparent

Step 2
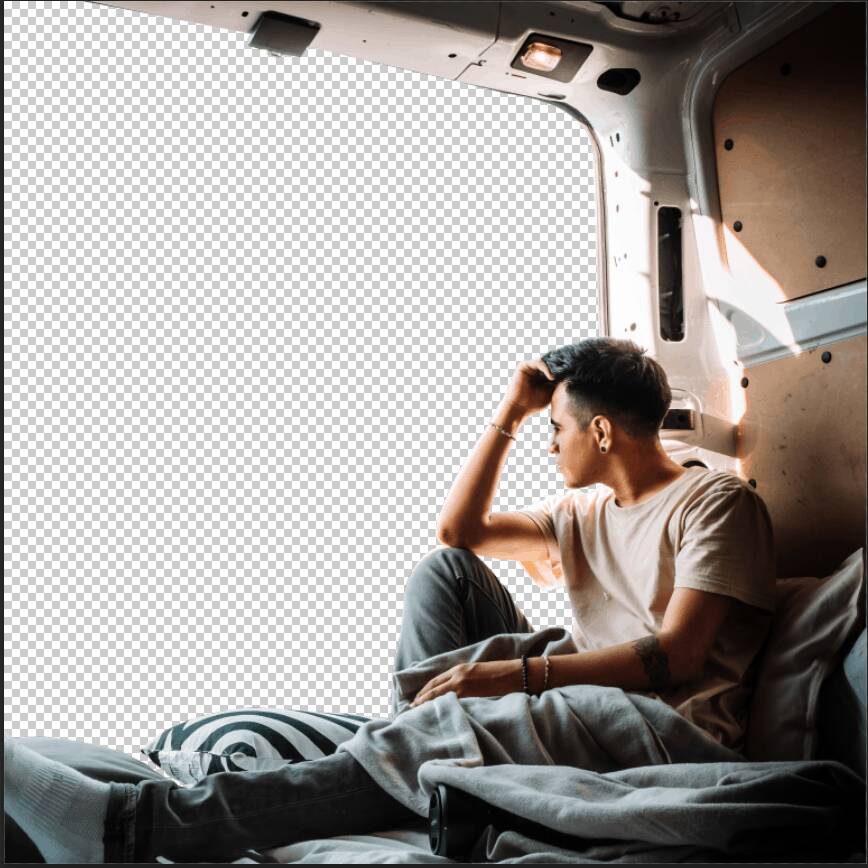
Now, go to File > Open and select Model. Then use a Pen Tool(P) and start selecting. When we finish the selection press right click on mouse and “Make Selection” then create layer mask..The simplest path you can draw with the standard Pen tool is a straight line, made by clicking the Pen tool to create two anchor points. By continuing to click, you create a path made of straight line segments connected by corner points.
- Select the Pen tool.
- Position the Pen tool where you want the straight segment to begin, and click to define the first anchor point (do not drag).
- Click again where you want the segment to end
- Continue clicking to set anchor points for additional straight segments.
- The last anchor point you add always appears as a solid square, indicating that it is selected. Previously defined anchor points become hollow, and deselected, as you add more anchor points
- Complete the path by doing one of the following:
- To close the path, position the Pen tool over the first (hollow) anchor point. A small circle appears next to the Pen tool pointer
 when it is positioned correctly. Click or drag to close the path.
 - To leave the path open, Ctrl-click (Windows) or Command-click (Mac OS) anywhere away from all objects. To leave the path open, you can also select a different tool.


Feather Radius set to 0px and check Anti-alliased. After the selection area has been created, simply copy (Ctrl / Cmd + C) and Paste (Ctrl / Cmd + V) it to our work canvas. Then position the image with the transform tool (Ctrl / Cmd + T). Hold Alt + Shift and resterize like image below. In Photoshop CC only hold Alt to resterize al sides together.
Step 3
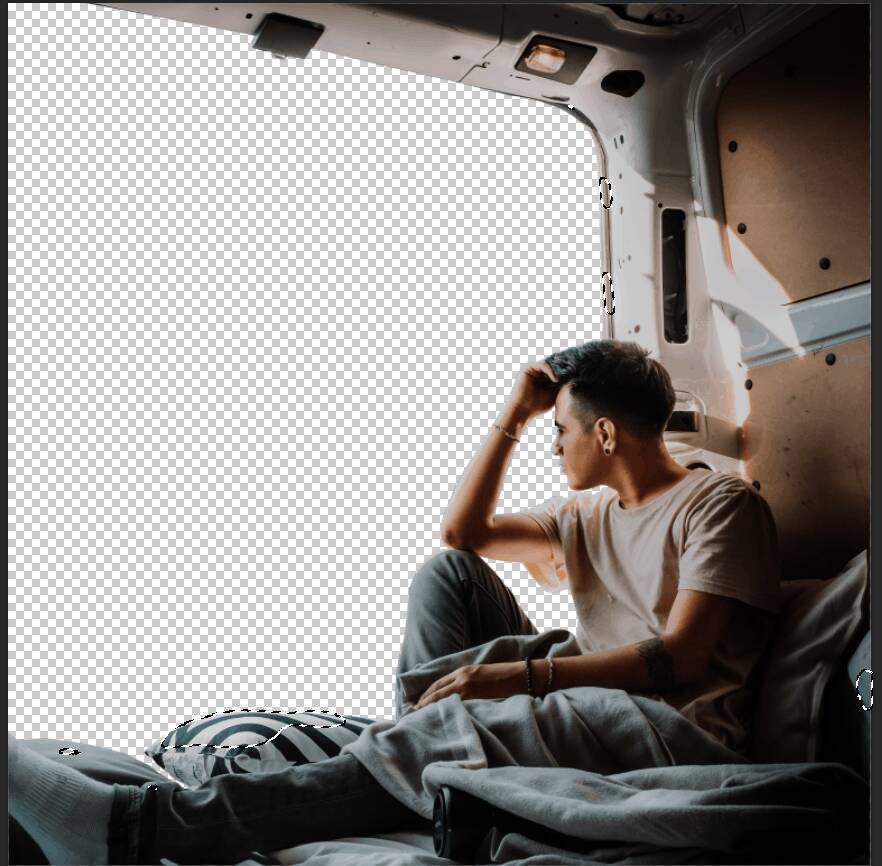
Add Adjustment Layer ” Levels”

Step 4
Add Adjustment Layer “Curves” and press Ctrl/Cmd + I to invert. Then use Brush Tool(B) Soft Round with foreground color white and paint on Highlight parts.
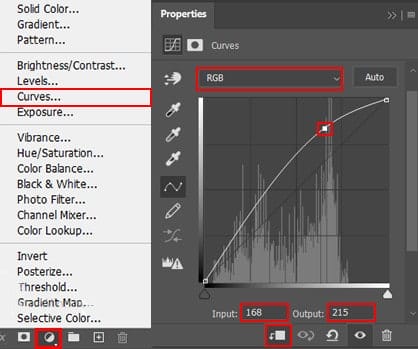
Step 5
Add Adjustment Layer “Curves” and press Ctrl/Cmd + I to invert. Then use Brush Tool(B) Soft Round with foreground color white and paint on Dark parts.


Step 6
Add Adjustment Layer “Color Balance”

Step 7
Now go to File > Place and select Sky photo. Then place it below first layer “Model”, position the image with the transform tool (Ctrl / Cmd + T). Hold Alt + Shift and rasterize like the image below. In Photoshop CC only hold Alt to rasterize all sides together.
6 responses to “How to Create a Realistic scene of Rocket Launch in Photoshop”
-

Hi! I have a question. With every tutorial I do, my color histograms are way different from te ones in the tutorial. This happens right from the start.. It makes it nearly impossible to follow the tutorial the right way…
Any tips?
-
great
-
just problem with your psd link :)
-
Great tuto, just a probllem with the psd link :)
-
..very good, just problem with psd link :)
-
My bad – it’s been fixed now!
-
Leave a Reply to fabienCancel reply