Luminar AI lets you turn your ideas into reality with powerful, intelligent AI. Download the photo editor and see how you can completely transform your photos in a few clicks.


Step 10
Select your all vector shapes, right click on one of it and go to Merge Shapes.
Click on the Layer Thumbnail Icon that stands for this vector shape and change the color to #F6F6F6.


Step 11
Open the Layer Style window for the vector shape that makes up your horinzontal key and enter the settings mentioned in the next images.


Step 12
Duplicate your horizontal key for 3 times using the Control + J keyboard shortcut and place the key copies as you can see in the first image.
To create a vertical key, simply select a key, hit Control + T and rotate it 90 degress.
If you want to change the key order, simply focus on your Layers panel, select your key and use the Control + [or Control + ] buttons from your keyboard shortcuts, as you can see in the second image.


Step 13
Open the Layer Style window for your vertical keys, go to Satin section and replace the existing settings with the ones shown below.


Step 14
Focus on the Layers panel, select all your keys and hit Control + G to group them.
Open the Layer Style window for this group and enter the settings mentioned in the next image.


Step 15
Change the foreground color to #00FFEA, select the Rounded Rectangle Tool, set the Radius to 6px from the top bar and create a 25 x 80px.
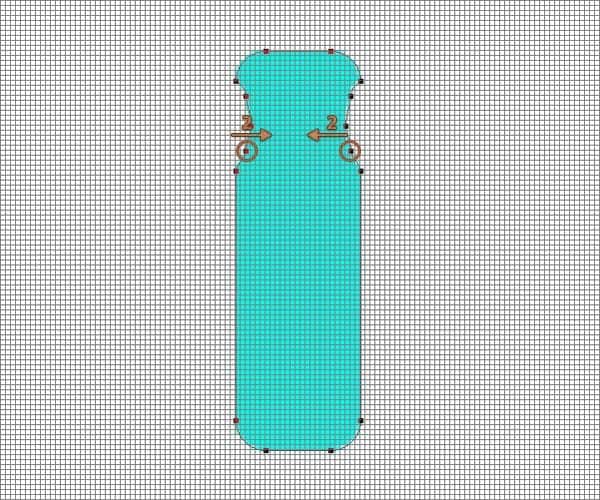
Pick the Add Anchor Point Tool, focus on the blue vector shape and add new anchor points as you can see in the second image.

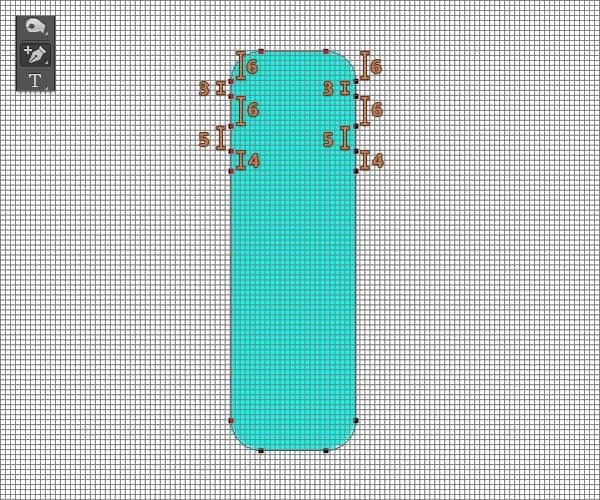
Step 16
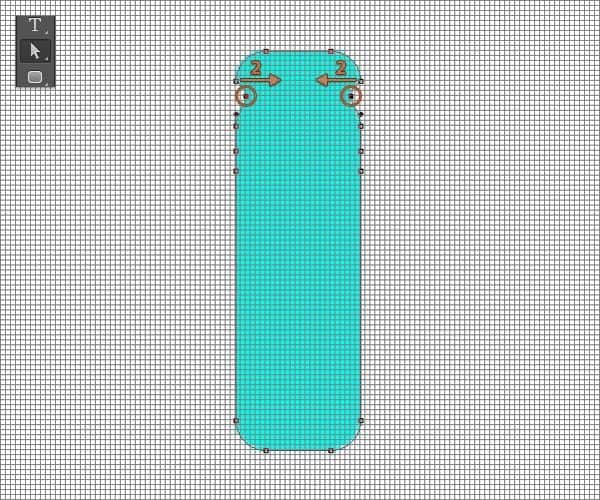
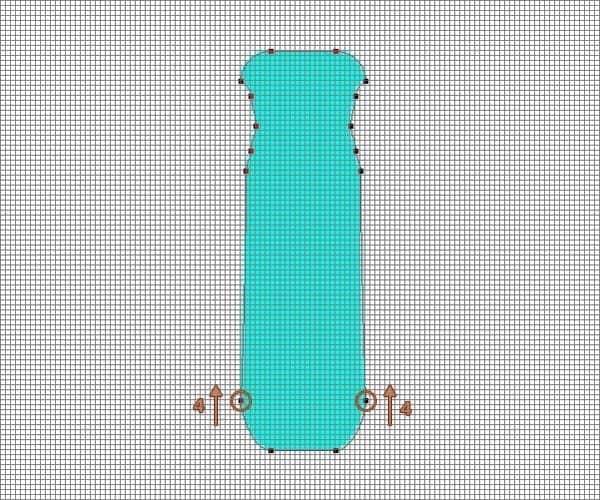
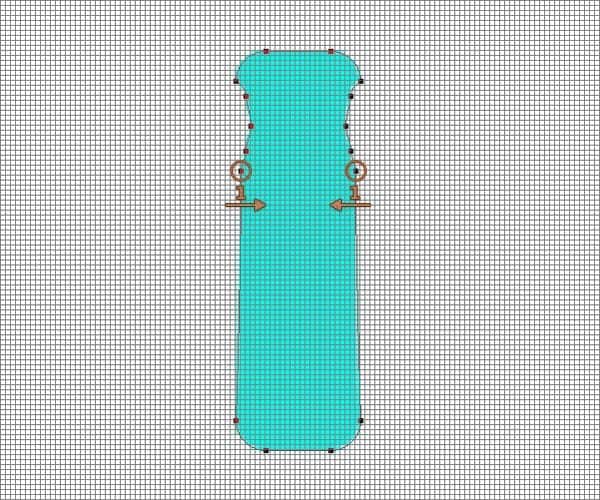
Pick the Direct Selection Tool, select the highlighted anchor points one by one and drag them as you can see below.

Step 17
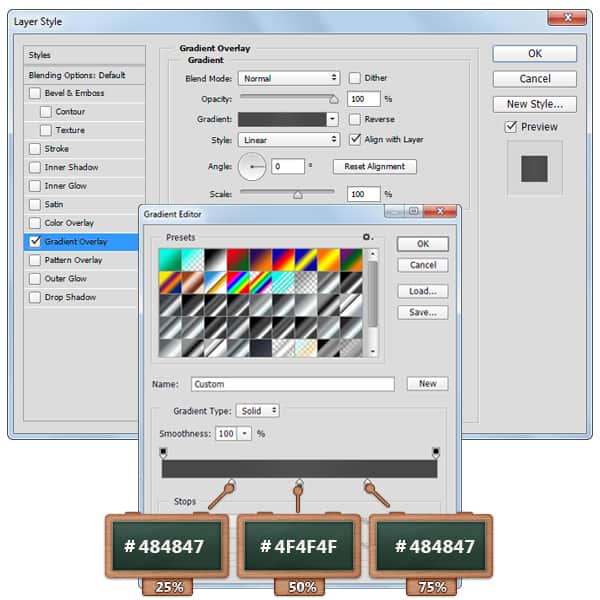
Open the Layer Style window for the blue vector shape and enter the settings mentioned below.

Step 18
Focus on the Layers panel, make sure that the blue vector shape is still selected and then duplicate it.
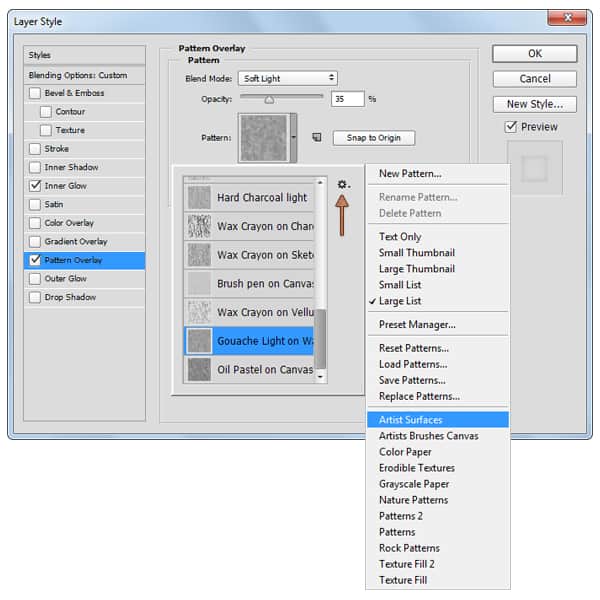
Right click on this fresh copy, go to Clear Layer Style and then lower the Fill to 0%.
Open the Layer Style window for this copy and enter the settings mentioned in the next images.


Step 19
Set the foreground color to #4C4C4C and pick the Ellipse Tool. Move to your canvas, create two, 6 x 34pxvector shapes and place them as you can see in the first image.
Pick the Direct Selection Tool, select the highlighted anchor points and drag them 15px up using the up arrow button from your keyboard as you can see in the second image.


One comment on “Create a Tools Text Effect in Photoshop”
nice nice