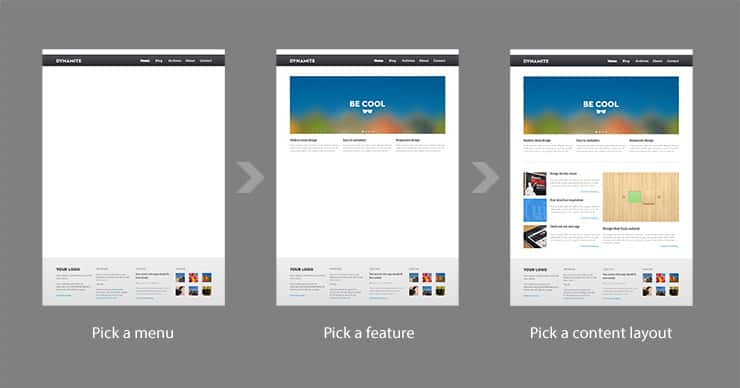
You start off by choosing whether you’d like to create a template with the menu on the top or on the left. Once that is selected, WebZap will present you with 14 header or 9 sidebar navigation styles to choose from. Next, you choose the feature area. Finally, you complete it with a content layout to show in the fold. In 3 simple steps, you’ve created yourself a homepage layout.
Editing the Layout
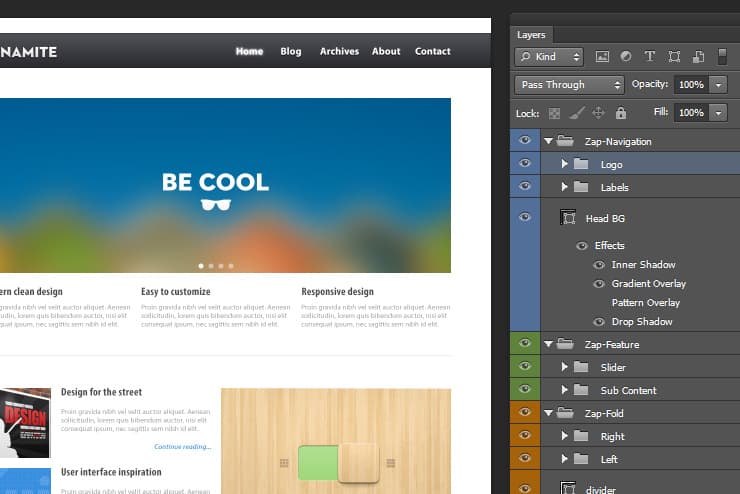
WebZap comes with a good number of premade layouts/styles and it doesn’t stop there. The layouts are organized into layer groups with vector shape and text layers. This means you can easily edit text and alter shapes (ex. backgrounds, buttons, etc.) nondestructively. One caveat is that if you rename the layer groups, WebZap will not update the content when you select a new style. This is because WebZap relies on the layer group names for identification. Instead, you will get a new layer group with the new content.
Adding UI Elements
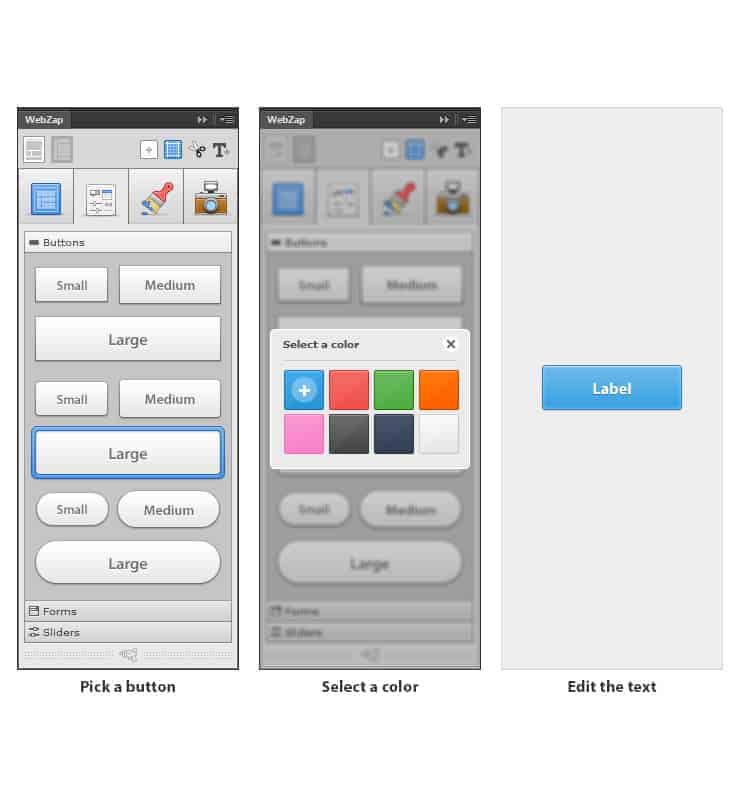
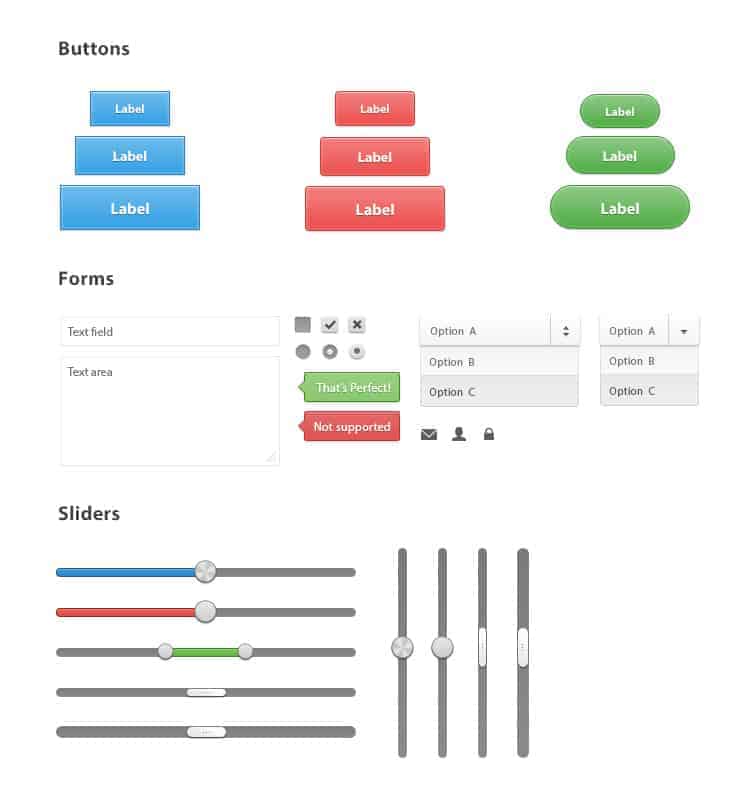
Asides from creating quick web layouts, WebZap also lets you create quick buttons, forms elements, and sliders. There are the 3 common button shapes, 15 form elements, and 5 slider styles. Adding them is as easy as clicking. To edit them, you need to know how to edit layer styles and vector paths. Some UI elements let you customize the colors while others don’t.
[vc_gallery type=”nivo” interval=”10″ onclick=”link_no” img_size=”full” images=”4734,4735″ custom_links_target=”_self” width=”1/1″ el_position=”first last”] [vc_separator width=”1/1″ el_position=”first last”]
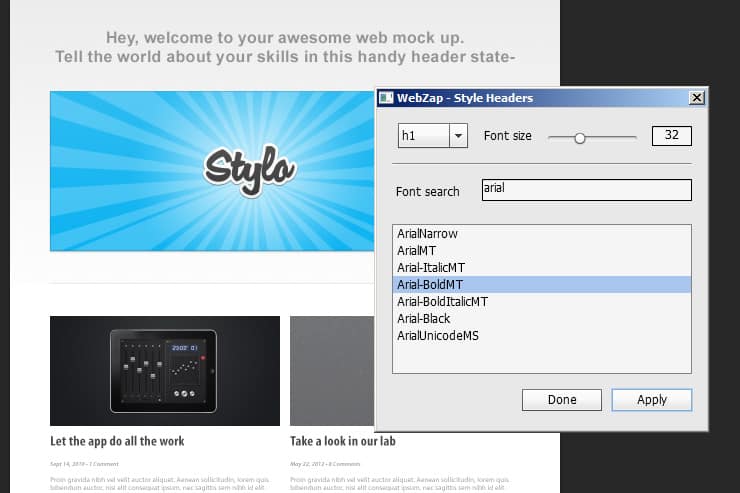
In the styling tab, you can change the style and color for the frame, dividers, and text. They’re all perfect albiet the text styles. This area lets you customize the font styles for the header tags (h1, h2, h3, etc.) and it works great as it is, but we wished they used the new paragraph/character styles feature found in Photoshop CS6.


Creating Mockups
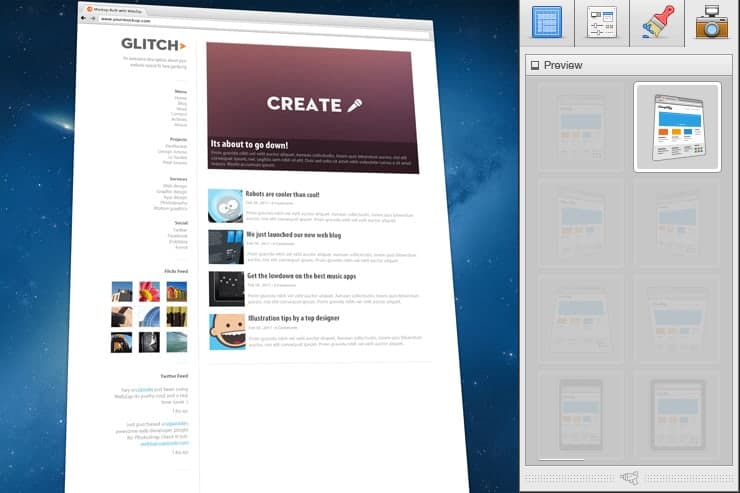
Once you’re happy with your design, you can create mockups of your template in the preview tab. WebZap comes with 8 Apple-centric mockup styles:
- 6 desktop browser mockups in different angles
- 1 smartphone mockup
- 1 tablet mockup


Getting around the flattened mockups
While these are easy to use, we don’t see ourselves using them much. We’re hoping that in future updates, WebZap will come with more customizable mockups. The mockups are a flattened image but it is very easy to get around. Simply undoing a step (Ctrl+Z) will reveal a Smart Object. Double-clicking that Smart Object will reveal the layers.
9 responses to “WebZap Review: Create 960 Grid Layouts in a Zap”
-

wow.. Fantastic steps.. I really like it. keep up :-)
-
Nice review but I disagree that it’s a “must-have”.
I got this but still rather design from scratch using a 960 grid PSD.
-
I agree!
-
-
Can you add a picture as the background?
Like when I put this theme into wordpress will it be fully editable-
I don’t think so. It’s more of a visual template creator, you need to code it to HTML for yourself.
-
-
Is there a free trial?
-
Don’t think there’s a free trial :(
-
Lol it’s 15 bucks, cmon …
-
$15 is $15 man
-
Leave a Reply