
Download Lightroom presets and LUTs, absolutely free. Use the presets to add creativity and style to your photos.
![23[3]](https://cdn.photoshoptutorials.ws/images/stories/cb356ec438c2_14B98/233.jpg?strip=all&lossy=1&quality=70&webp=70&avif=70&w=1920&ssl=1 "23[3]")
Dodge the arch of his boots to create light. Burn the edges of his pants to create shadow.
![23a[3]](https://cdn.photoshoptutorials.ws/images/stories/cb356ec438c2_14B98/23a3.jpg?strip=all&lossy=1&quality=70&webp=70&avif=70&w=1920&ssl=1 "23a[3]")
Step 24 – The Evil Thief
Your second character, the Evil Thief, is completed and should look like this:
![24[3]](https://cdn.photoshoptutorials.ws/images/stories/cb356ec438c2_14B98/243.jpg?strip=all&lossy=1&quality=70&webp=70&avif=70&w=1920&ssl=1 "24[3]")
Step 25 – Starting the third character
Use the Pen tool to trace a path for this last character. Refer to Step 11 if you’re struggling.
![25[3]](https://cdn.photoshoptutorials.ws/images/stories/cb356ec438c2_14B98/253.jpg?strip=all&lossy=1&quality=70&webp=70&avif=70&w=1920&ssl=1 "25[3]")
Step 26 – Drawing the body
Draw the body, including his bandana, guns, belts, and boots. Don’t be afraid to exaggerate the character’s body dimensions.
![26[3]](https://cdn.photoshoptutorials.ws/images/stories/cb356ec438c2_14B98/263.jpg?strip=all&lossy=1&quality=70&webp=70&avif=70&w=1920&ssl=1 "26[3]")
Step 27 – Filling in the character with colors and adding depth
Create a new layer behind the layer with the outline. Fill in the hat with camel brown (#dfae6c). Fill in the sash around the hat and the gun grip with a chocolate brown (#653515). Fill in his face and hands with cream (#f3c196). Fill in his hair and facial hair with dark brown (#593c23). Fill in his lips and gums with dark pink (#d59982). Fill in his bandana with red (#a2070c). Fill in his shirt with light brown (#ce9856). Fill in his pants and belt buckle with purple (#87698d). Fill in his boots with khaki brown (#ce9856). Fill in his spurs, belt, and gun holder with brick brown (#5e2605). Fill in the metal part of the grip with gray (#89847b). Dodge and Burn parts of the body you think would be exposed to light and shadows.
![27[3]](https://cdn.photoshoptutorials.ws/images/stories/cb356ec438c2_14B98/273.jpg?strip=all&lossy=1&quality=70&webp=70&avif=70&w=1920&ssl=1 "27[3]")
Step 28 – The Fat Thief
Your third character, the Fat Thief, is completed and should look like this:
![28[3]](https://cdn.photoshoptutorials.ws/images/stories/cb356ec438c2_14B98/283.jpg?strip=all&lossy=1&quality=70&webp=70&avif=70&w=1920&ssl=1 "28[3]")
Step 29 – Adding Characters to the Setting
Drag each character onto the image you created in Steps 1-9.
![29[3]](https://cdn.photoshoptutorials.ws/images/stories/cb356ec438c2_14B98/293.jpg?strip=all&lossy=1&quality=70&webp=70&avif=70&w=1920&ssl=1 "29[3]")
Step 30 – Add shadows
Select the characters and create shadows for them.
![30[3]](https://cdn.photoshoptutorials.ws/images/stories/cb356ec438c2_14B98/303.jpg?strip=all&lossy=1&quality=70&webp=70&avif=70&w=1920&ssl=1 "30[3]")
Step 31 – Create buttons
Select the Rectangular Marquee tool and create 3 rectangles. Fill the rectangles with white and set the Opacity to approximately 20%.
![31[3]](https://cdn.photoshoptutorials.ws/images/stories/cb356ec438c2_14B98/313.jpg?strip=all&lossy=1&quality=70&webp=70&avif=70&w=1920&ssl=1 "31[3]")
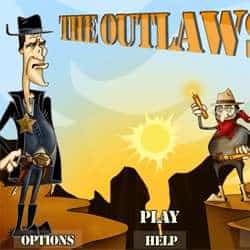
Step 32 – Label the buttons
Use the Text tool and write on the buttons. In this example, I used: Play, Options, Help, and Scores. Add borders to the text by changing the Layer Style to the following settings:
- Check “Stroke”
- Size: 3
- Position: Outside
- Blend Mode: Normal
- Opacity: 100
- Fill Type: Color
- Color: black
![32[3]](https://cdn.photoshoptutorials.ws/images/stories/cb356ec438c2_14B98/323.jpg?strip=all&lossy=1&quality=70&webp=70&avif=70&w=1920&ssl=1 "32[3]")
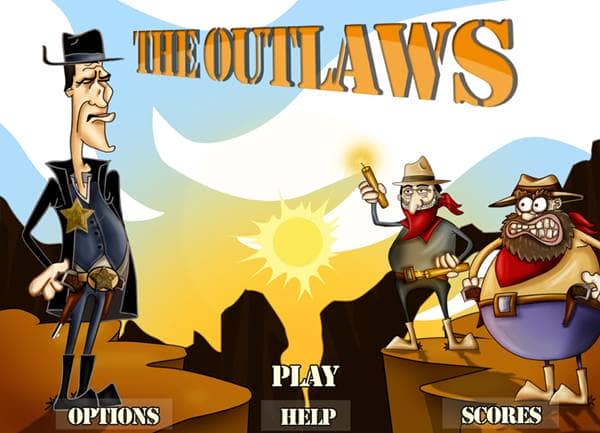
Step 33 – Color adjustment
Adjust the color (Adjustment Layers > Levels) with the following settings:
- Channel: RGB
- Input Levels: 10, 1,00, 245
- Output Levels: 0, 255
![33[3]](https://cdn.photoshoptutorials.ws/images/stories/cb356ec438c2_14B98/333.jpg?strip=all&lossy=1&quality=70&webp=70&avif=70&w=1920&ssl=1 "33[3]")
Final Results
One comment on “Create a Flash Game Mockup in Photoshop: “The Outlaws””
what a great tutorial.. all the concept is clear.. great job