
Step 39 – Layer Styles.
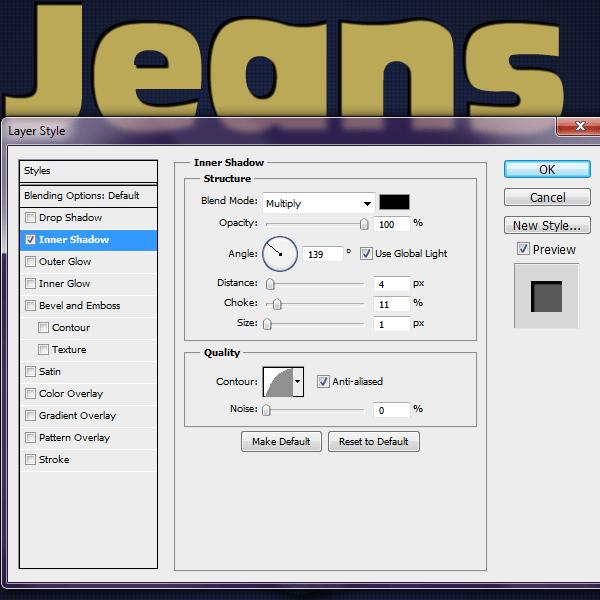
Add these layer styles to each of the layers. Once you have applied the layer styles to one of the layers then you can just ‘copy and paste’ the layer styles onto the other letters. First up, Inner Shadow
Bevel and Emboss

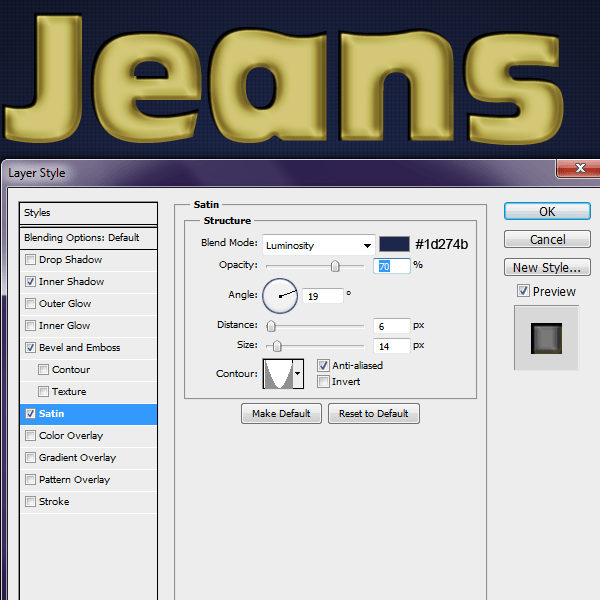
Satin
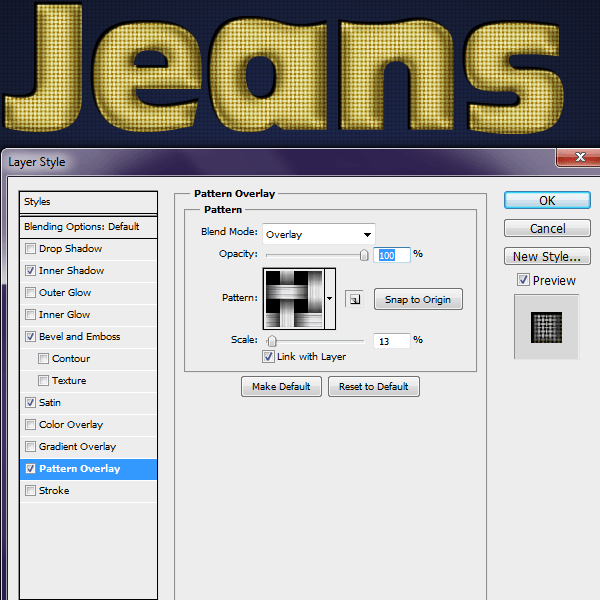
Pattern Overlay
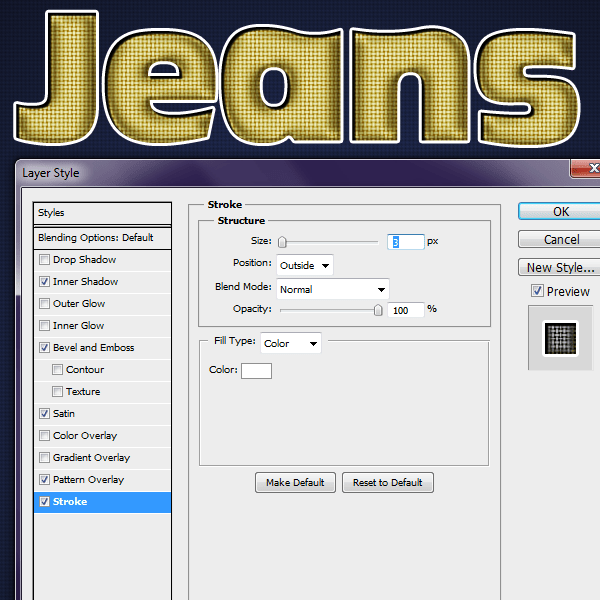
Stroke
Step 40 – Dot Pattern
While your text layer is selected go to Select > load Selection. Then Select > Modify > Contract 6px

Step 41 – Dots
While the selection is still active create a new layer, name it ‘Dots’. On this Dot layer go to Edit > Stroke

Step 42
Create a layer mask on this ‘Dot’ layer and erase parts of the stroke away so that it looks like stitching. I used a 8px Hard round brush. Then change this layer to ‘Hard Light’

Step 43 – Placement
Rasterize all of your text layers. Then resize your text layers (Right Click on text layer > Rasterize) and arrange them like the image below Edit > Free Transform. Note: Don’t forget to Merge the dot layers onto the text layer and place the text layers beneath the ‘Flap’ layer
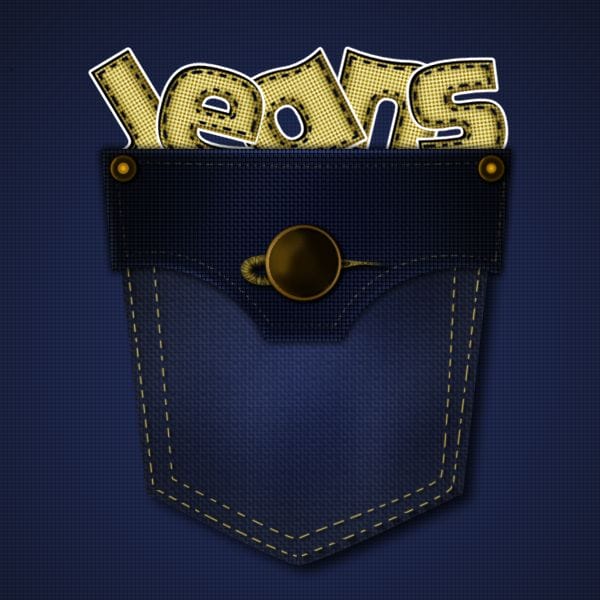
Step 44 – Text Drop Shadow
Lets add a Drop shadow to the text.
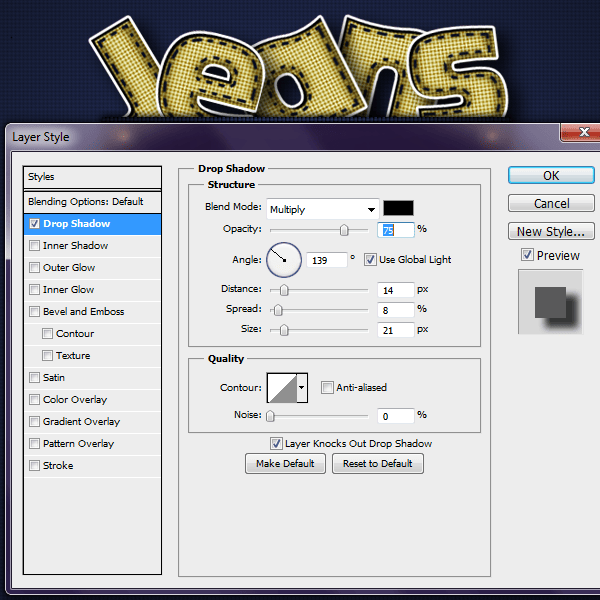
Step 45 – Enhance Shadow
Ok now we will enhance the shadow a bit more. Duplicate all of your text layers (take off the drop shadow by clicking the ‘eye’) and merge them together and change the Color Overlay to Black #000000. Next ‘Convert to Smart object’,then ‘Rasterize’

Step 46 – Blur Shadow
Filter > Blur > Gaussian Blur
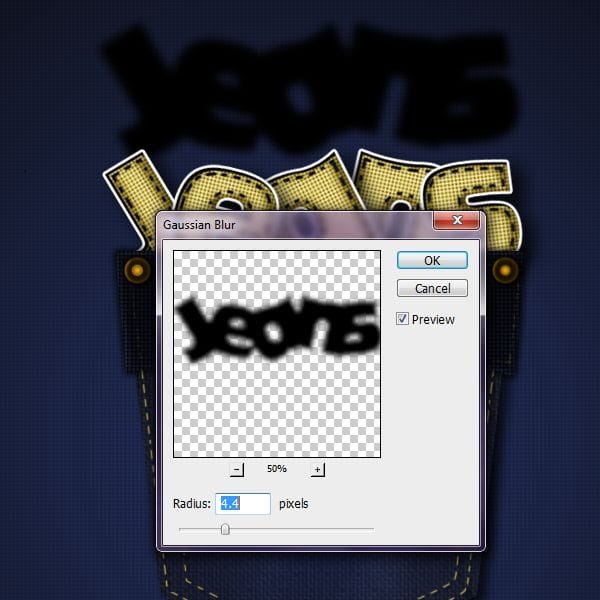
Step 47
Change this layer to Soft Light with an Opacity of 50%. Move the shadow behind your “Jean” text.

Step 48 – Jean Detail
Finished with the text! Now we will go back and add some highlights to the ‘Pocket.’ Create a new layer and name it ‘Pocket Highlights’ just make sure that it is above the ‘Pocket’ layer. Create a selection like the one below from the ‘Pocket Layer’. In the next step we will create a stroke.

Step 49 – Stroke
While the selection is active. Go to Edit >Stroke> #ffffff
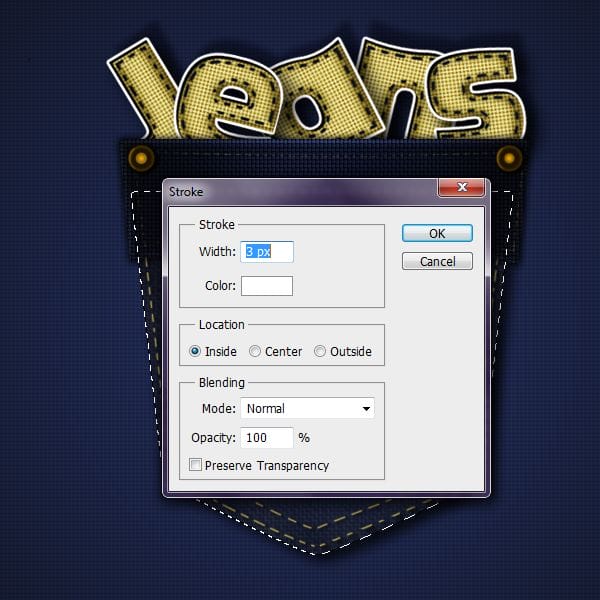
Change this layer to Soft Light

Step 50 – Detail Stitching
One last detail and then we will de done! Like the pocket stitching, create a line like the image below in a new layer

Right click path and select Stroke Path(make sure your Paint Brush is set to 2px hard round brush #bba958)

Step 51 – Repeat
Erase away sections so that it looks like stitching. Repeat these steps to create the second line also.


Leave a Reply