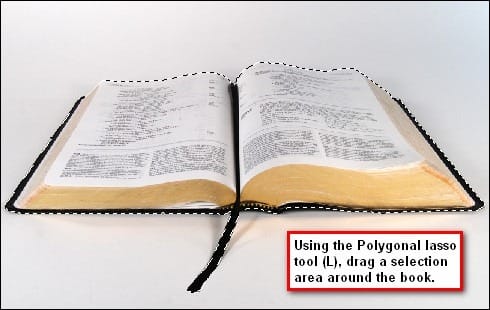
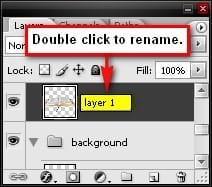
Now we’re ready to remove the book from its background. Activate the Move tool (V) and drag the selected image to our canvas and then rename the book’s layer to book. To rename a layer, simply click on the words “layer 1” (etc) and the text box would appear and you may now rename it.
Activate the Transform tool (Ctrl/Cmd + T) because we would need to resize the image. See further instructions on the image below:

Now, let’s proceed to making the book’s shadow. Let’s create a new layer (Ctrl/Cmd + Shift + N) and name this layer book shadow. Make sure that this layer is under the book’s layer.
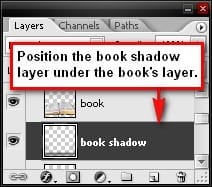
Activate the Brush tool (B), set the foreground color to Black and then use the following brush settings:
- Brush size: 1300 px
- Hardness: 0%
- Opacity: 15%
- Flow: 100%
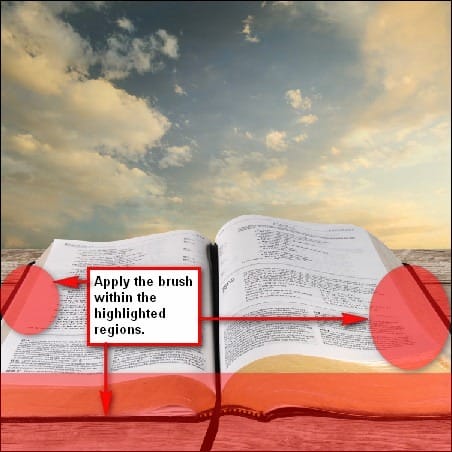
Before we begin, click on the book shadow layer to make sure that you are going to brush in the shadow on the right layer. Now, it’s time to apply the brush. See image below:

To add the shadow’s intensity, we will be utilizing the Burn tool (O) on the book to darken the part where little light is hitting it.
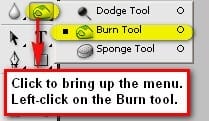
Activate the Burn tool (O) and input the followings settings:
- Brush size: 400 px
- Range: Midtones
- Exposure: 25%


Now, we will darken the book to further increase the way it blends with the image. To do that, let’s create a new layer (Ctrl/Cmd + Shift + N) and name it darken the book. Let’s put this layer on top of all the layers that we’ve created since our aim is to darken the book itself. To start, activate the Brush tool (B) and then use the following settings:
- Brush size: 300 px
- Hardness: 0%
- Opacity: 15%
- Flow: 100%
Apply the brush on the region shown on the image below:

Now that we’ve finished creating the book and its shadow, we’ll now proceed on to the next step, but before that, let’s group these layers (Ctrl/Cmd + G), let’s rename this group to book.

Step 4 – Add the grass on the book’s open page
In this step we would be adding the grass on the book’s open page and make it appear like the scene in a book came to life. To start, let’s open Grassy Field and then activate the Rectangular Marquee tool (M).
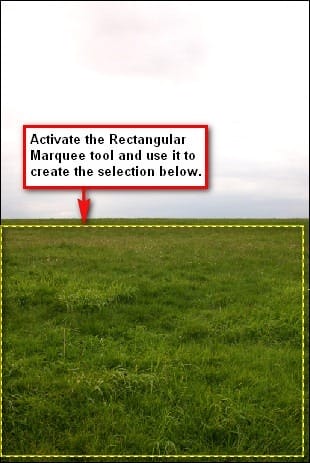
Now drag the selected area using the Move tool (V) on our canvas and rename the image as grass. Activate the Transform tool (Ctrl/Cmd + T) and then resize the grass layer as seen on the image below:
15 responses to “Make a Story Book Come to Life in Photoshop”
-
Thanks a lot! Your tutorial is very useful. Your approach is very helpful to into all the details =) Here is my version http://milanaserk.deviantart.com/art/Once-Upon-a-Time-482135725?ga_submit_new=10%253A1410641999
-
suche a good tutoriel
-
doy!
-
awsome tutorial
-
thank u. very much
-
Please add the links again.. I want to try this!
-
Thank you for posting a tutorial that actually works. Not only that, I learned a few things.
Once again, thank you. -
i am make a book
-
Beautiful tutorial and I want to try but stock links broken?
-
Yes the stock links seem broken. That is the downsides of using free stock photos; they can sometimes disappear without any warning.
-
-
most links of stock were died, who can give me links??
Thx-
Thanks for letting me know! I’ve updated the links including the long road picture. There was one picture that I couldn’t find the link for but it’s just a cloud picture that’s easily found somewhere else.
-
-
Great tutorial! I really love it! I only have one problem… It seems the image of the long road is not available anymore :( Any chance you know where to find it or maybe mail it to me? I can’t find any other good images to use as replacement. Thx
-
used this tutorial for my Lotr fan art http://d24w6bsrhbeh9d.cloudfront.net/photo/6009214_700b.jpg
-
OMG ! , i saw it … it was amazing , a really great masterpiece ^_^ ….. keep up the great work !
-


Leave a Reply