
Trust in dreams, for in them is hidden the gate to eternity. In this Photoshop tutorial, we will learn how to create a Night landscape scene. First, we’ll open a background photo and replace the sky. Next, we’ll add some adjustment layers and place birds, moon, and clouds. Finally, we’ll use the Camera Raw filter for the finishing touch.
Preview of Final Image

Tutorial Resources
Step 1
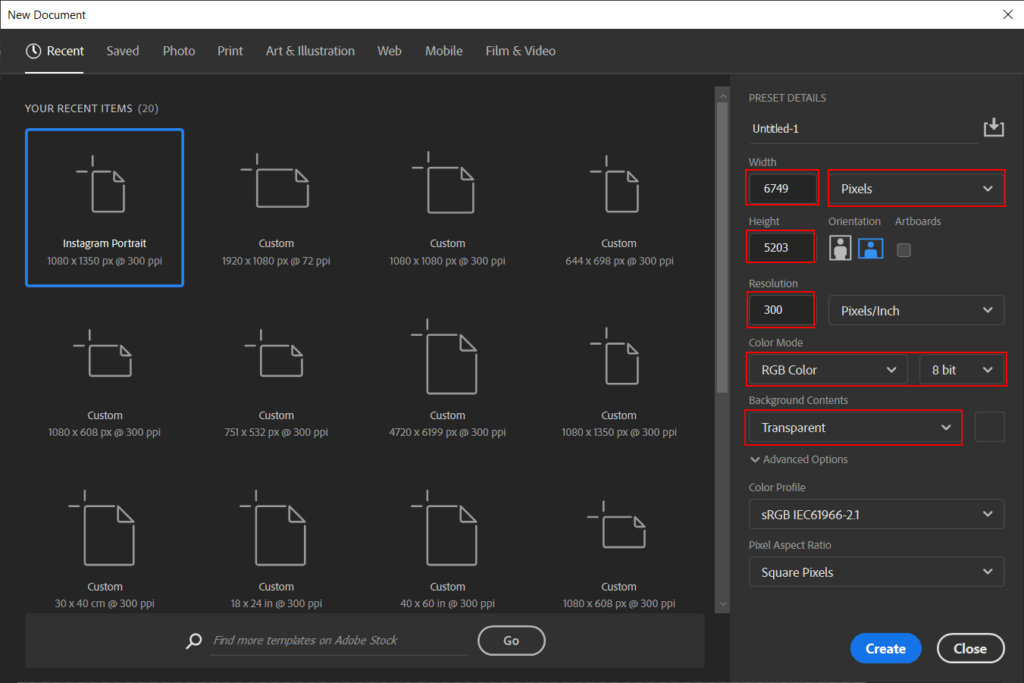
Now, let’s start by creating a new image file, go to the Menu bar and click File > New, and then input the following values on their respective fields
- Preset: Custom
- Width: 6749px
- Height: 5203px
- Resolution: 300px
- Color Mode: RGB Color 8 bit
- Background Contents: Transparent
Step 2
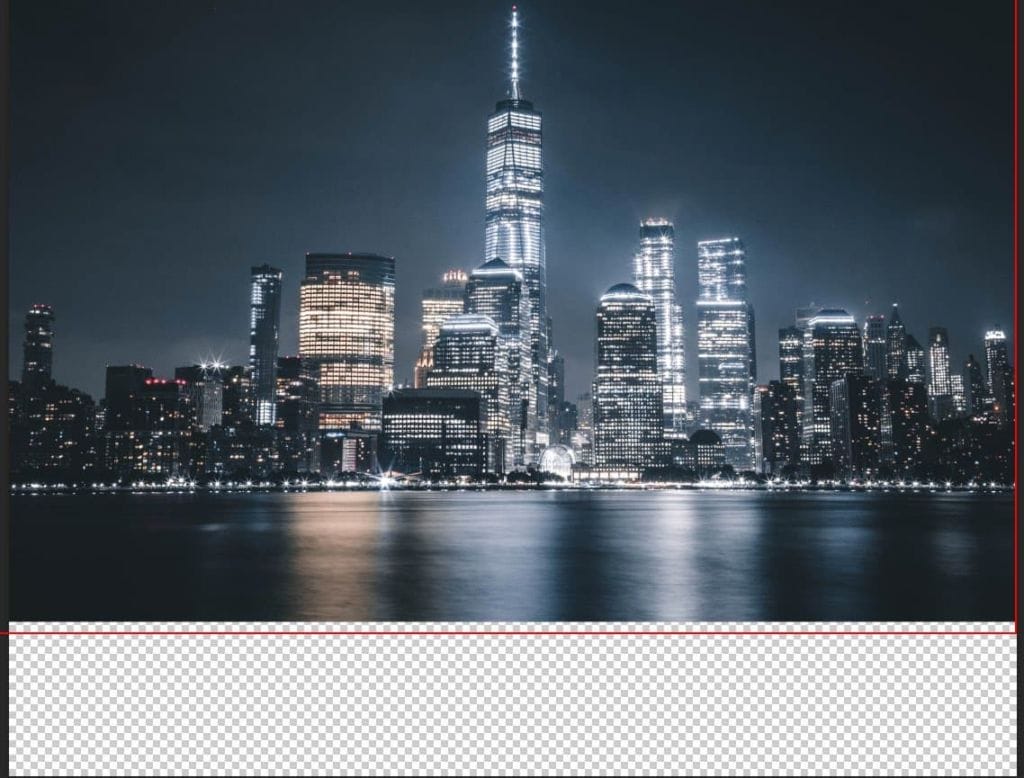
Now, place Background photo Go to File > Place and select City. Then place it to our work canvas. Then position the image with the transform tool (Ctrl / Cmd + T). Hold Alt + Shift and rasterize like the image below. In Photoshop CC only hold Alt to rasterize all sides together.

Step 3
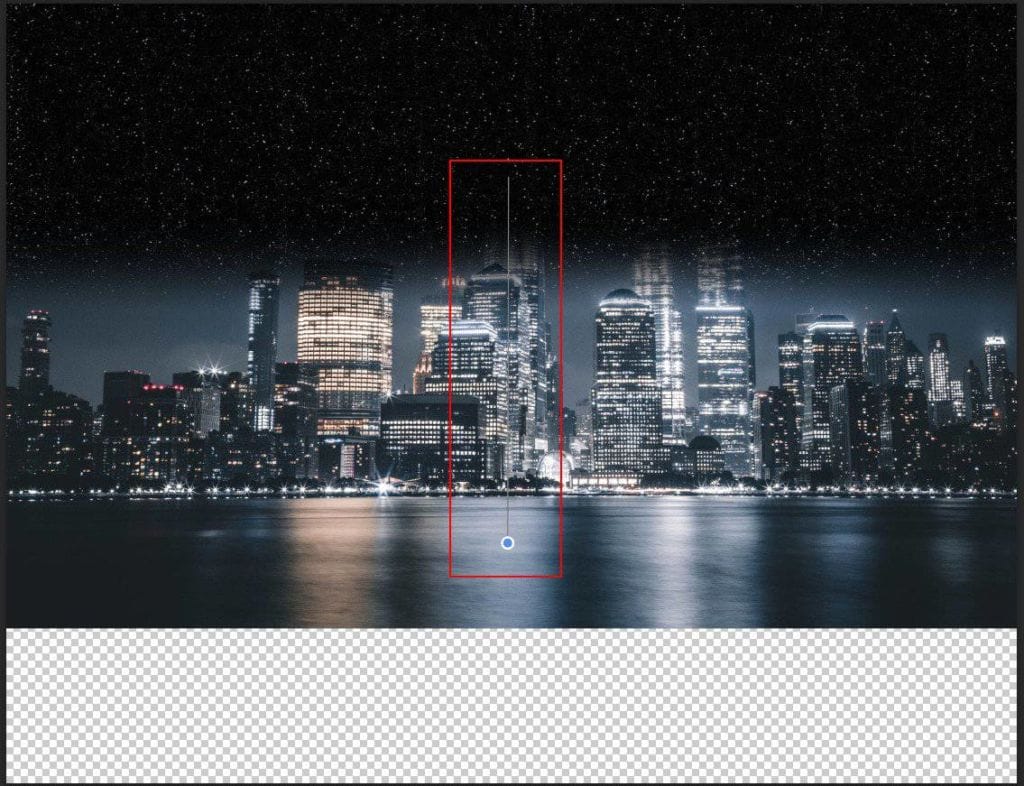
Next, place another photo Go to Filte > Place and select Stars. Then place it to our work canvas, position the image with the transform tool (Ctrl / Cmd + T). Hold Alt + Shift and rasterize like the image below. In Photoshop CC only hold Alt to rasterize all sides together. Blend mode change to Screen with Opacity 60%.


Now create a layer mask then Use Gradient Tool(G) with foreground color black/white and drag from the bottom of the image to the top as in the example you see.

Step 4
Add Adjustment Layer “Hue/Saturation”

Step 5
Now, place another photo Go to Filte > Place and select Milky Way. Then place it to our work canvas, position the image with the transform tool (Ctrl / Cmd + T). Hold Alt + Shift and rasterize like the image below. In Photoshop CC only hold Alt to rasterize all sides together. Blend mode change to Screen.

Next create a layer mask then Use Gradient Tool(G) with foreground color black/white and drag from the bottom of the image to the top as in the example you see.


Step 6
Add Adjustment Layer “Levels”

Step 7
Open Gate and hold Ctrl/Cmd and click on layer and after the selection area has been created, simply copy (Ctrl / Cmd + C) and Paste (Ctrl / Cmd + V) it to our work canvas. Then position the image with the transform tool (Ctrl / Cmd + T). Hold Alt + Shift and resterize like image below. In Photoshop CC only hold Alt to resterize al sides together.
7 responses to “A Gate of New Hope Photoshop Tutorial”
-

Photoshop prtis ka karna
-
PSD File is not downloadable.
-
The PSD file works for us. It’s a really big file, so it will take awhile to download.
-
-
The download link doesn’t work
-
Sorry about that – link has been fixed!
-
-
very good :)
just a problem with link psd-
Sorry about that – link has been fixed!
-
Leave a Reply to ArtCancel reply