
Step 35
Next, we add Clouds but first we need to import brushes. Select a Brush Tool(B) and right click on background. Now click on the gear icon and Import Brushes (Select a downloaded brush).

Step 36
Create a new layer with Foreground color Gray and Select Brush Tool(B) and right click on background to select Cloud Brushes folder.

Now we can paint clouds…

Step 37
When we finished all this, now merge all layers to one. Slecet the last layer and hold CTRL/CMD + SHIFT + ALT + E. Now we have a final layer, right click on mouse and select Convert to Smart Object. Then go to Filter > Camera RAW Filter (Version 2021 CC). At its most basic, the Photoshop Camera Raw filter allows you to use the functions of the ACR interface at any time within Photoshop. This allows you to make any adjustments within ACR at any time during your workflow instead of just limiting its usage to theraw processing stage.While it would be possible to import your working file into Lightroom to make the same sets of adjustments, doing this in Photoshop saves you from that cumbersome step. It allows you the use of these tools without any extra effort.

Step 38
Step 38
Now in Camera Raw Filter, set the Value: Basic
- Temperature: -5
- Exposure: -0.20
- Contrast: +4
- Highlights: +13
- Shadows: -9
- Whites: +7
- Blacks: -6
- Texture: +6
- Clarity: +11
- Vibrance: +4

Curve
- Highlights: +6
- Lights: +3
- Darks: -3

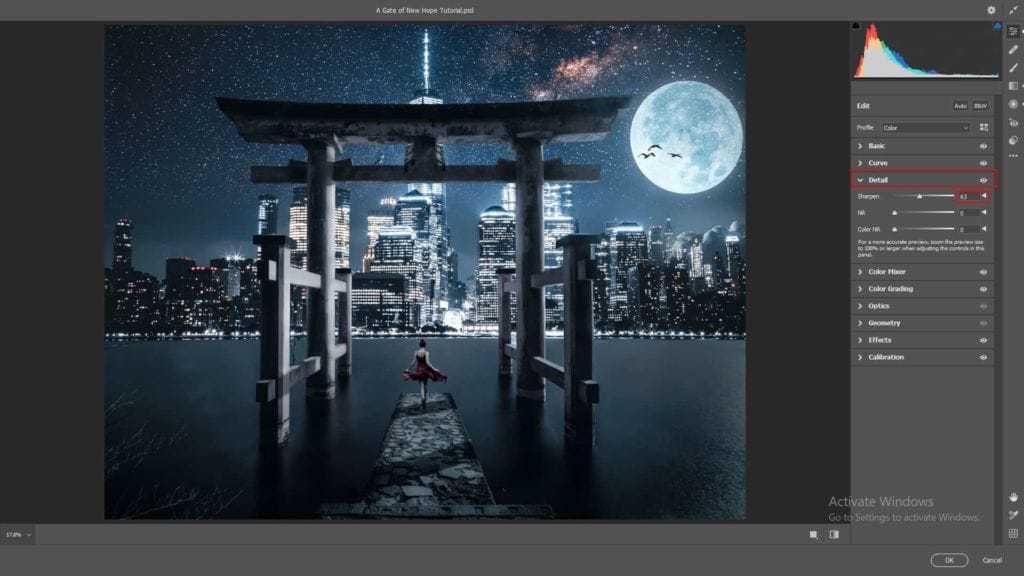
Detail
- Sharpen: +63

HSL Adjustments Hue
- Blues: +2
- Purples: -3
Saturation
- Blues: +4
Luminance
- Aquas: +3
- Blues: -7

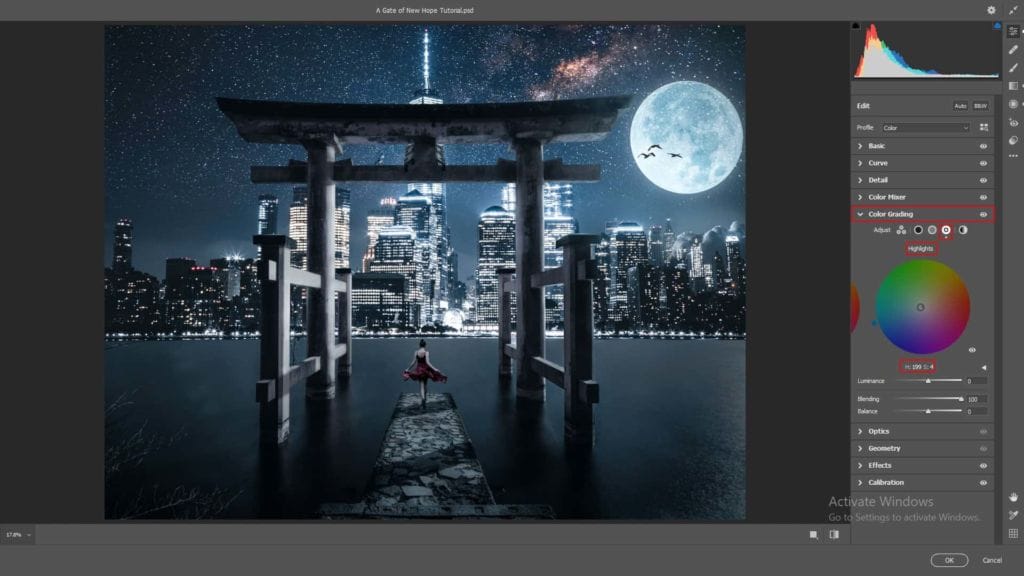
Color Grading
Shadows:
- H: 221 S: 0
Midtones:
- H: 358 S: 0
Highlights:
- H: 199 S: 4


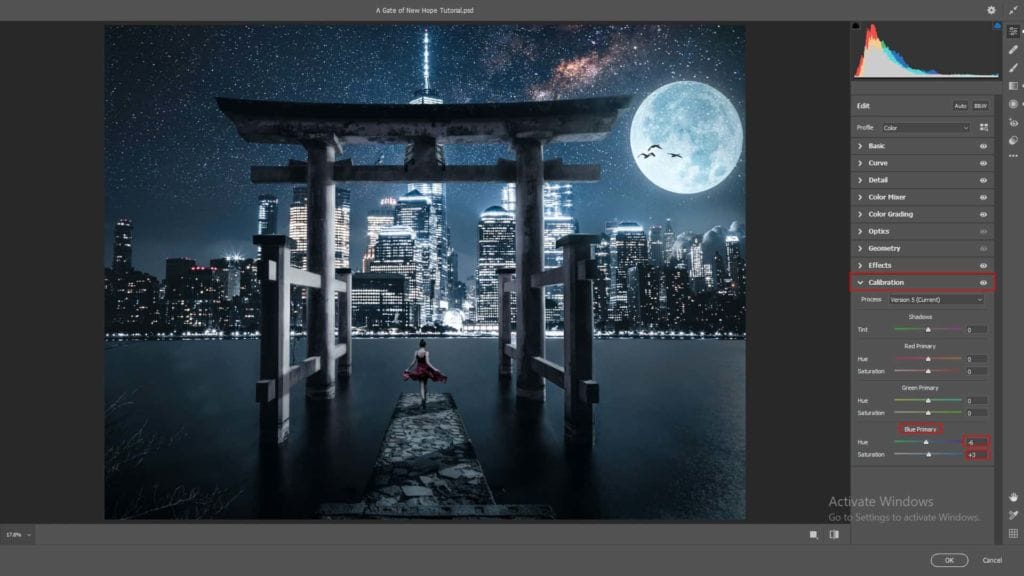
Callibration
- Blue Primary:
- Hue: -6
- Saturation: +3

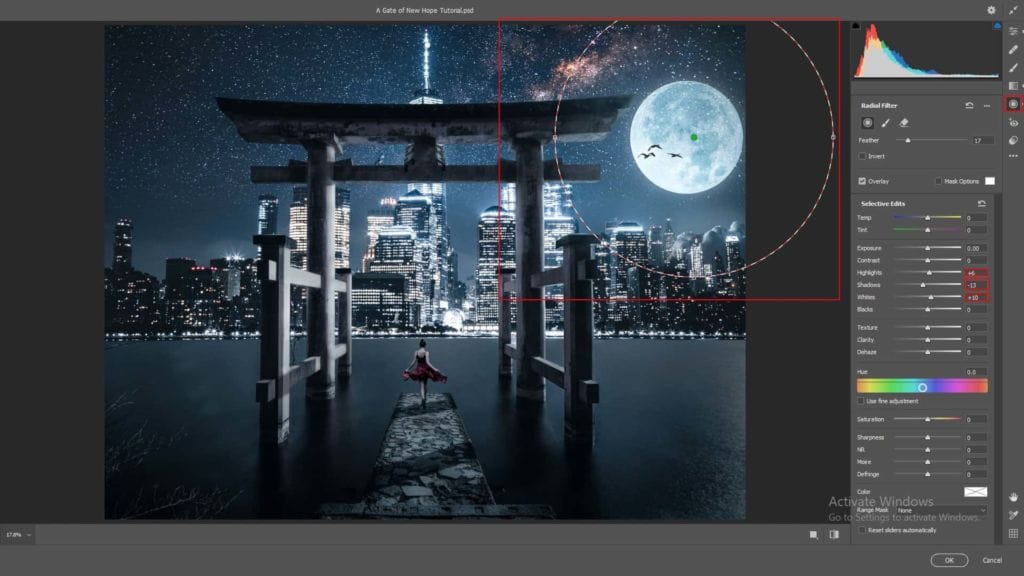
Radial Filter
- Highlights: +6
- Shadows: -13
- Whites: +10

Gradulated Filter
- Exposure: -0.10
- Highlights: -40
- Shadows: -8
- Blacks: -4

And finally, everything should look like this

Final Results

Download the PSD
7 responses to “A Gate of New Hope Photoshop Tutorial”
-
Photoshop prtis ka karna
-
PSD File is not downloadable.
-
The PSD file works for us. It’s a really big file, so it will take awhile to download.
-
-
The download link doesn’t work
-
Sorry about that – link has been fixed!
-
-
very good :)
just a problem with link psd-
Sorry about that – link has been fixed!
-


Leave a Reply