Turn any photo into a dot grid artwork with these Photoshop actions. You'll get great results with dots that change size. They get larger in brighter areas and smaller in darker areas. Free download available.
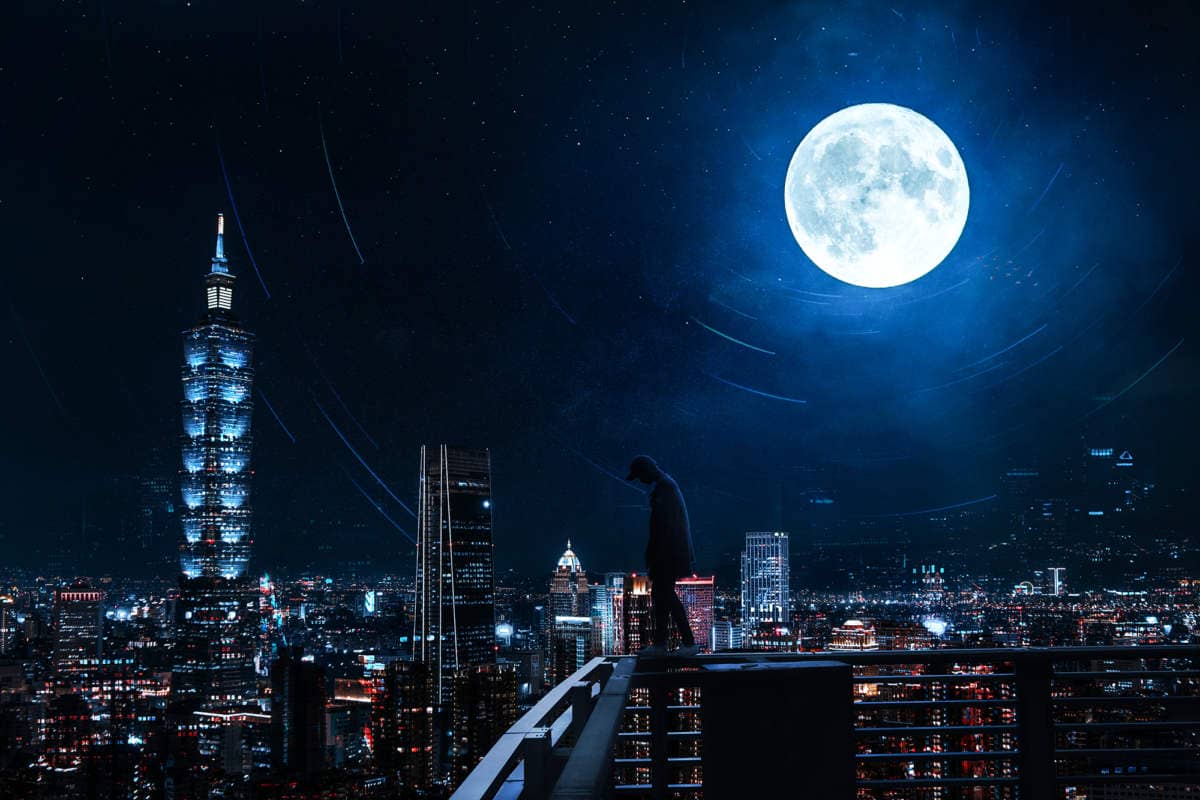
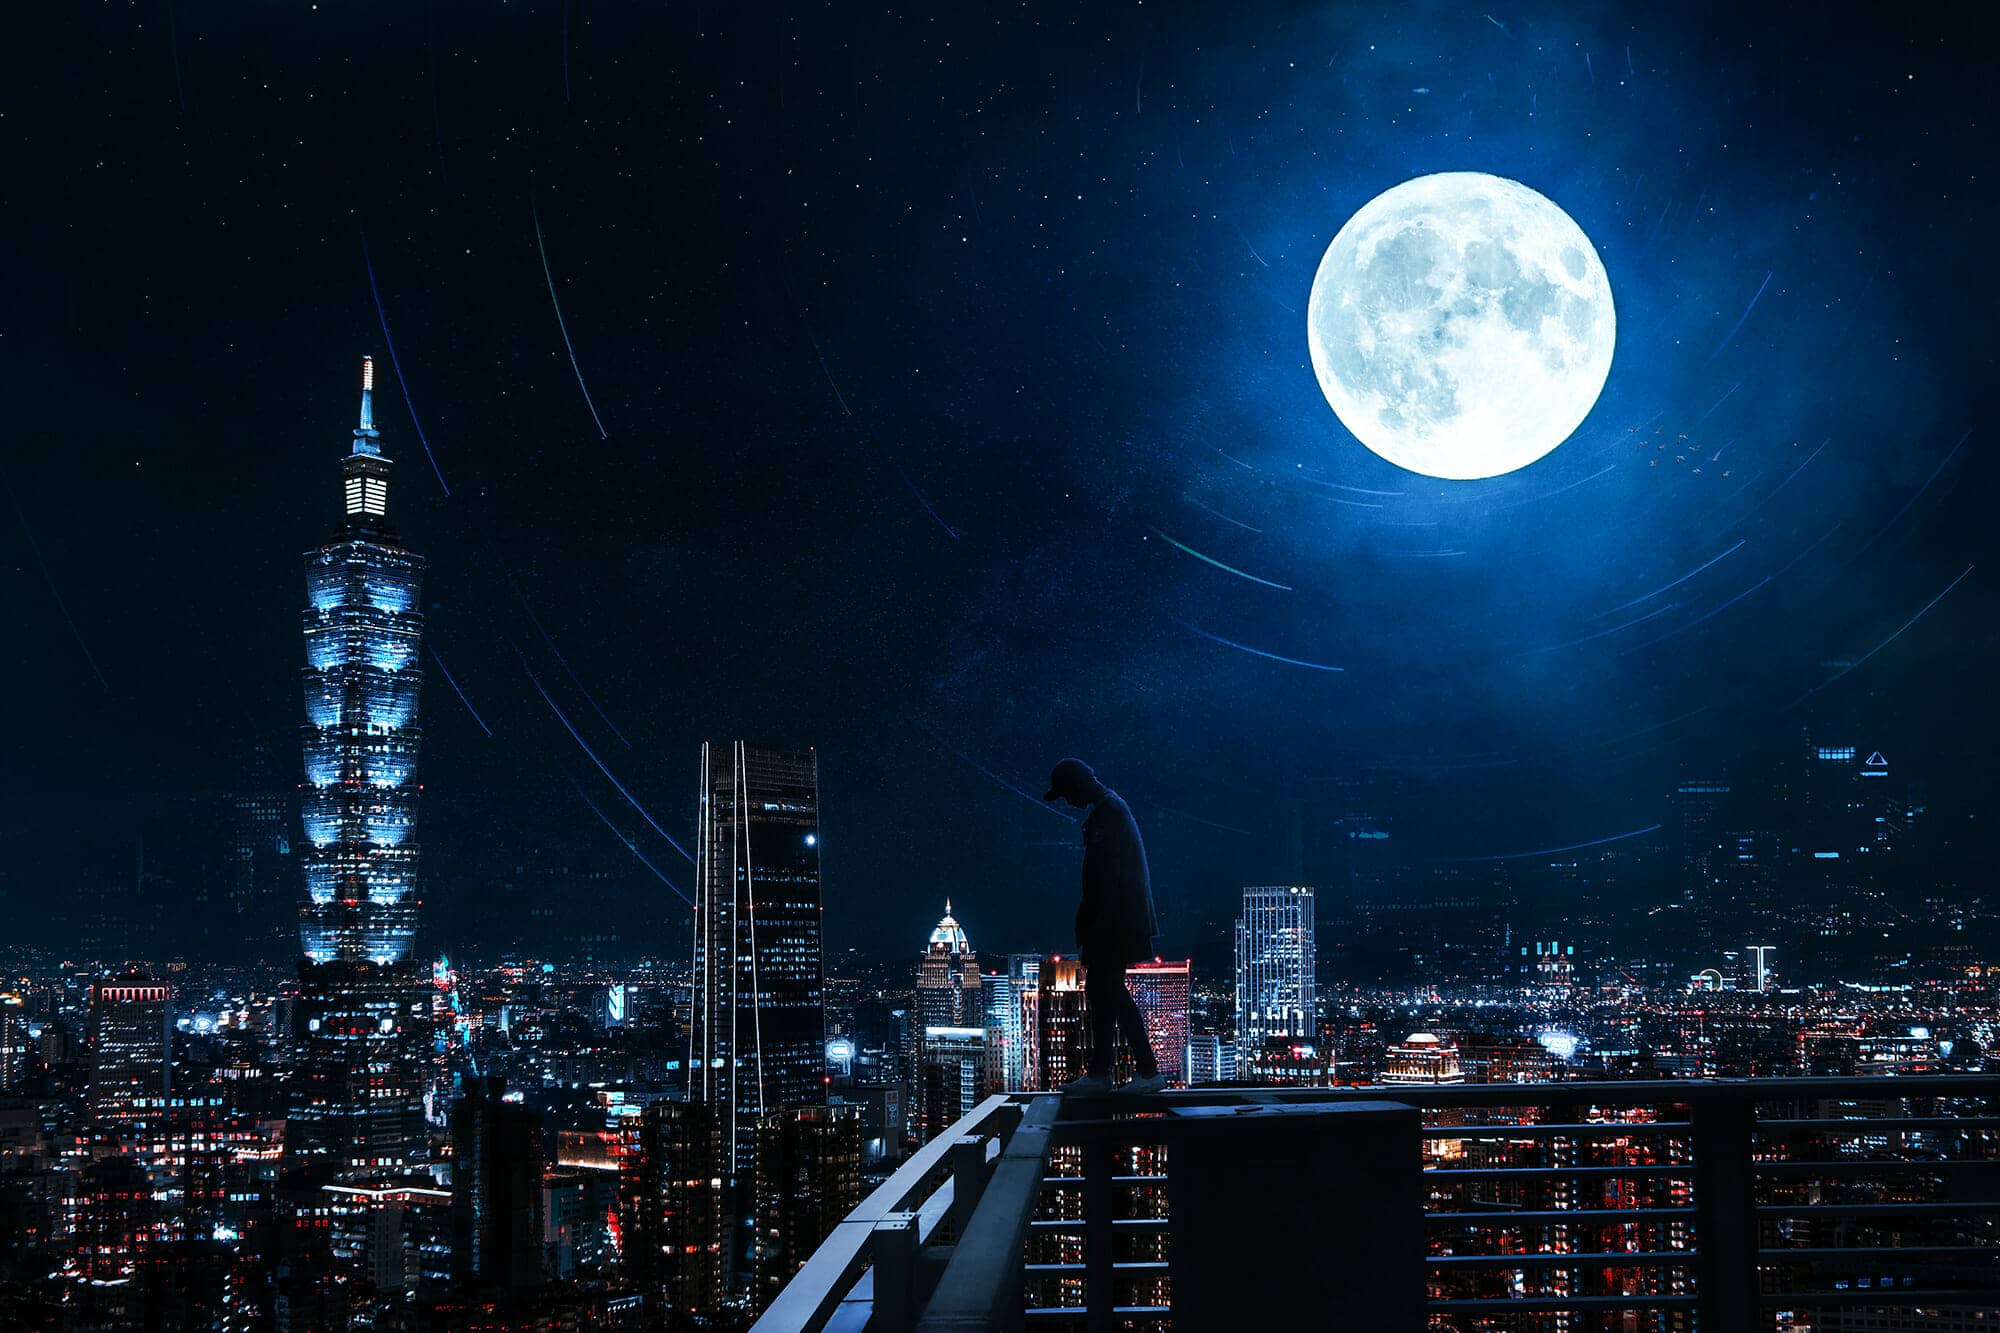
At a certain stage in his evolution, the man himself had been able to lay hold upon a higher order of things, which raised him above the level of the beasts that perish, and enabled him to see, at least in the distance, the shining towers of the City of God. In this Photoshop Tutorial, we will learn how to create a beautiful scene of city. First, we placed a City and adjust the glow/light effect, then added the man and blended it with Adjustment layers. Next place moon, birds, and textures, then Finally, we use Camera Raw Filter.
Preview of Final Image
Tutorial Resources
Step 1
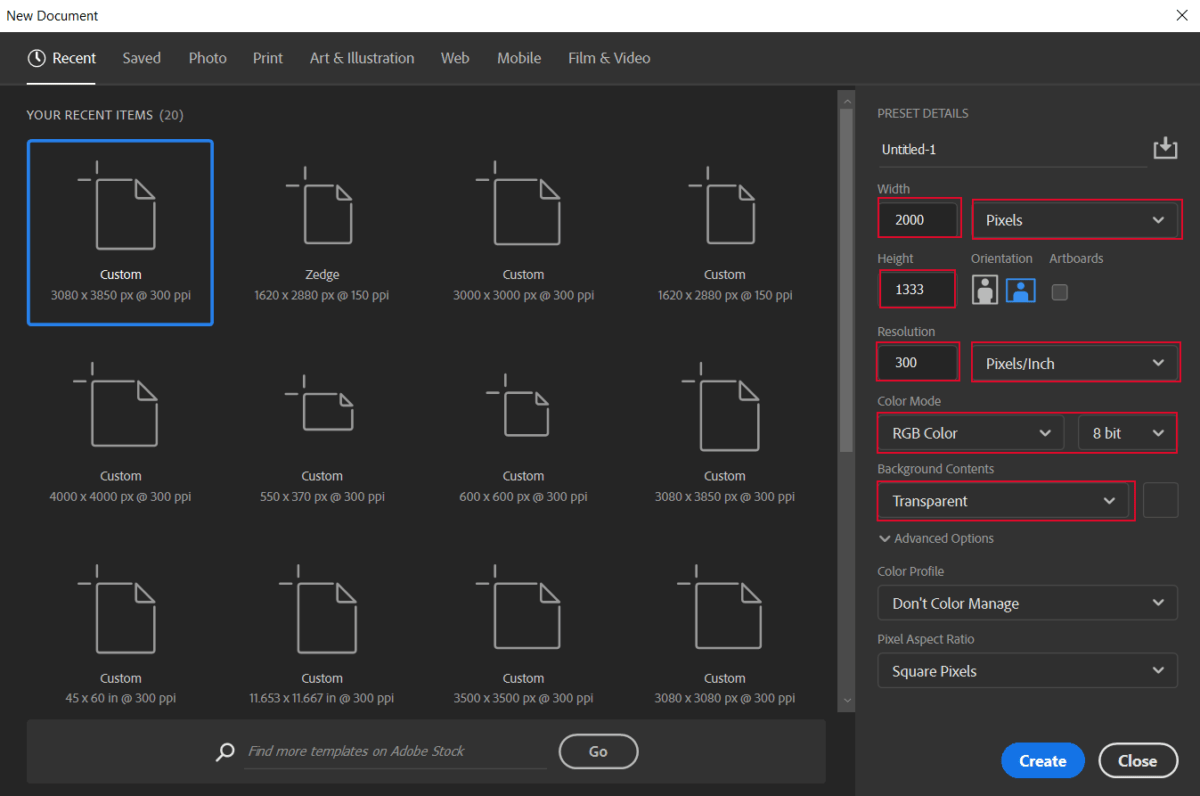
Now, let’s start by creating a new image file, go to the Menu bar and click File > New, and then input the following values on their respective fields
- Preset: Custom
- Width: 2000px
- Height: 1333px
- Resolution: 300px
- Color Mode: RGB Color 8 bit
- Background Contents: Transparent
Step 2
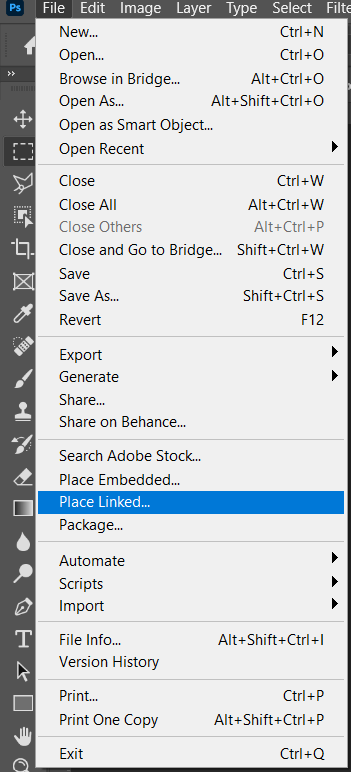
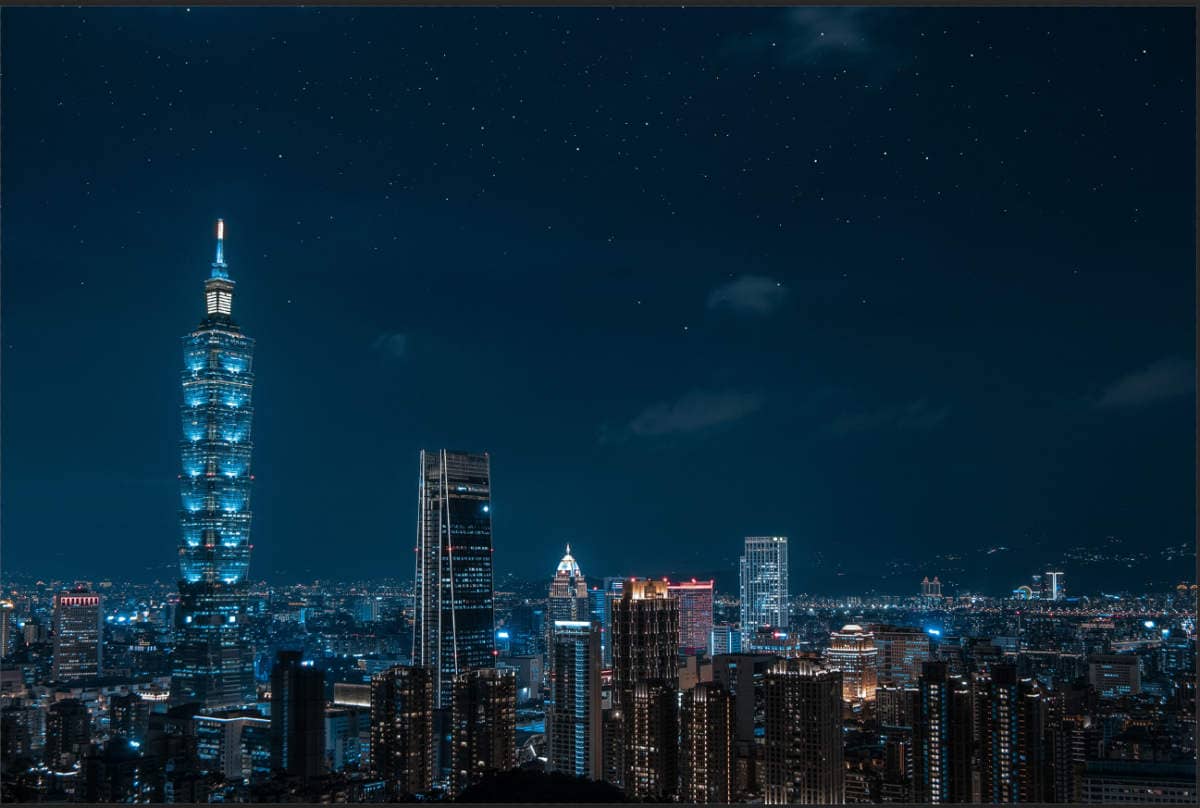
Now, place City Go to File > Place and select City, then place it to our work canvas and position the image with the transform tool (Ctrl / Cmd + T). Hold Alt + Shift and rasterize like the image below. In Photoshop CC only hold Alt to rasterize all sides together.
Step 3
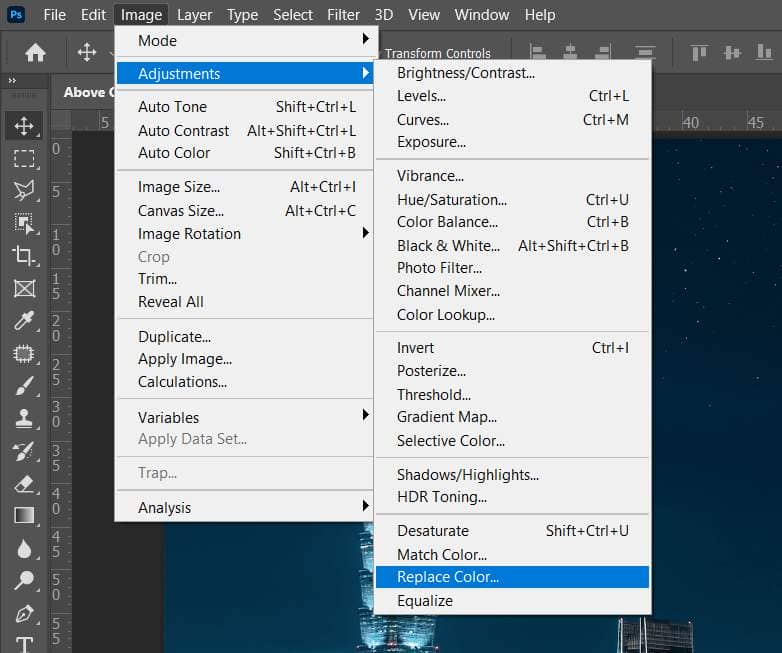
In step 3 Duplicate City layer Ctrl/Cmd + J and go to Image > Adjustments > Replace Color...
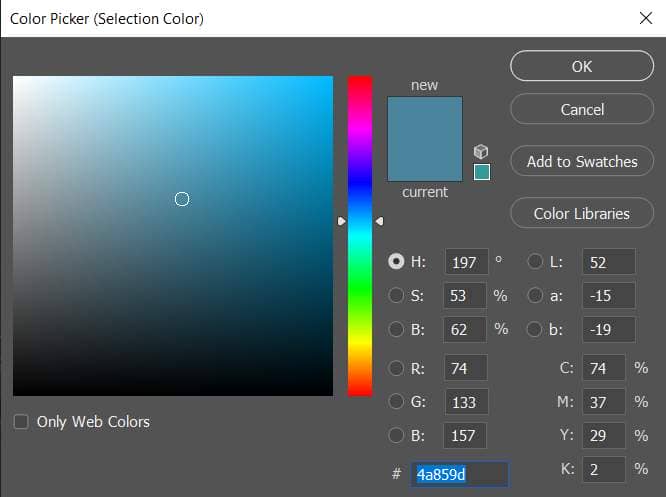
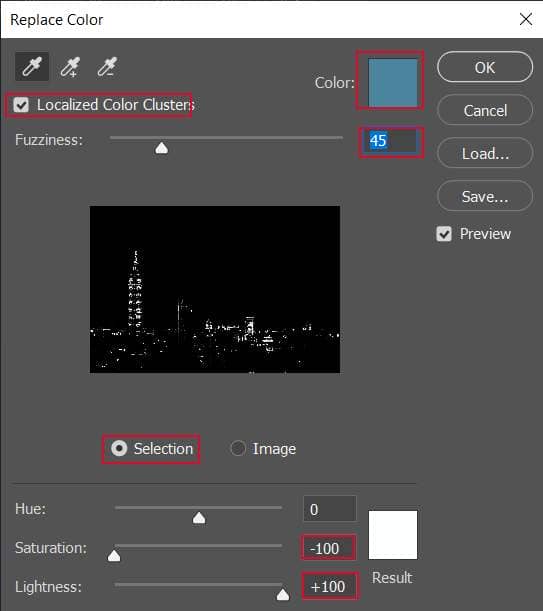
Color : Blue #4a859d
Check Localized Color Clusters
Fuzziness : 45
Saturation : -100
Lightness : +100
Step 4
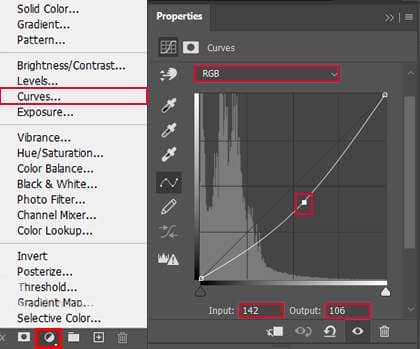
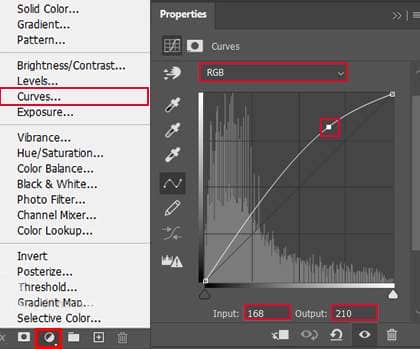
Add Adjustment Layer "Curves"
Step 5
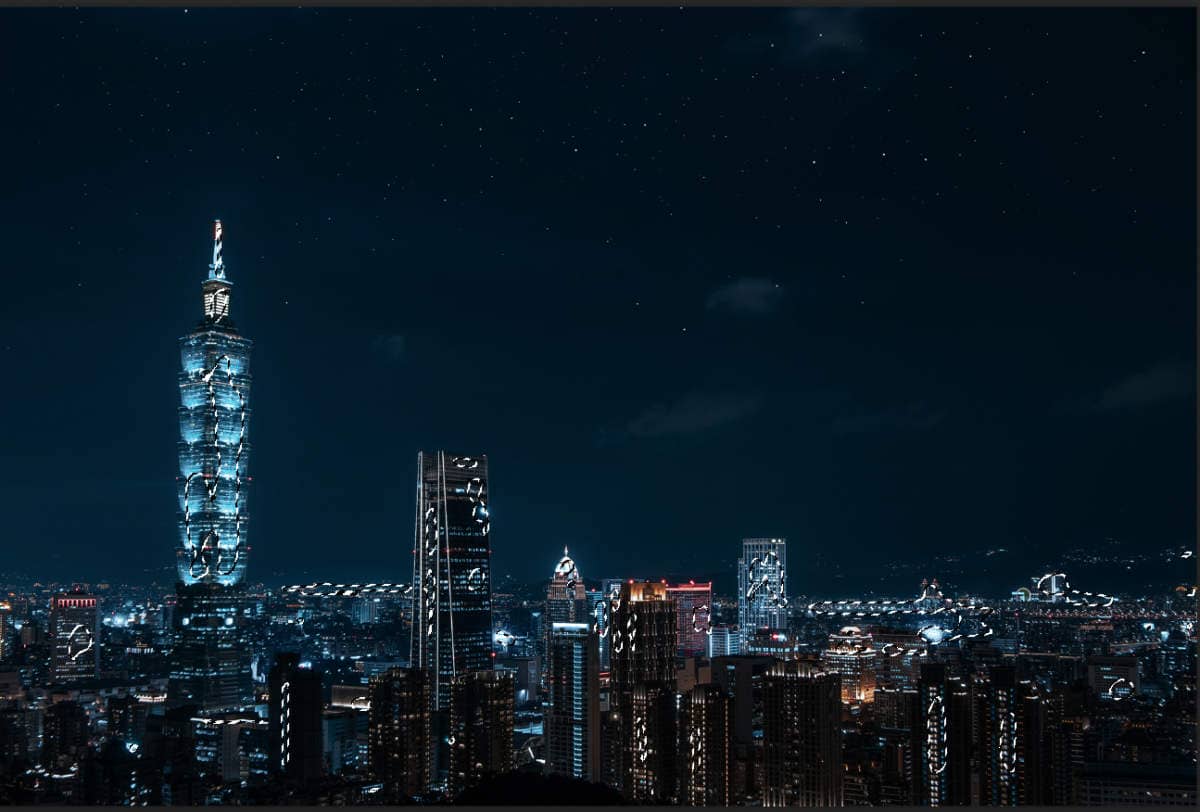
Add Adjustment Layer "Curves" and press Ctrl/Cmd + I to invert. Then use Brush Tool(B) Soft Round with foreground color white and paint Highlight parts.
Step 6
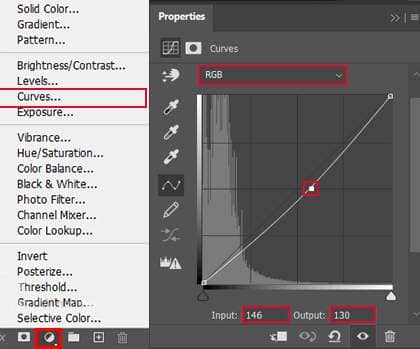
Add Adjustment Layer "Curves"
Step 7
Next, place glow effect Go to File > Place and select Glow City. Then place it to our work canvas and position the image with the transform tool (Ctrl / Cmd + T). Hold Alt + Shift and rasterize like the image below. In Photoshop CC only hold Alt to rasterize all sides together.
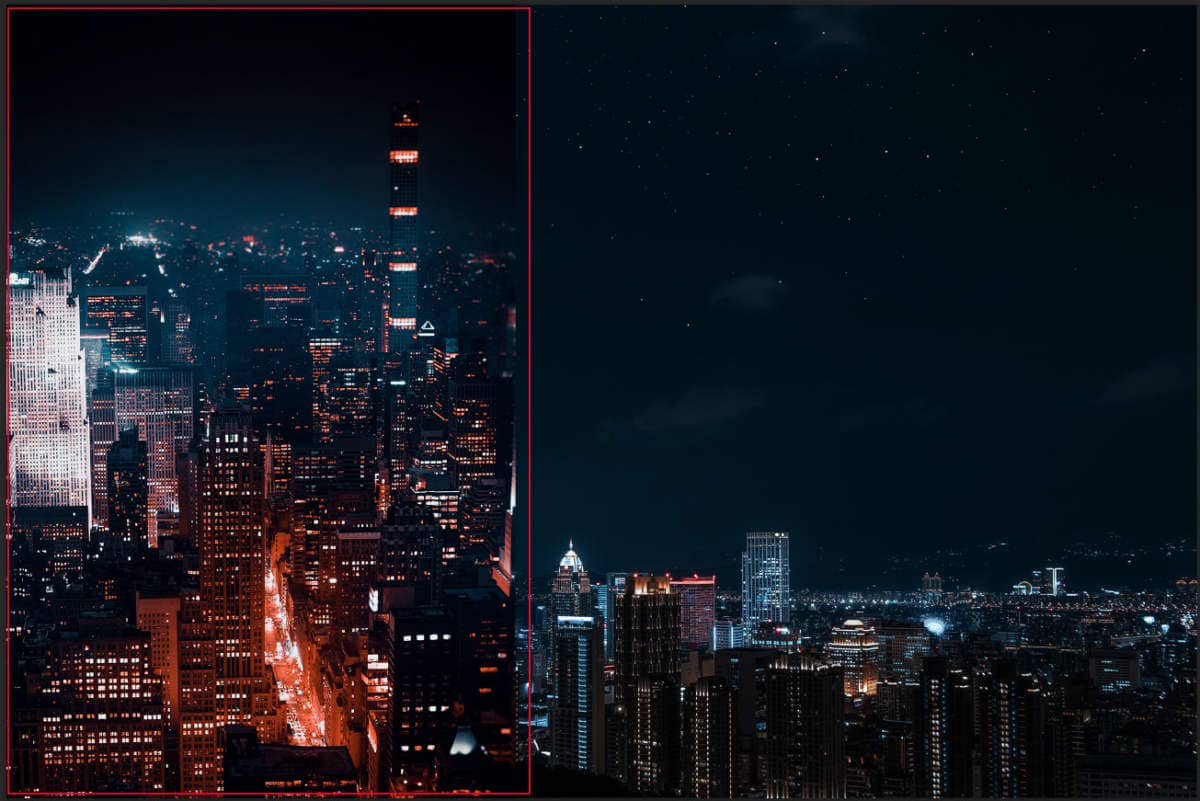
Now create a layer mask and use Soft Round brush tool with foreground color black and delete parts from sky and clouds. Blend mode change to Color Dodge.

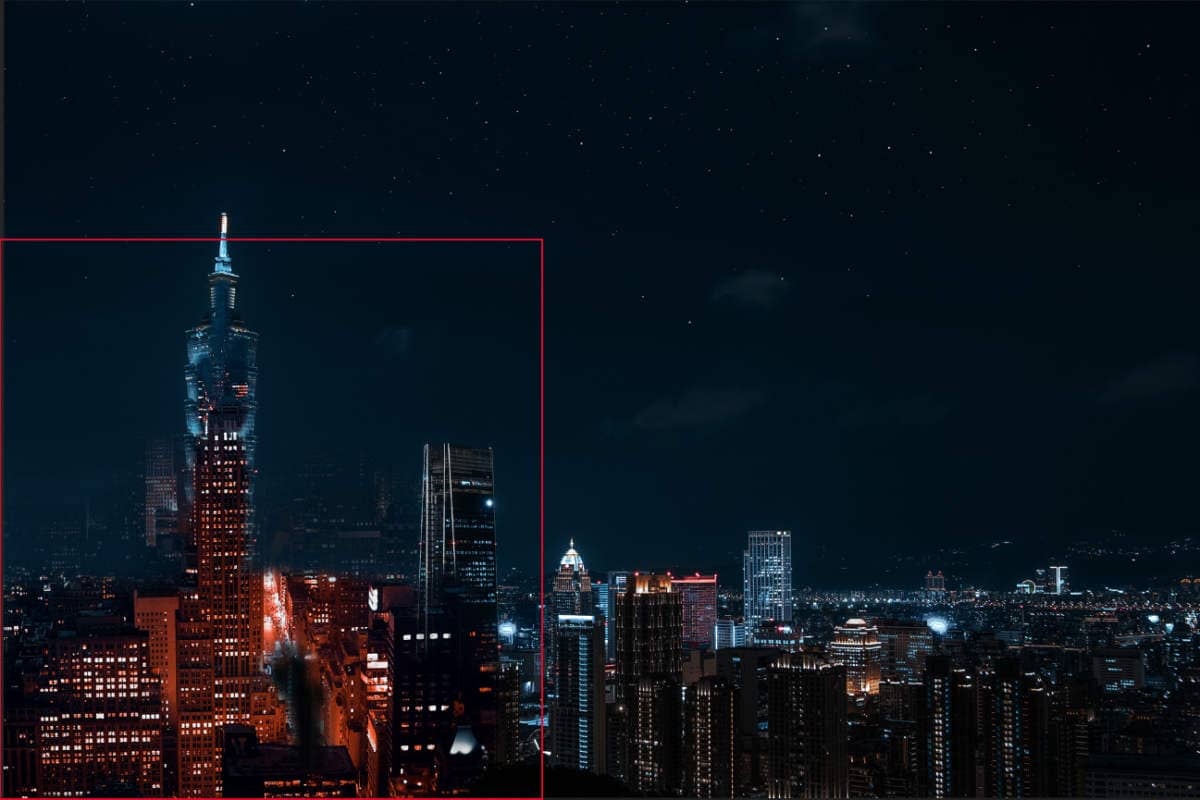
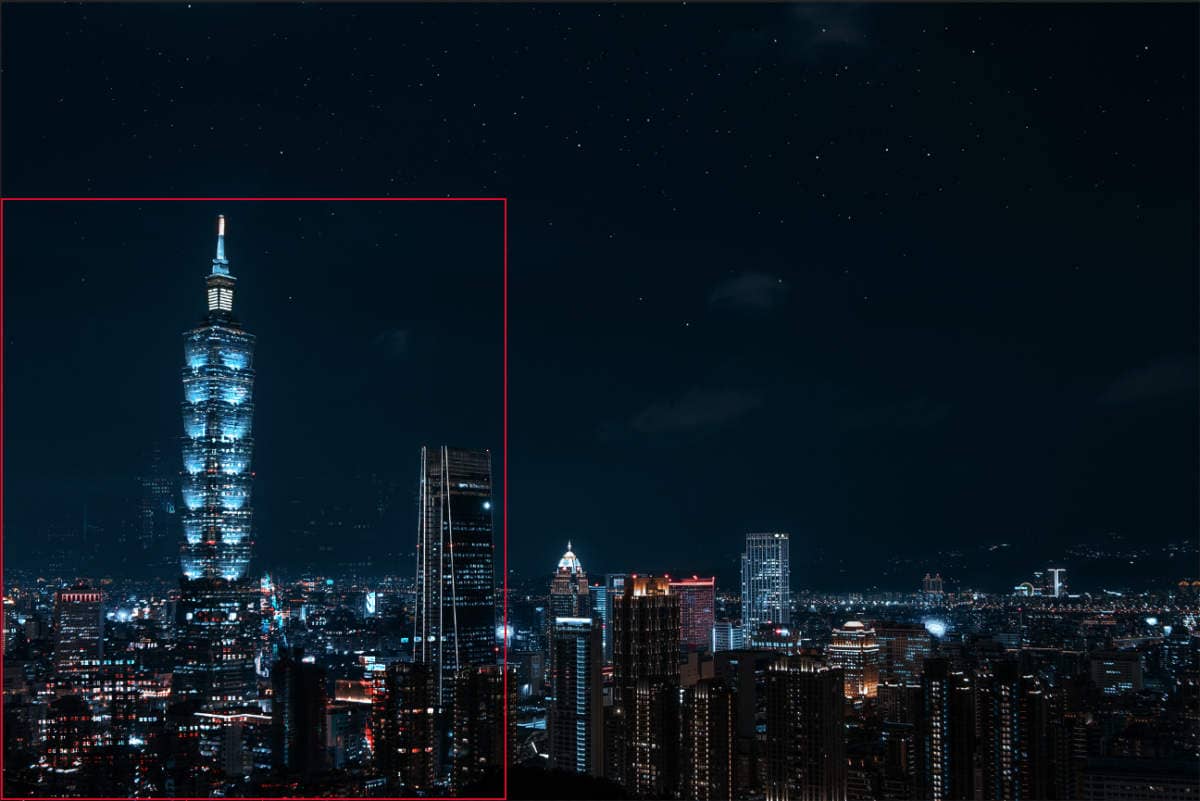
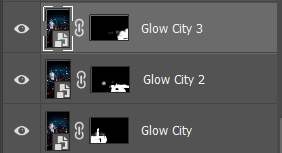
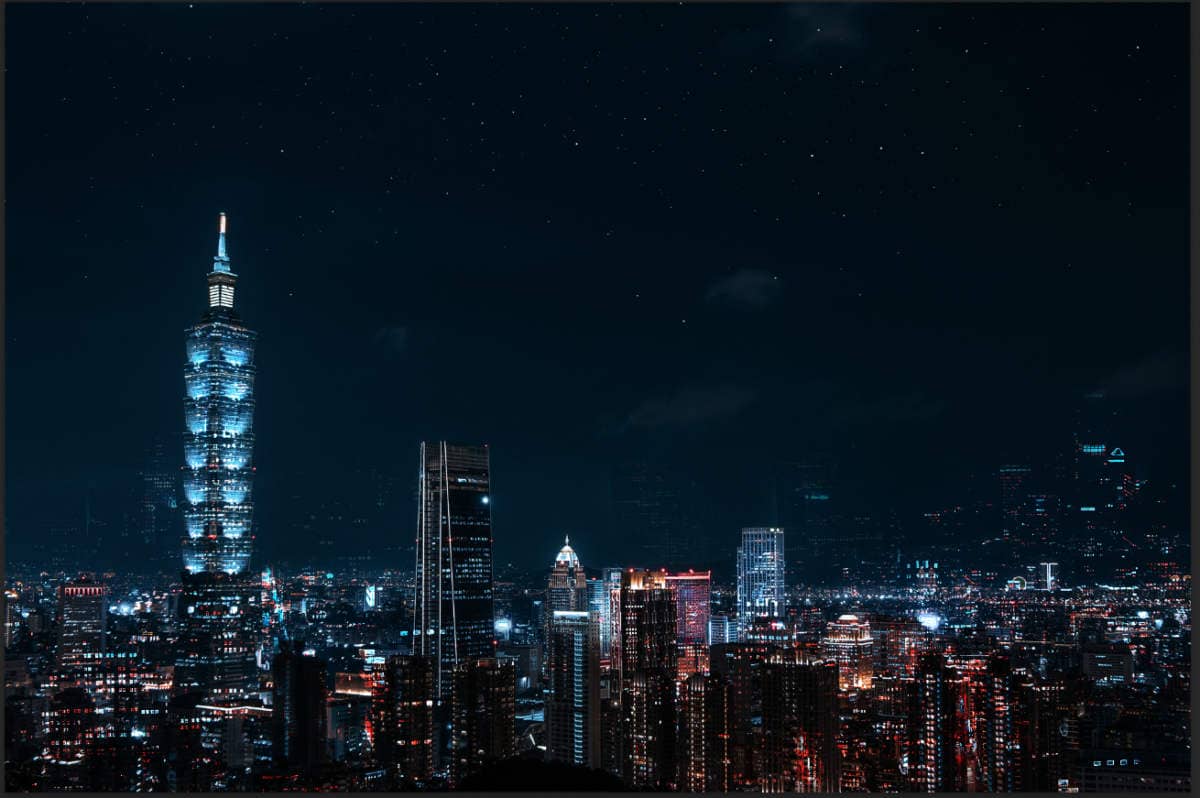
Use Shortcut Ctrl/Cmd + J to make two more layers.
Step 8
Now, go to File > Open and select Man. Then use a Pen Tool(P) and start selecting. When we finish the selection press right-click on mouse and “Make Selection” then create layer mask. The simplest path you can draw with the standard Pen tool is a straight line, made by clicking the Pen tool to create two anchor points. By continuing to click, you create a path made of straight line segments connected by corner points.

3 comments on “Create an Urban Rooftop Scene in Photoshop”
In grote lijnen kan ik het wel volgen maar vanaf stap 14 ga ik nogal onderuit. Het bedekken van die Man en dat mooie blauwe kleurtje op zijn rug, lukt mij niet. Zodra Ctrl-I mee mag doen, maak ik kennelijk een essentiële fout. Moet ik het Masker omkeren? Dan krijg ik Wit.
Ik vond het wel leerzaam; het gebruik van allerlei Aanpassingslagen is bij mij wat helderder.
Veel dank voor al jullie moeite om deze tutorial de Wereld in te sturen. Wat mij betreft mag bij iedere stap ook het Lagenmenu zichtbaar zijn/worden. Dan denk ik beter mijn in de fout gaan kan beoordelen.
Met vriendelijke groet, HK.
Zeer bedankt voor deze uitgebreide Tutorial. Ik mis dikwijls het totaal overzicht van de Lagen en vanaf stap 7 ga ik 'de mist in'. De Glow City lukt natuurlijk maar het Toevoegen van die 3 Lagen Curves is mijn Masker wit met zwart. Toepassing van Pen bij Man geen probleem.
Ik ga nu verder met pagina 2......
Wonderful!