One of Photoshop CC 2015 new feature is more or less the same with Illustrator artboard, allowing us to create multiple pages within one document. But Photoshop’s artboard is more flexible because we can freely change the arboard size and position.
Now we can be more productive, because we are able to create multiple design pages inside a single document. For example, we can use it for designing multiple layout for a responsive website, or multiple pages of an app interface, or somehing that is more simple like designing a banner ads.
What you’ll be creating
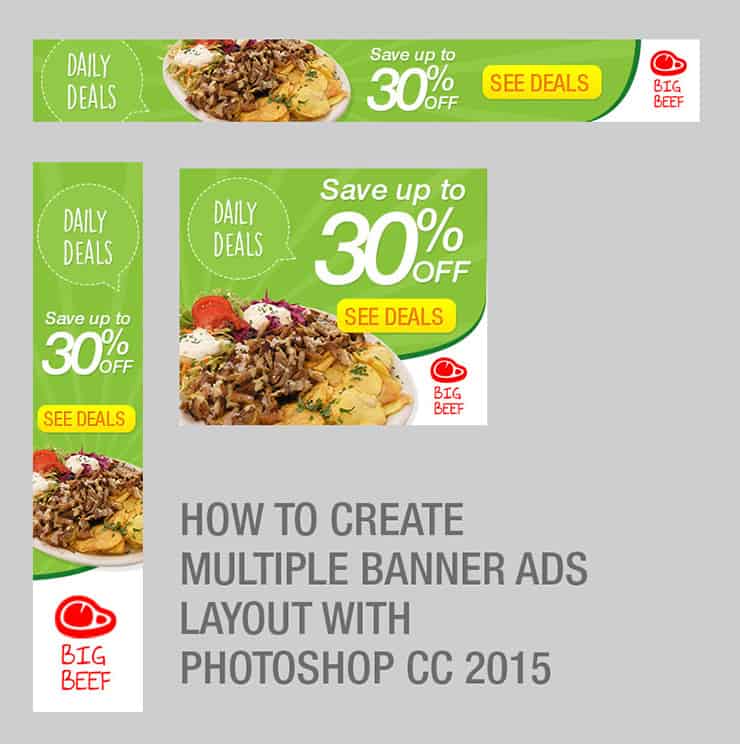
This time we will design banner ads about promotional discount from a fake restaurant. As you can see, the same design will be adapted in various banner size, this is where the artboard feature become useful.

Tutorial Resources
Step 1
Within Photoshop CC 2015, press CTRL+N to create a new document. Select Document Type: Artboard. Below it, you can choose any default artboard size or set it manually from the width and height input box.
For this tutorial, I set the width to 728 px and height 90 px. Click OK.

Step 2
An artboard is now created with spesific width and height as we set in the previous step. To select the arboard, click on its name.
To change artboard name, double click on its name from the layers panel.

Step 3
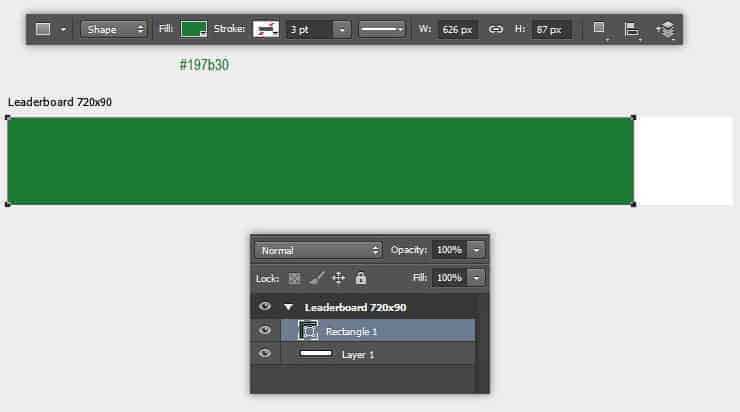
Draw a rectangle shape, set the fill to green (#197b30) and stroke to none. Draw a long rectangle shape, see image below as your reference.

Step 4
When you’re done creating rectangle, the Properties panel is shown automatically. This was also a new feature in Photoshop CC 2015.
We can adjust corner radius value to make a rounded rectangle. In this example, fill the corner radius value that was located in the bottom-right corner to 80 px.

Step 5
Press CTRL+J to duplicate rectangle layer. Change the fill color to bright green (#8dc63f) then use Move tool to nudge it to the left. See image below as your reference.

Step 6
Press CTRL+O, then select and open food bowl image. I use Pen tool to select this food bowl. If you have another selection tricks, just do what works best with you. Done selecting, press CTRL+C to copy selected area.
11 responses to “Creating Multiple Banner Ads Layout Using Artboard in Photoshop CC 2015”
-
Excellent guide, thanks
-
Keren mas bro..
-
I am stuck at this step
“We can repeat transformation and also copy the shape at the same time by pressing ALT+SHIFT+CTRL+T. Do this once to see how it works.”using latest photoshop version
-
In web design, it is essential to be able to get the banners all similar. This makes it much easier.
-
Very nice tutorial. I like making banner ads in photoshop, but I never have put them all on the same file. Thanks!
-
Your tutorial is so easy to understand and you express it very cleanly. Photoshop is really a wonder.
-
????
-
-
Thank your for sharing this information. Great tutorial
-
Great tutorial
-
Considero el banner muy sencillo pero efectivo, facil de elaborar bajo una idea sencilla y practica gracias
-
Great tutorial, Jayan! Having read many, many tutorials and created some myself, your attention to detail, along with screenshots, is wonderful. I am familiar with artboards in Illustrator, but have yet to work with them in Photoshop. I love what I am seeing and look forward to working through your tutorial for creating social media posts in different sizes for the different social media platforms. Thanks so much!

Leave a Reply