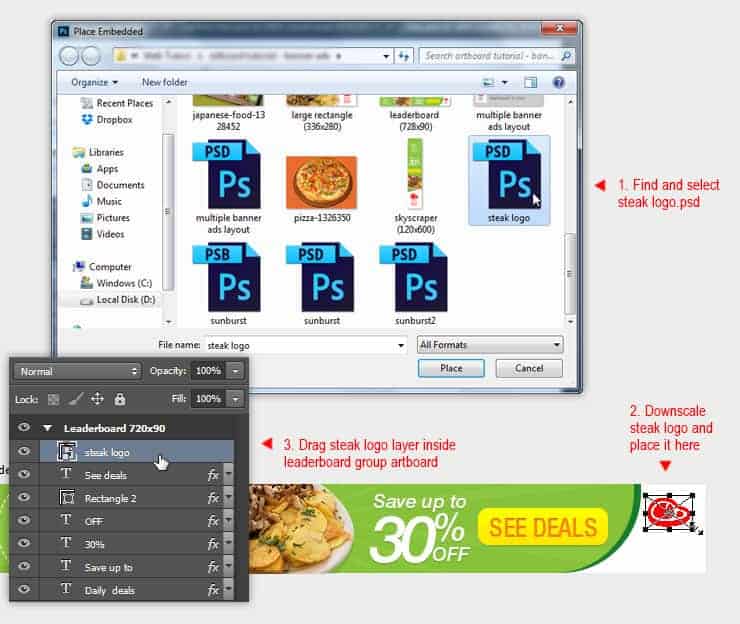
Step 39
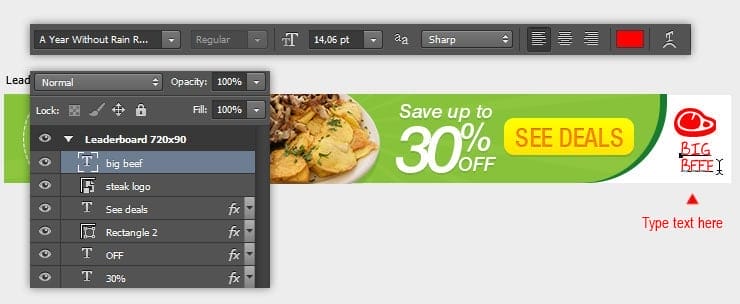
Add logo text below steak logo.
Step 40
From the layers panel, we can close or open the artboard group. We can also easily to duplicate the artboard by pressing CTRL+J.

Step 41
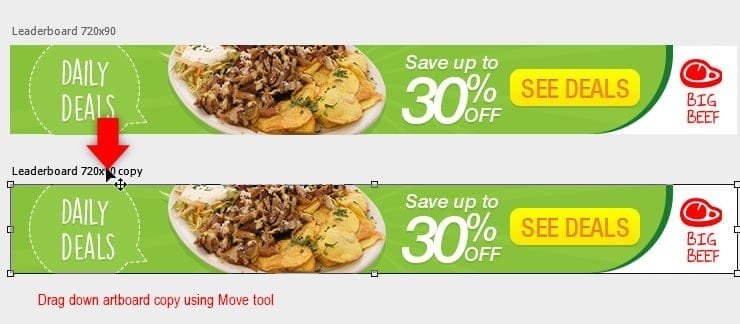
Use Move tool to drag artboard copy below the original one.
Step 42
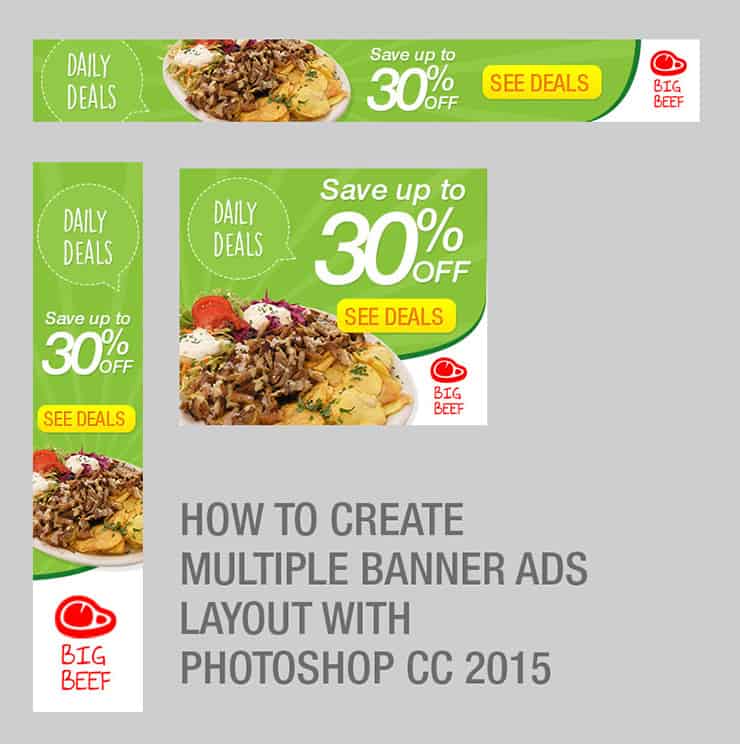
This way, we can conveniently make design change without having to create new document. Each artboard is completely grouped separately. As you can see below, I can get two different design in one document.

Step 43
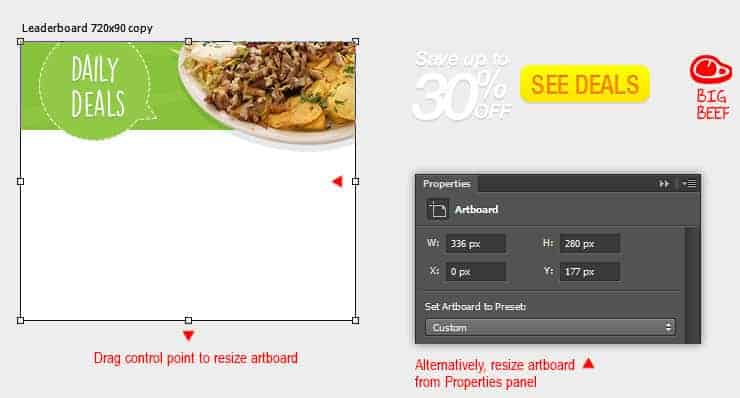
It doesn’t stop there. Photoshop allow us to change the artboard size easily, by dragging the control point or change Width and Height value from the Properties panel.
Have a notice, if you change the artboard size smaller, some layers will left outside the box. In this example, I change the artboard copy width to 336 px and height to 280 px.
Step 44
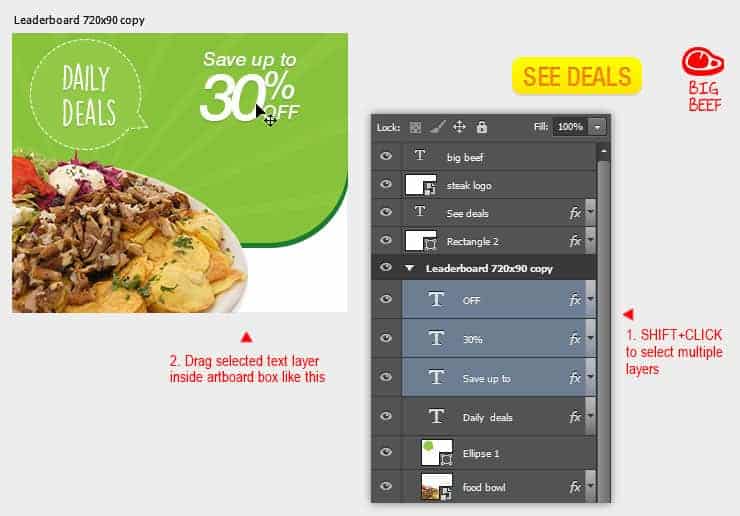
Make some composition adjustment for the green background and food bowl image. See image below as your reference. Next, manually insert those layers that left outside into artboard box using the Move tool. Start with the “Save up to 30% OFF” text layers.
Step 45
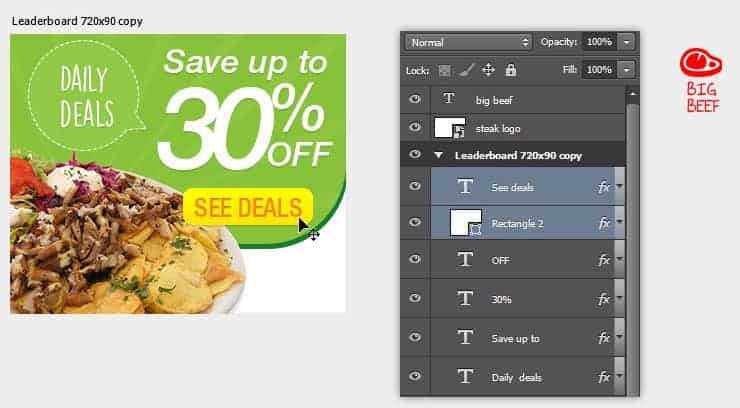
Upscale the discount texts, then insert the call-to-action button inside the artboard.
Step 46
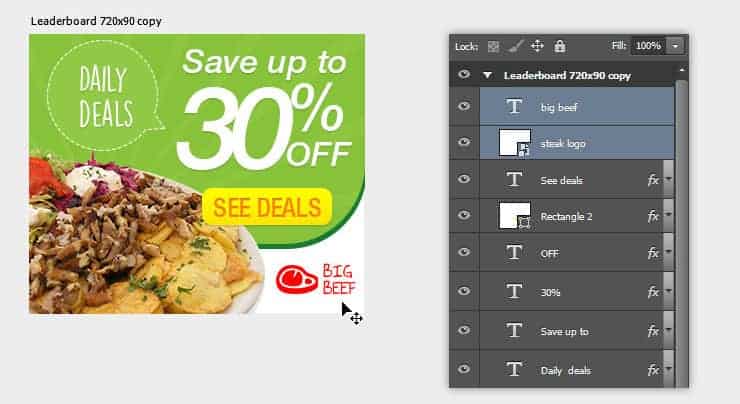
Don’t forget to insert back the steak logo and text into the artboard.
Step 47
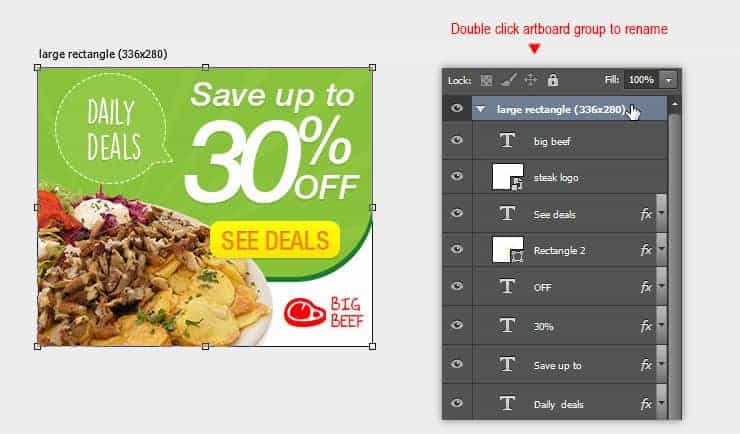
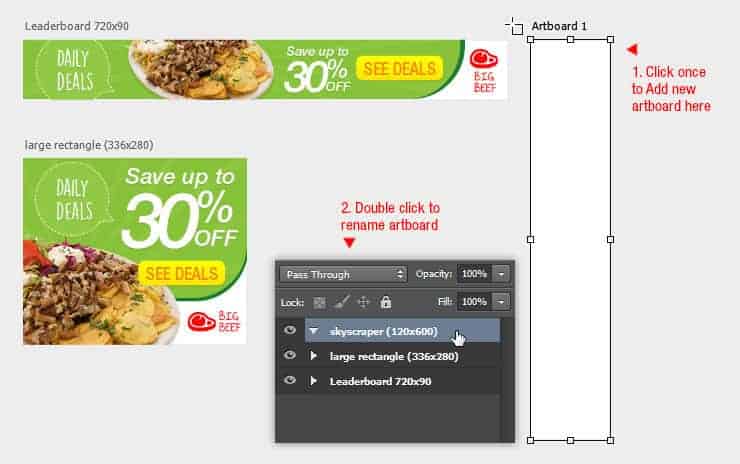
Change artboard name to “large rectangle (336×280)”. Double click artboard name to do this step.
Step 48
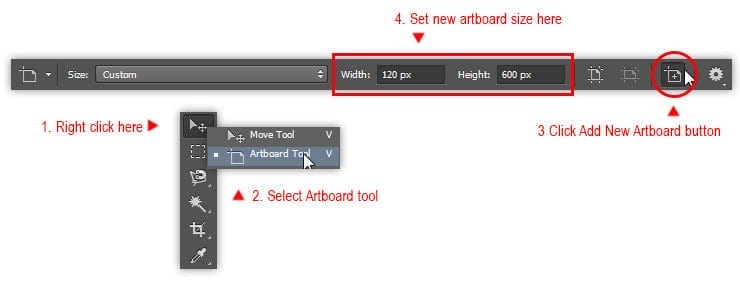
Now we need to create new artboard. Grab the Artboard tool. Click the New artboard button, then set the width and Height for new artboard. In this example, set the Width to 120 px and Height to 600 px.
Step 49
Still using Artboard Tool, click once in the blank area to create new artboard. Rename the artboard to “Skycrapper (120×600)”.
Step 50
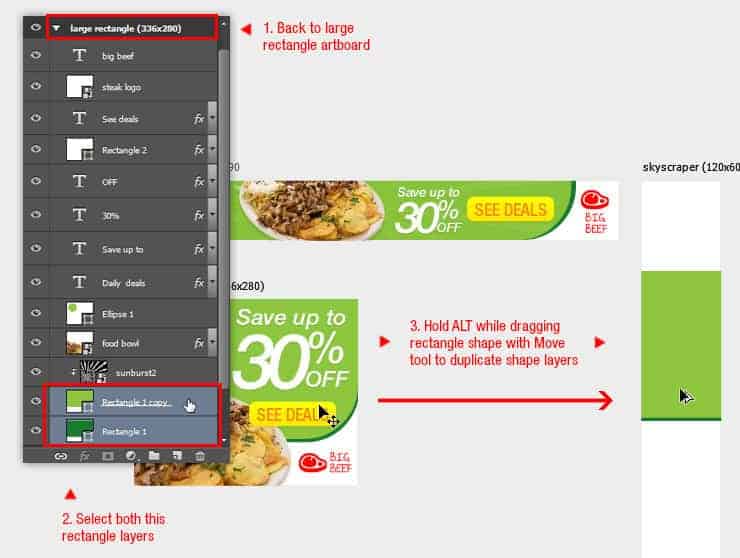
In this new artboard we will reuse the same element from previous artboard. So, get back to previous artboard and select both green rectangles within layers panel.
Grab the Move tool, then hold ALT while dragging the rectangles from “large rectangle” artboard to “skycrapper” artboard. This will copy both rectangles into skycrapper artboard.
Step 51
Press CTRL+T to resize the rectangle so it fits with the artboard width. Press ENTER to confirm transformation.
11 responses to “Creating Multiple Banner Ads Layout Using Artboard in Photoshop CC 2015”
-
Excellent guide, thanks
-
Keren mas bro..
-
I am stuck at this step
“We can repeat transformation and also copy the shape at the same time by pressing ALT+SHIFT+CTRL+T. Do this once to see how it works.”using latest photoshop version
-
In web design, it is essential to be able to get the banners all similar. This makes it much easier.
-
Very nice tutorial. I like making banner ads in photoshop, but I never have put them all on the same file. Thanks!
-
Your tutorial is so easy to understand and you express it very cleanly. Photoshop is really a wonder.
-
????
-
-
Thank your for sharing this information. Great tutorial
-
Great tutorial
-
Considero el banner muy sencillo pero efectivo, facil de elaborar bajo una idea sencilla y practica gracias
-
Great tutorial, Jayan! Having read many, many tutorials and created some myself, your attention to detail, along with screenshots, is wonderful. I am familiar with artboards in Illustrator, but have yet to work with them in Photoshop. I love what I am seeing and look forward to working through your tutorial for creating social media posts in different sizes for the different social media platforms. Thanks so much!

Leave a Reply