

Now merge all the layers of background molecules in a single layer (Layer > Merge Layers or Cmd/Ctrl+ E), but leave at least one layer of a molecule because it is useful to us later.

Convert this layer for Smart Filters (Filter > Convert for Smart Filters) and add filter “Gaussian Blur” (Filter > Blur > Gaussian Blur…). Set Radius: 25px. So we can create a volume for the image.

Step 25
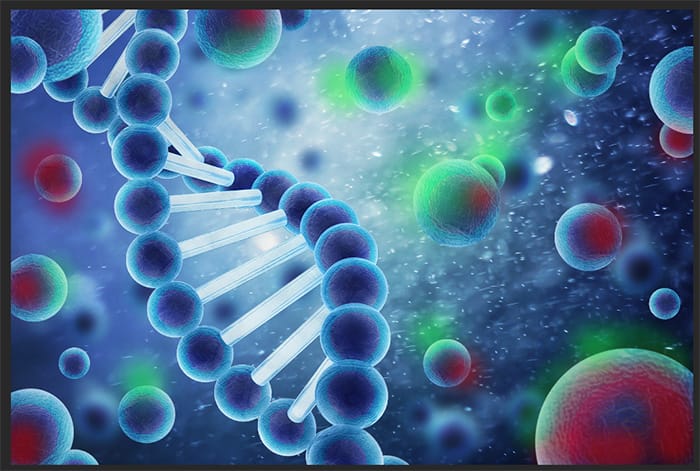
Necessary to impose light and shadow. Although the molecule and blurred, but is and why they should match the lighting. Create a New Overlay-neutral layer (Layer > New > Layer or Cmd/Ctrl+ Shift + N). Use Dodge Tool (O) and Burn Tool (O) with there settings: Size: 175px, Exposure: 30%, Range: Midtones. Apply light and shadow relative bright spot on the texture (light source). In image green is light, red is a shadow and set this layer as clipping mask (Option/Alt+ Cmd/Ctrl + G).

Group all layers (Cmd/Ctrl + G), name it “Background”, then move the layers with the DNA and one molecule outside a group.

Step 26
Now create a molecule of the first plan. Repeat steps 24-25 and position of the molecule as shown in image. Do not leave the layer with the molecule and for “Gaussian Blur” change Radius to 9.0px.


Step 27
Let’s create a depth of field for molecules. Take a Brush Tool (B) with Size: 200px, Hardness: 0%, Opacity: 40%. Remove the on filter mask of a blur effect from the illuminated parts of the molecules, but not from all.
Need a little darken molecules that are located near the edges of the image. Create a new layer (Cmd/Ctrl+ Shift + N) above the Overlay-neutral layer, set it as clipping mask (Option/Alt+ Cmd/Ctrl + G). Use Brush Tool (B) from the previous point, draw darkness as shown in image. Set Opacity for this layer to 54%

Step 28
For now work with molecules is completed and you come back to the creation of a background. Place file “chemistry_by_mariasemelevich-d7xq5kv” (File > Place (Place Embedded)) in group “Background”. Set Blending mode to “Overlay” and Opacity: 70%. To make this texture white, add adjustment layer “Invert” (Layer > New Adjustment Layer > Invert…).
8 responses to “Create This Abstract Medical Image of DNA with Photoshop”
-

no
-
It’s a good thing that some images come with what’s written… Too many mistakes from picture to writting…
Even the size of the doc is wrongly written….. That’s just poorly written Tut…. -
some pic is not found, please repair it, thank you!
-
Nice one
-
What is RMB?
-
This is the right mouse button.
-
-
thx!
I’d like to learn more same techniques) -
Arne Zou, na das ist ja was für uns.^^
Leave a Reply