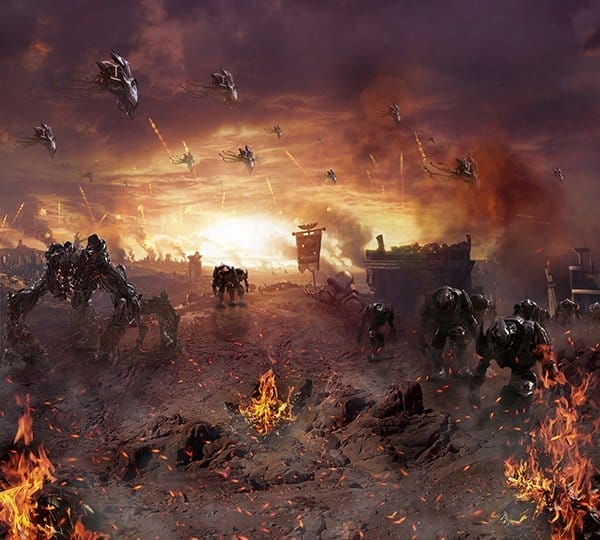
Create a fragment of an epic scene of an alien invasion! In this tutorial, I will show you how to create a realistic landscape with the effects of battle and attacking aliens. You will learn interesting techniques, tricks and much more. So battle breaks out!
We will begin this photomanipulation with a realistic landscape. Add the main image and I will tell you how to make realistic foregrounds and sky. The next step is to add the aliens and work on their realism. The third step is to add the alien wreckage. The final step I worked lighting and add a few effects. You need attention, inspiration, good mood and any version of Photoshop. Have fun!
Tutorial Resources
- Tartarus at War – cnquistador
- Sunset – LemnosExplorer
- Desert – HumbleBeez
- Blaze Package – resurgere
- Sparks – MariaSemelevich
- Shooting – MariaSemelevich
- Aliens PNG – MariaSemelevich
Step 1
Let’s get started! After opening Photoshop, create a new document. Go to File > New or the short key Cmd /Ctrl+ N. A blank document with size of 3000 pixels wide and 2698 pixels high, resolution 200 Pixels/Inch, Background Contents: Other (color #898989).

Step 2
Now I added in working document the main scene image to create perspective and atmosphere. Go to File > Place (Place Embedded) and select image “tartarus_at_war_by_cnquistador-d4ewfqq”. Flip horizontal this image (right click on image in Transform mode or Edit > Transform > Flip Horizontal). I use Free Transform tool (Ctrl/Cmd+T or Edit > Free Transform) to resize the image and place it in the top of working area, but not completely, leave a little free space in the upper part working area (for the sky).

Step 3
While I left this image and proceeded to the foreground. Place (File > Place (Place Embedded)) in working document image “desert_stock_5_by_humblebeez-d32tmun”. As with the previous picture flip it horizontal (right click on image in Transform mode or Edit > Transform > Flip Horizontal) and resize (Ctrl/Cmd+ T or Edit > Free Transform) this picture as shown in image below. Arrange the picture to the mountains overlap (were above the edge) of the main image.

Step 4
And now a very interesting step. Let’s just say, an exercise in mindfulness. In this step, we need to remove the sky, and most importantly, to make the transition from the first image for a second, but that was not visible seam. So, first select Magic Wand Tool (W) then select all sky (Hold Shift to add other colors to selection). Then Inverse selection (Select > Inverse or Cmd/Ctrl + Shift + I).
10 responses to “How to Create an Epic Scene of Alien Invasion in Photoshop”
-
boring :)
-
lol
-
hiii
-
-
Can we get the PSD thanks!
-
Great tutorial!
-
wowww amazing artwork kindly upload PSD file i am your big fan.
-
U should try it ??
U can download the app easily.. portable app -
????
-
gooddd
-
Very good!! Thank you for sharing


Leave a Reply