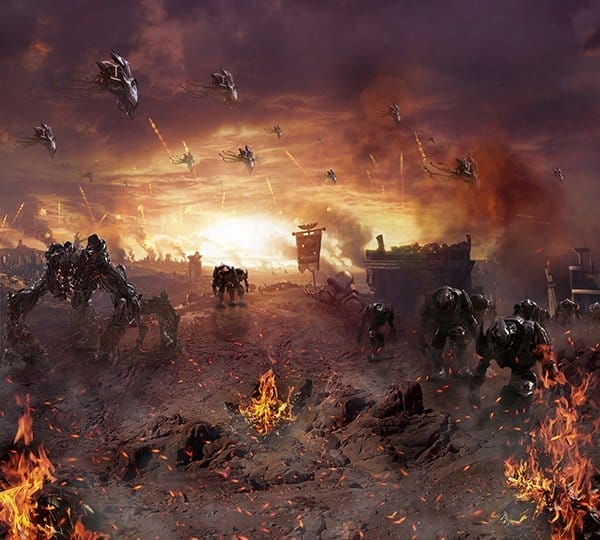
Step 31
One last adjustment layer is “Hue/Saturation”. Set Hue: -35, Saturation: -36, Lightness: -31. Now a bit of balancing the color and saturation for realism. I specifically decided to write you this color scheme if you want to add other objects and implement them in this atmosphere.

Step 32
Now add a fire. Place (File > Place) image “sidestreet-stock (5)” in folder “Package Fire_stock_by_sidestreet_stock”. Change Blending Mode to “Screen”. When you are dealing with a variety of effects (fire, fireworks, lights, etc.), or something on a black background, then most convenient method of applying this it’s change blending mode to “Screen” or “Lighten”. Change the size of the fire (Cmd/Ctrl + T), that it was not a huge fire and was proportionate to the location where you place it.

I’ll show you how to add fire and the rest fire images you can add yourself. I used fire images “sidestreet-stock (3)”, “sidestreet-stock (5)”, “sidestreet-stock (10)”, “sidestreet-stock (12)”. After end of the work with all fire images, I have merge them into one layer (Cmd/Ctrl + E) and change the Blending Mode to “Screen”. If the fire seems too bright, use the adjustment “Hue/Saturation” (Image > Adjustments > Hue/Saturation…), reduce the brightness and saturation of the layer.

Step 33
Now add the glow from the fire, so that it was realistic. I know of many techniques, but here is my version of the superposition of light. So, create a new layer and set color #e9b22d. For this layer, we need a light tone (usually I take the color from the flame using Eyedropper Tool (I) to observe the correct tone). Using Brush Tool (B) (Size: 400px, Opacity: 65%, Hardness:0%) draw near fires and debris, as shown in image below. Set for layer Opacity: 30% and Blending Mode “Overlay”.


Step 34
Now the main glowing color. Repeat previous step, but set brush color to #e6e03d and change layer Opacity to 59%. Duplicate this layer (Cmd/Ctrl + J) and set Blending Mode “Linear Burn” and Opacity: 100%.


Step 35
I darkened the fires in the foreground. I create a new layer “Fill with Overlay-neutral color (50% gray)”, (Cmd/Ctrl + Shift + N and be sure to set “Overlay” blending mode). Settings for Burn Tool (O) in step 12. A little darkened fire in the foreground, that parts of alien to not stand out.
10 responses to “How to Create an Epic Scene of Alien Invasion in Photoshop”
-
boring :)
-
lol
-
hiii
-
-
Can we get the PSD thanks!
-
Great tutorial!
-
wowww amazing artwork kindly upload PSD file i am your big fan.
-
U should try it ??
U can download the app easily.. portable app -
????
-
gooddd
-
Very good!! Thank you for sharing


Leave a Reply