
Step 21
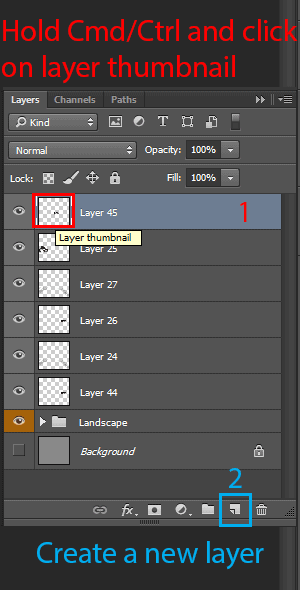
Use Free Transform tool (Ctrl/Cmd+ T) to Flip Vertical and connect shadow with alien’s legs. Select Distort Tool in transform mode and move the shadow a little closer to the alien (for pulling the mid-point of the upper horizontal frame) so that it was shorter and tilt it to match the light source (basically move the shadow slightly to the right). Change Opacity to 35%. And so it must be repeated for every alien. I understand that it is a bit tedious, but for a realistic picture of the shadows are very important.


Step 22
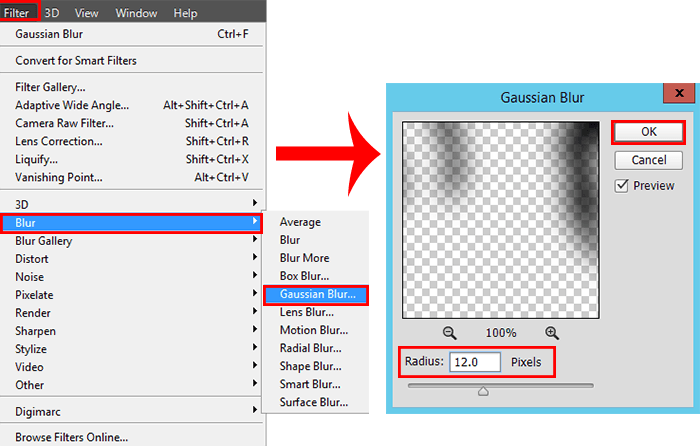
If you are satisfied with the position of shadows then combine them in a single layer (Cmd/Ctrl + E or right click on selected layers, from the drop-down list, select “Merge Layers”). Add filter Gaussian Blur (Filter > Blur > Gaussian Blur), set Radius: 15.0px. Shadows are ready! Also merge layers with aliens (Cmd/Ctrl + E) to make it convenient to work with it.

Step 23
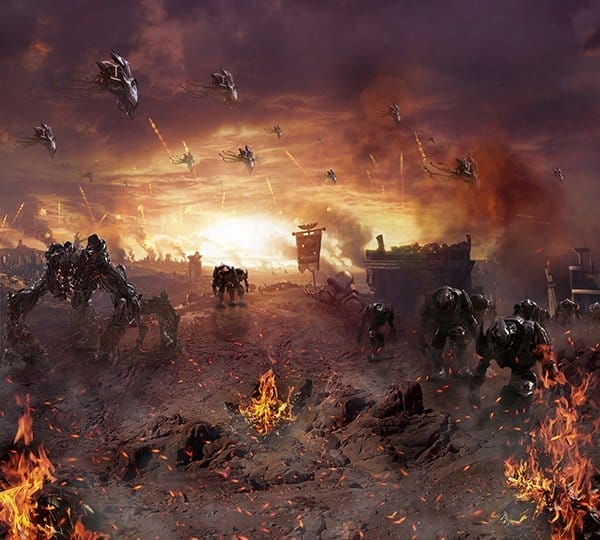
Stay flying ships of aliens. As in the previous steps select all and move flying aliens in the working document. Place them just above the missiles. Add a layer mask and use Brush tool (B) with very small Opacity: 15-30% (Size: 150px, Hardness: 0%), remove some parts to create visibility of the flight in the clouds. Try to remove the part of the ship on which the sun shines and the tentacles, because they are thin and not likely to look much clearer.

Step 24
Now with the same brush, but at a new layer draw a small haze on ships. Select colors, used Eyedropper Tool (I) from places near the ships to accurately observe the gamut. Do not paint over the ships fully or you’ll lose the realism. Make this layer as Clipping Mask (Cmd/Ctrl + Opt/Alt + G).

Step 25
It remains to add the haze on the aliens. But first, let me do a brush like smoke. I modified the standard “Per Smoke Brightness Variance” Photoshop brush. Select brush “Per Smoke Brightness Variance” and press F5 to move in Brush settings. Increase the size to 500px, set Spacing to 80% and go to “Shape Dynamics”. There do brush of different sizes (Size Jitter: 100%) and add it to the rotation (Angle Jitter: 40%). It remains to give a little volume to brush, because when use in drawing it was not linear. On tab “Scattering” set Scatter: 75% and Count: 1. Save this brush because it will need us at the end of this tutorial.
10 responses to “How to Create an Epic Scene of Alien Invasion in Photoshop”
-
boring :)
-
lol
-
hiii
-
-
Can we get the PSD thanks!
-
Great tutorial!
-
wowww amazing artwork kindly upload PSD file i am your big fan.
-
U should try it ??
U can download the app easily.. portable app -
????
-
gooddd
-
Very good!! Thank you for sharing


Leave a Reply