Download Lightroom presets and LUTs, absolutely free. Use the presets to add creativity and style to your photos.
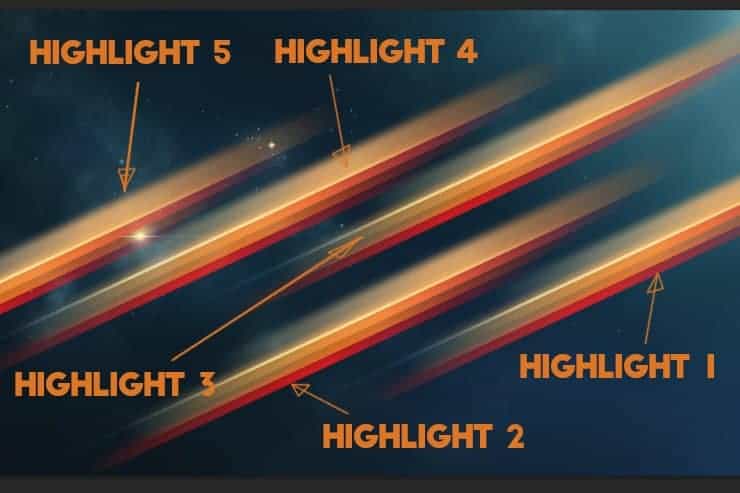
Step 18
Select the Highlight 1 Group. Press CTRL+T to activate the Free Transform tool. Scale the Highlight 1 group to 80% and set the opacity to 60%.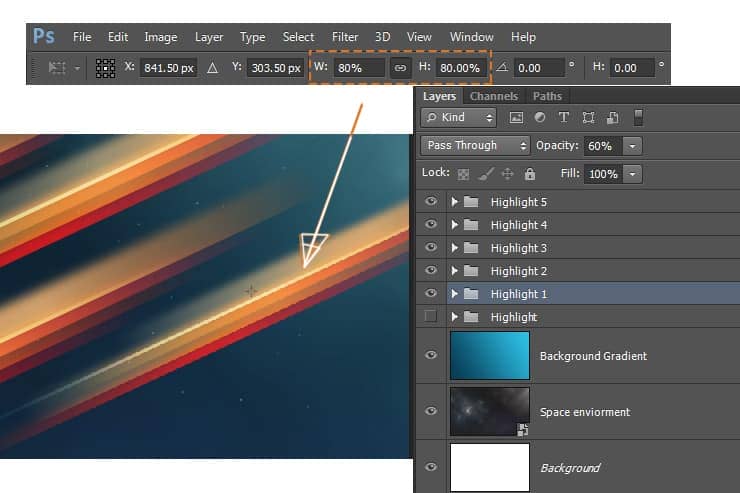
Step 19
Select Highlight 2 and Highlight 4. Set the opacity to 40%.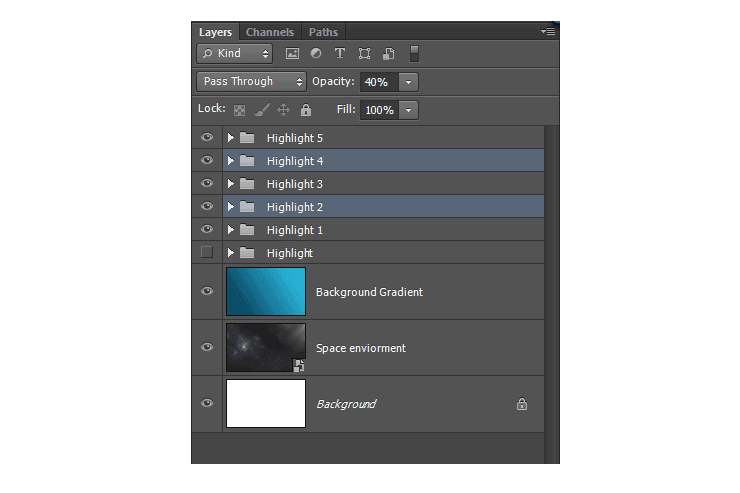
Step 20
Now open the Highlight 5 group. Select the layers Highlight 1 to Highlight 4. Set the opacity to 45%.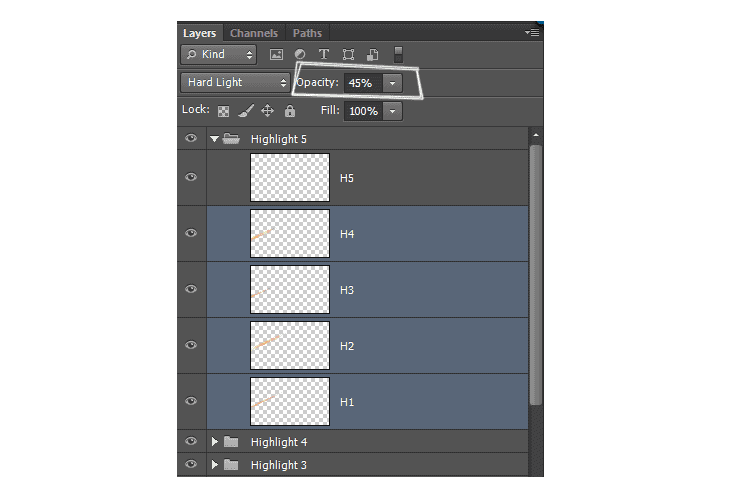
Step 21
Select the H5 layer move the layer top right in a direction the group is facing. See the image below.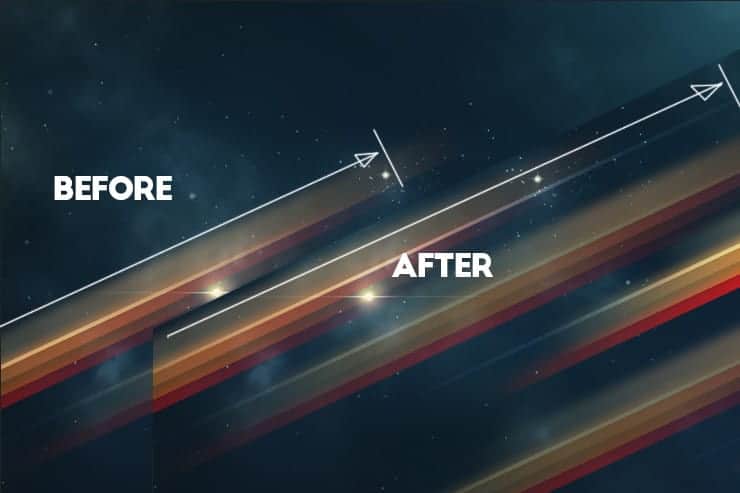

Step 22
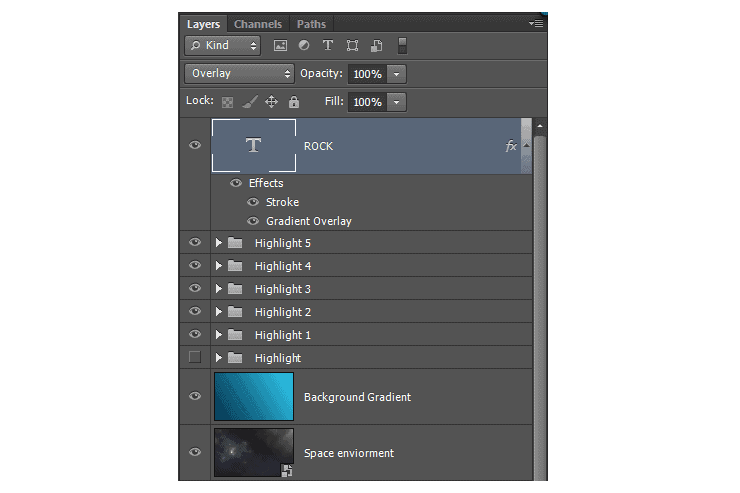
Press the T key on your keyboard to activate the Type Tool. Pick the Big John font. Set the size to 230px. Write the word ROCK and place it somewhere in the middle.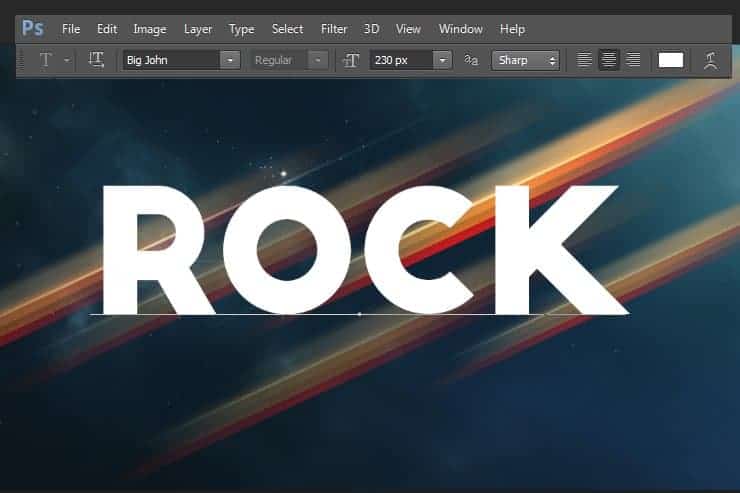
Step 23
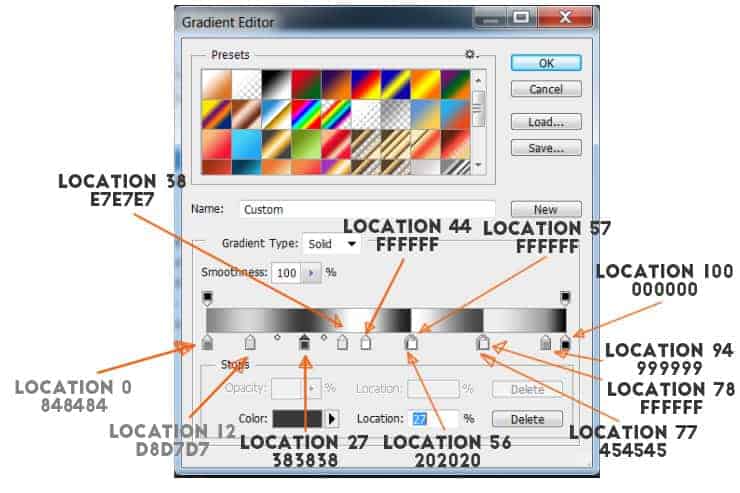
Select the Rock text. Go to Layer > Layer Style > Gradient Overlay. Blend mode should be Soft Light. Opacity 100%. Gradient Black to White. Scale of 100%.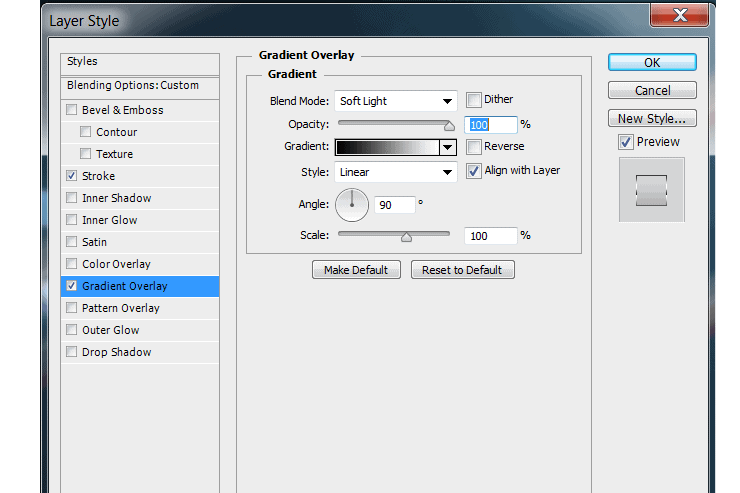

Step 24
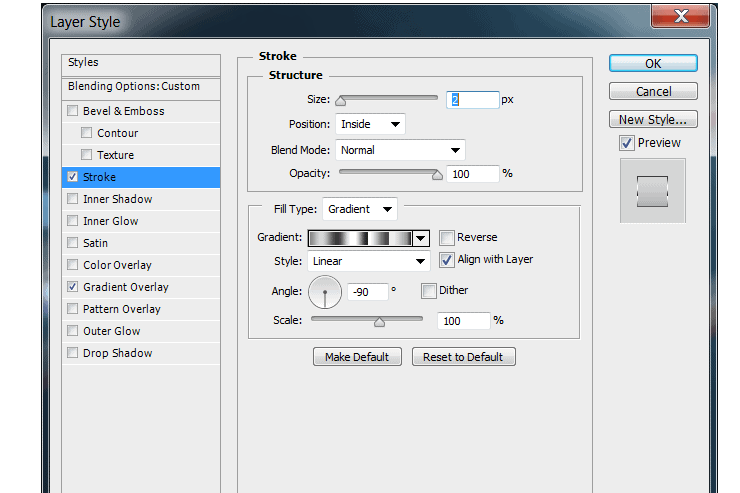
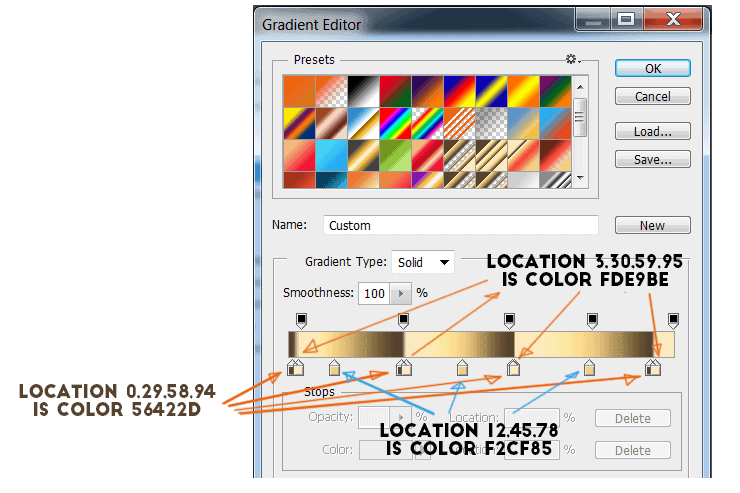
Duplicate the Rock layer and name it Rock 1. Now using the arrows keys on your keyboard, move the Rock 1 layers 7 times to the right and 7 times down. Gradient Overlay stays exactly the same as it was for Rock layer. Stroke section stays exactly the same as in Rock layer. We only have to change the gradient. Go to Layer > Layer Style > Stroke. Open the gradient editor.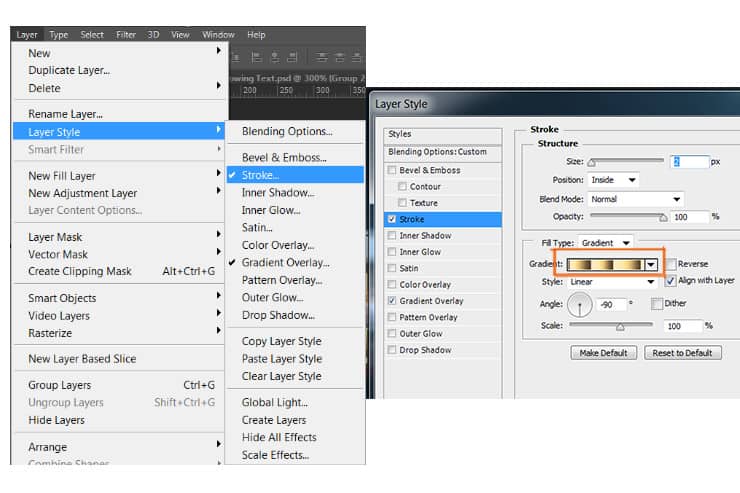
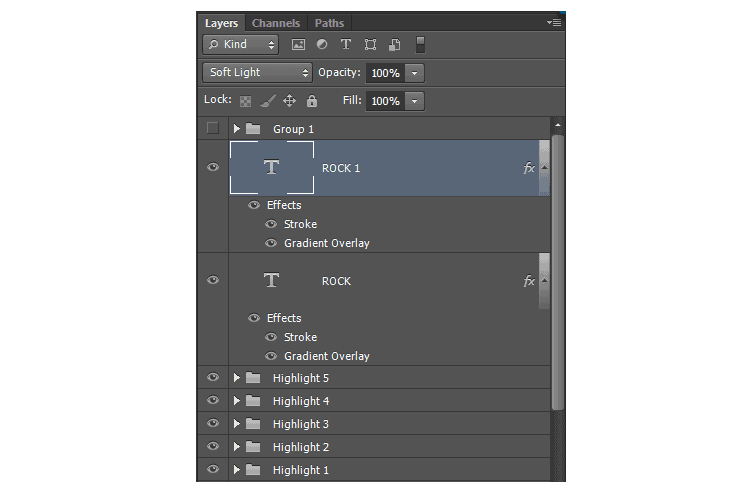

Step 25
Select the Rock 1 layer and Duplicate it. Rename the layer Rock 2.Make sure you have the Rock 2 layer selected. Now using the arrow keys on your keyboard, move the Rock 2 layer 11 times to the left and 11 times up. Go to Layer > Layer Style > Stroke. Change the Opacity of the Gradient to 50% and press OK.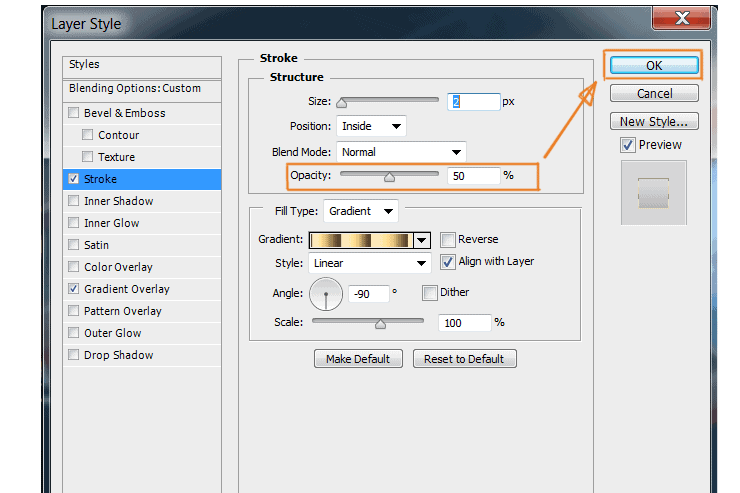

Step 26
Go to Layer > New > Layer ( or CTRL+Shift+N ). Name it Block Line and place it right on top of Highlight 5 and below Rock.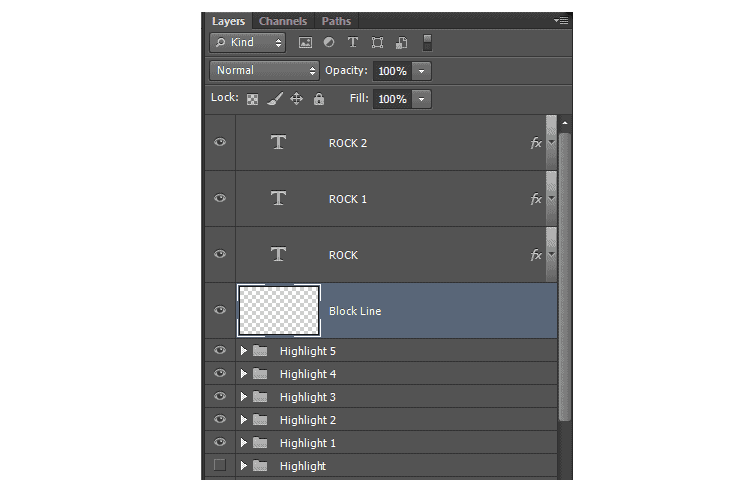


10 comments on “Create a Space Flate Text Effect in Photoshop”
the images are broken all time when I open this page
Fixed! Thanks
How to download background image ?
Thank you for the great tutorial. I made the front of my bdaycard :D
http://prntscr.com/88h4fb
Not bad,not bad at all.
verry good tutorial! Well done!
It's nice!
how to create this text???
Simply follow the tutorial. If you are stuck at some of the steps just let me know which one is it and ill try to help you
You are so lame, read the instructions instead of commenting first.