

Step 8
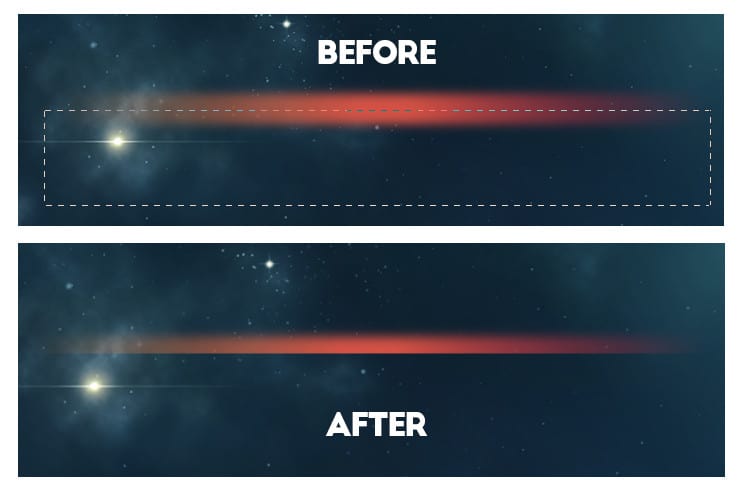
Create a new layer. Go to Layer > New > Layer ( or press CTRL+ SHIFT+N ). Name it H1 and press OK. Now press the M key on your keyboard to activate the Rectangular Marquee Tool. Make a rectangle that has 300px in width and 30px in height. Press the G key on your keyboard to activate the Gradient tool. Open the gradient editor and create a gradient as it is shown in the image below. Now drag the gradient to fill the shape.In the end, press CTRL+D to deselect the shape.
Step 9
Make sure you have the H1 layer selected. Go to Filter > Blur > Gaussian Blur. Set the Radius to be 5px and press OK.


Step 10
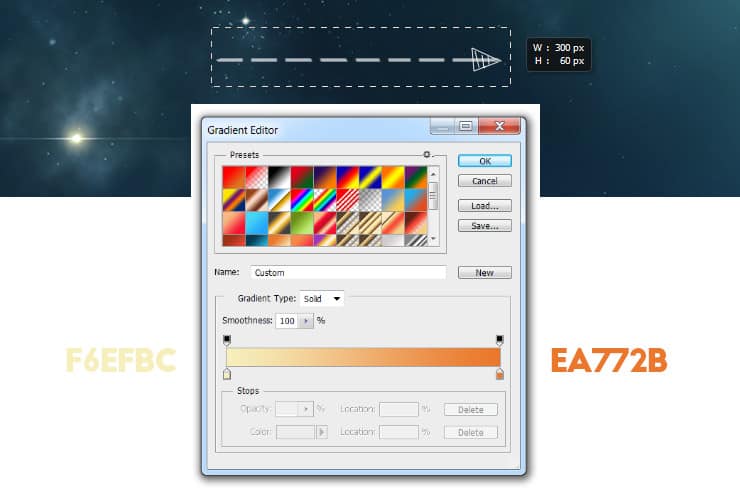
Create a new layer. Go to Layer > New > Layer ( or press CTRL+ SHIFT+N ). Name it H2 and press OK. Now press the M key on your keyboard to activate the Rectangular Marquee Tool. Make a rectangle that has 300px in width and 60px in height. Press the G key on your keyboard to activate the Gradient tool. Open the gradient editor and create a gradient as it is shown in the image below. Now drag the gradient to fill the shape. In the end, press CTRL+D to deselect the shape.
Step 11
Repeat Step 9 for H2 Layer ( make sure to do exactly the same we did for H1 layer in step 9 ). The result is shown in the image below.
Step 12
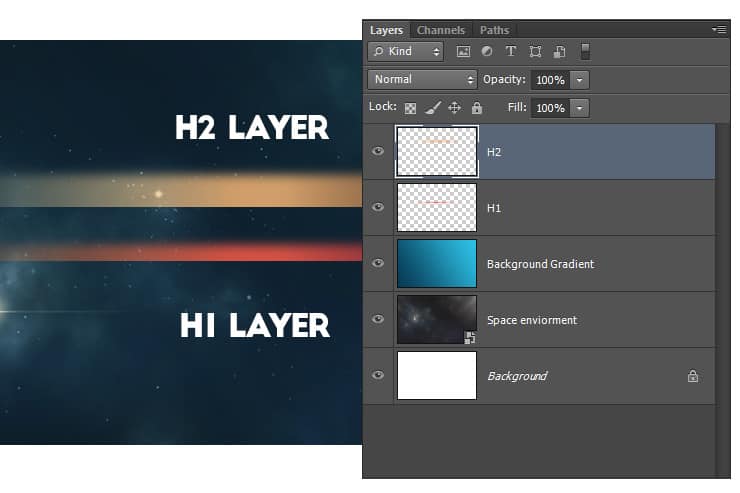
Now lets position the H1 and H2 layer. They need to be close to each other. H1 layer will be moved more to the left and H2 more to the right. In the image below you can see how they are positioned. The 2 layers need to slightly touch but not a lot.10 responses to “Create a Space Flate Text Effect in Photoshop”
-
the images are broken all time when I open this page
-
Fixed! Thanks
-
-
How to download background image ?
-
Thank you for the great tutorial. I made the front of my bdaycard :D
http://prntscr.com/88h4fb-
Not bad,not bad at all.
-
-
verry good tutorial! Well done!
-
It’s nice!
-
how to create this text???
-
Simply follow the tutorial. If you are stuck at some of the steps just let me know which one is it and ill try to help you
-
You are so lame, read the instructions instead of commenting first.
-


Leave a Reply