- Click the Add New Layer button at the bottom of the Layers panel.
- With the new layer active, click the lock position button at the top of the Layers panel to keep the new layer aligned with the Background layer.
- In the Options bar for the Clone Stamp tool, set the Sample menu to Current & Below to copy detail from the underlying layer and place it on the new layer.
Define a sample area, and brush new detail over the object
- With the Clone Stamp tool selected, Alt-click (Windows) or Option-click (MacOS) an area of detail to set the sample point. A preview inside the Clone Stamp pointer shows the detail you will use for the retouching. The preview is useful for aligning sampled detail with other parts of the image.
- Brush over the area where you want to add the sampled detail to cover an object. As you work, a crosshair indicates where the detail is copied from.
Inspect the results to check for repeating detail
Removing objects with the Clone Stamp tool can sometimes result in detail from the sampled area repeated where you used the tool.
- Use the Clone Stamp tool with a smaller brush size to cover up obvious, repeating details.


Create a new layer and repeat the same process

Step 7
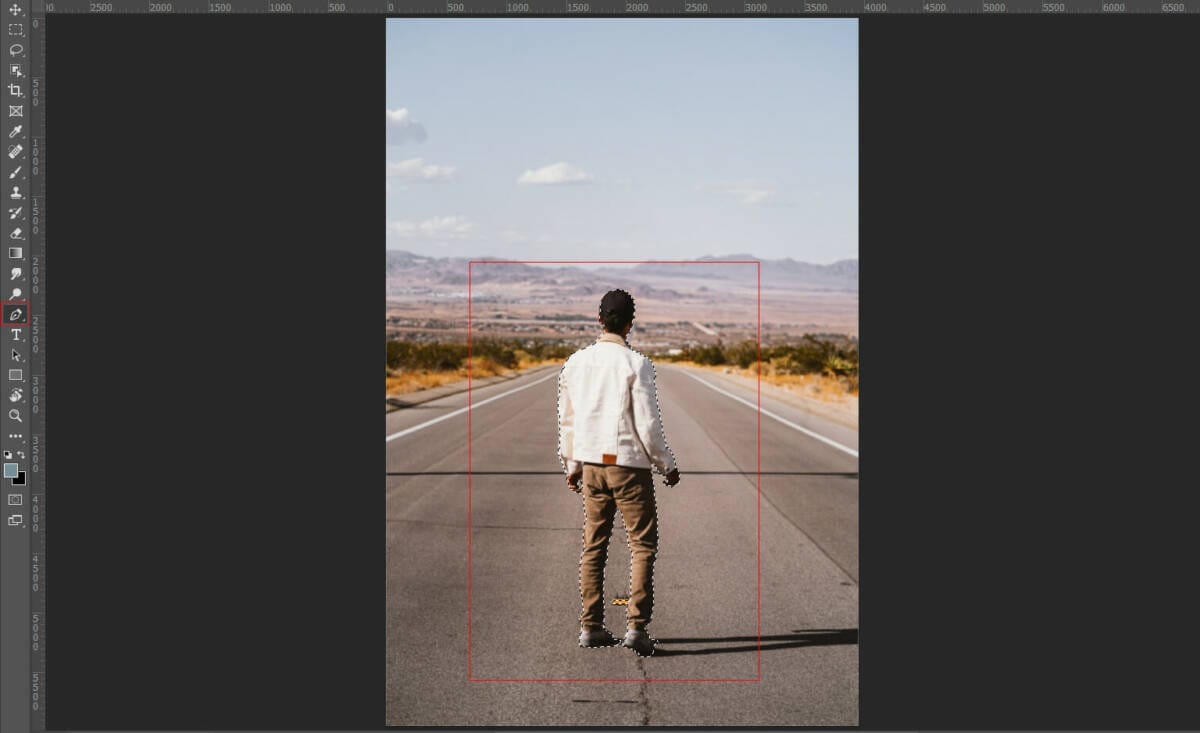
Now, go to File > Open and select Man. Then use a Pen Tool(P) and start selecting. When we finish the selection press right-click on mouse and “Make Selection” then create a layer mask. The simplest path you can draw with the standard Pen tool is a straight line, made by clicking the Pen tool to create two anchor points. By continuing to click, you create a path made of straight line segments connected by corner points.
- Select the Pen tool.
- Position the Pen tool where you want the straight segment to begin, and click to define the first anchor point (do not drag).
- Click again where you want the segment to end
- Continue clicking to set anchor points for additional straight segments.
- The last anchor point you add always appears as a solid square, indicating that it is selected. Previously defined anchor points become hollow, and deselected, as you add more anchor points
- Complete the path by doing one of the following:
- To close the path, position the Pen tool over the first (hollow) anchor point. A small circle appears next to the Pen tool pointer
 when it is positioned correctly. Click or drag to close the path.
 - To leave the path open, Ctrl-click (Windows) or Command-click (Mac OS) anywhere away from all objects. To leave the path open, you can also select a different tool.


Step 8
Add Adjustment Layer “Levels”

Step 9
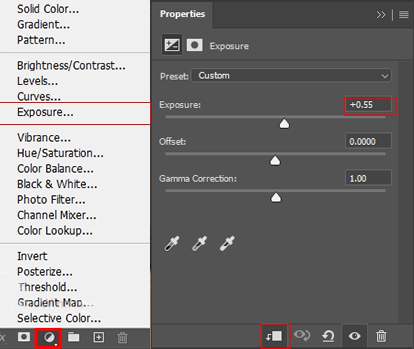
Add Adjustment Layer “Exposure”

Step 10
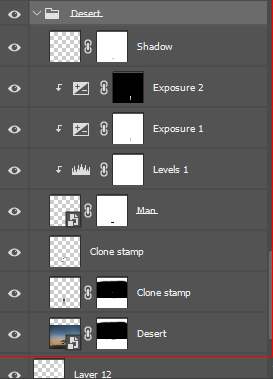
Add Adjustment Layer “Exposure” and press Ctrl/Cmd + I to invert and use Brush Tool(B) Soft Round with foreground color white and paint the right side on man.


Step 11
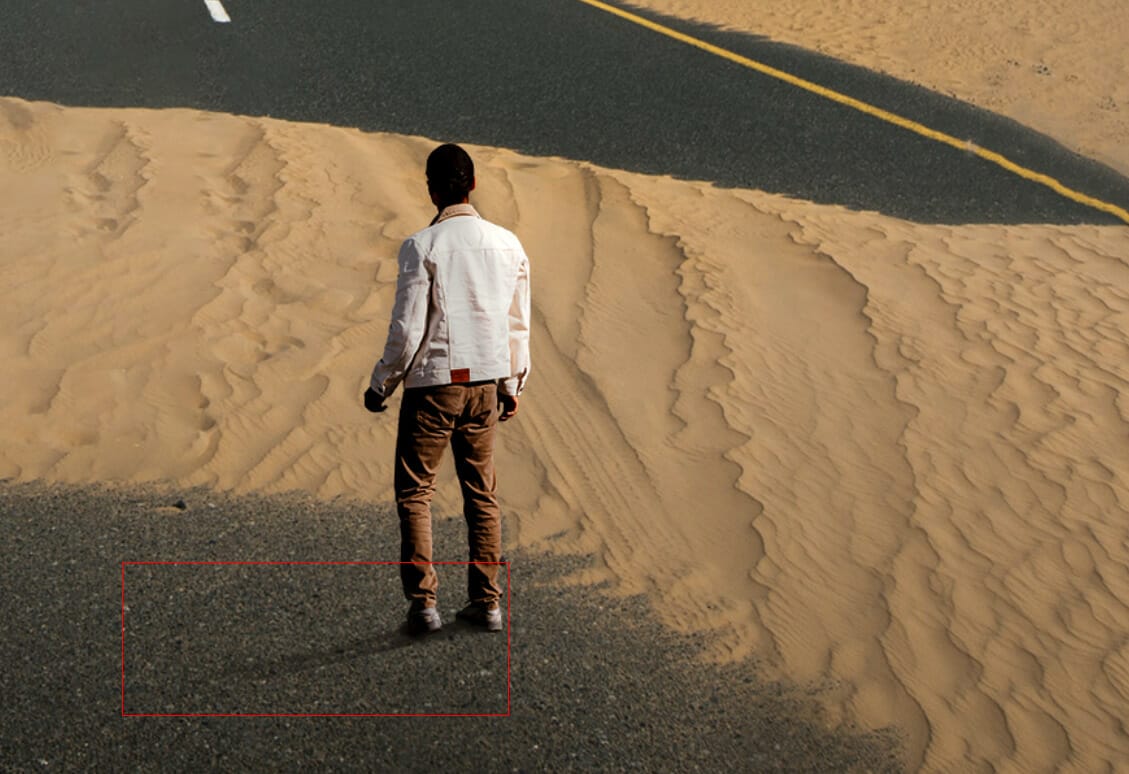
Now let’s paint shadow. Create a new layer and use a soft round brush tool (B) with the foreground color black. The flow of brush set to 10% and let’s start painting.


Press Ctrl/Cmd and with left-click on the mouse select layers from Desert to shadow and put in the folder (Ctrl/Cmd + G).

Step 12
Add Adjustment Layer “Color Balance”

Step 13
Add Adjustment Layer “Curves” Opacity set to 90%.

Step 14
Add Adjustment Layer “Curves” and press Ctrl/Cmd + I to invert and use Brush Tool(B) Soft Round with foreground color white and paint the right side. Opacity set to 80%.


Step 15
Add Adjustment Layer “Curves” and press Ctrl/Cmd + I to invert and use Brush Tool(B) Soft Round with foreground color white and paint the left side.


Step 16
Next, we will open Balloons and after you open the image, use the Quick Selection Tool(W) and start selecting the balloons. After the selection area has been created, simply copy (Ctrl / Cmd + C) and Paste (Ctrl / Cmd + V) it to our work canvas. Then position the image with the transform tool (Ctrl / Cmd + T). Hold Alt + Shift and resterize like the image below. In Photoshop CC only hold Alt to resterize al sides together. Make a selection with the Quick Selection tool Select the Quick Selection tool in the Tools panel. Add a checkmark to the Auto-Enhance option in the Options bar. Click and drag over an area you want to select. The tool automatically selects similar tones and stops when it finds image edges. Add to the selection To add to the initial selection, just click and drag over another area. The Quick Selection tool automatically changes to the Add to selection option. Subtract from the selection To subtract from the initial selection, press the Option key (macOS) or Alt key (Windows) as you select an area you want to remove from the selection. When you release the Option or Alt key, the Quick Selection tool switches back to its Add to selection option.
One response to “Create a Desert City Photo Manipulation”
-
The original desert photo’s lines on the road make the image look funny. I would have lessened the intensity of the right yellow line and the white middle lines to make a more complete photo. Also the person is tiny compared to the road and there’s no sand/dust in the foreground making the image look more fake. I understand the image has to be as raw as possible for the article but if you put a polished final with the little details people would appreciate that more. Because that’s the artistic touch that kind of needs to be taught. What separates a B+ and an A+.


Leave a Reply