Easily create a double exposure effect in Photoshop that will make people look twice. In this tutorial, you’ll learn how to cut out objects quickly, blend textures, and color grade the final results.
Preview of Final Results

Tutorial Resources
- Silhouette Portrait – Unsplash
- Forest – Unsplash
Step 1
Open the silhouette portrait photo in Photoshop. You can use your own photo but for best results, we recommend a backlit photo with a dark foreground and bright (nearly white) background.

Step 2
Place the photo of the forest (or use your own texture). You can place photos by dragging and dropping them into Photoshop or by going to File > Place.
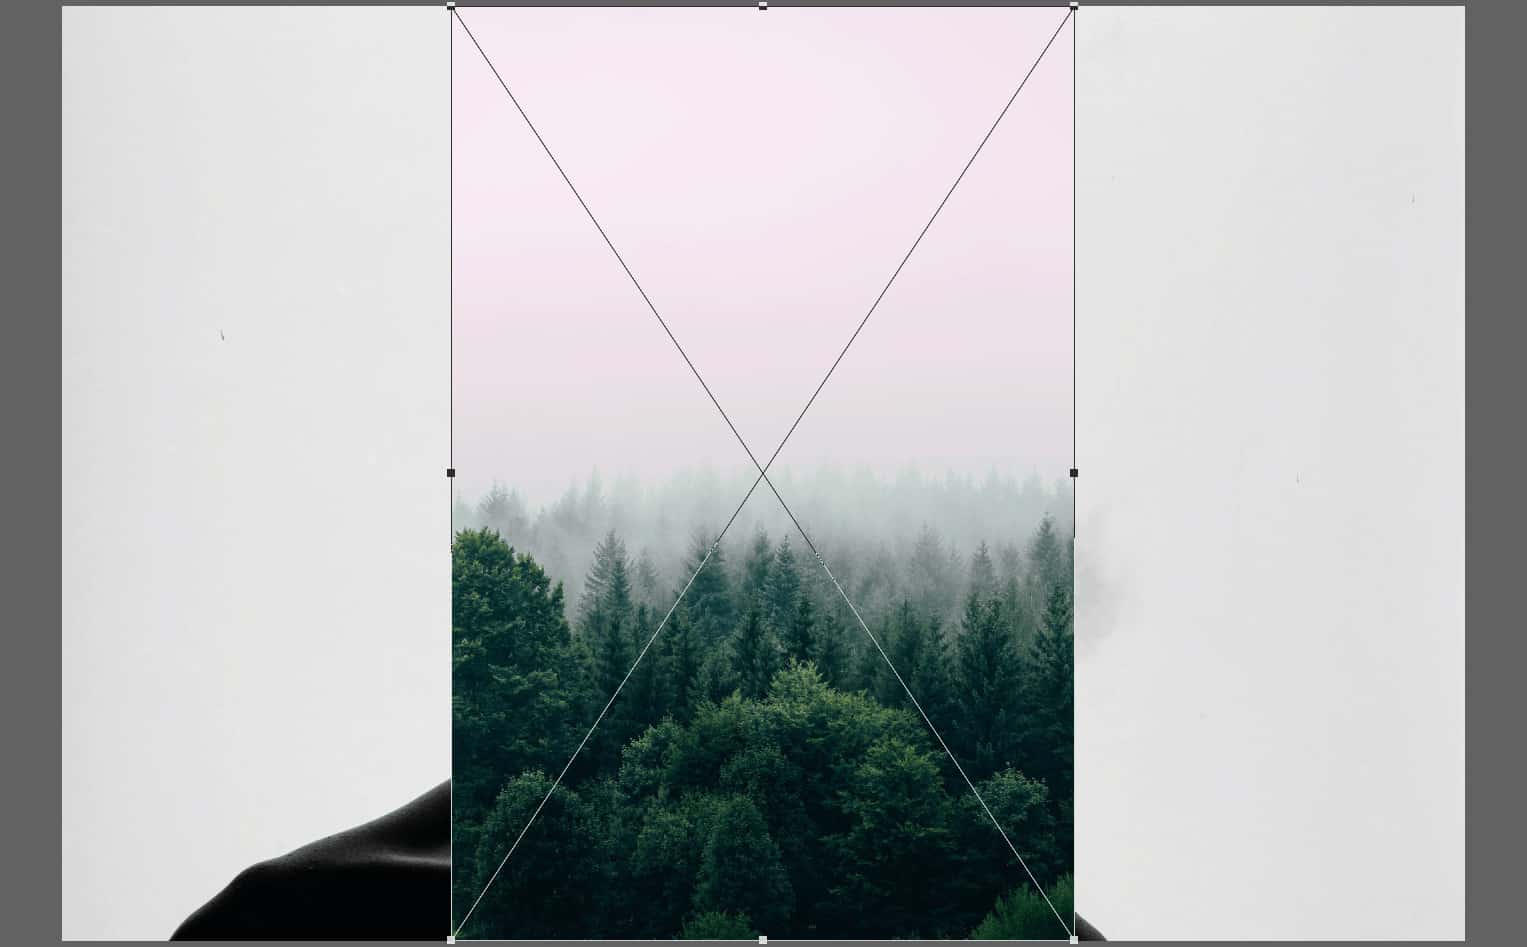
Before you start transforming the photo, change the blending mode to screen.

Scale and position the texture. Press Enter to apply the transformation.
Note: If you need to transform the image again, you can activate the Transform tool by pressing Ctrl/Cmd+T or by going to Edit > Free Transform.

Step 3
Now let’s work on the silhouette layer. Before we do anything, right-click on the layer and select Convert to Smart Object.
Doing this will let us edit the layer nondestructively in case we need to change any settings. More on this later.

Step 4
Open the Levels tool by pressing Ctrl/Cmd+L or by going to Image > Adjustments > Levels.

In the chart, drag the white input slider towards the left until the background is pure white.
You can also drag the black input slider towards the right to increase the contrast, but for our photo it isn’t needed.

Finally, adjust the middle gray input slider to fine-tune the opacity of your silhouette. For our photo, we’ll be dragging it towards the left to increase the silhouette’s visibility.

Step 5
Now let’s adjust the tones. Go to the Adjustments panel (Window > Adjustments) and add a Curves adjustment layer.

In the Layers panel, move this layer to the top if it isn’t already.

In the Properties panel (Window > Properties), you’ll see a graph with a line. Drag the top-right point downwards to drop the whites until it’s slightly gray.

Click in the middle of the line to add a point. Then, click about 1/4 from the left of the line to add another point. Drag this point down to increase the contrast or up to lower the contrast.
2 responses to “How to Create a Double Exposure Effect in Photoshop”
-

If my starting image does not look like the one in step 1 where it is dark, what can I do to turn my normal photo into one that looks like it’s backlit?
-
good
Leave a Reply to AnonymousCancel reply