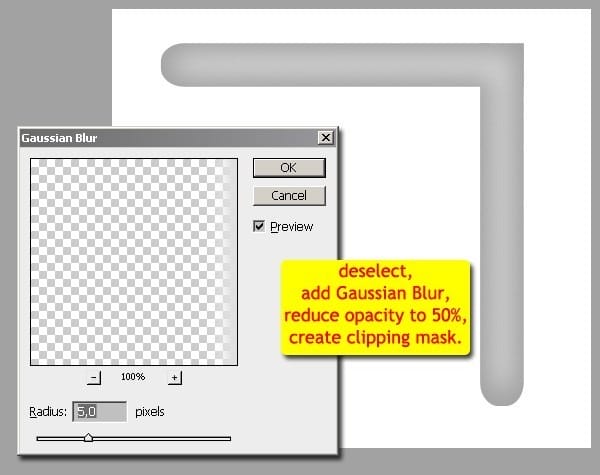
Step 11 – Rotating -45º
Select both layers at once (“highlight” and “shape 1”). Press “Cmd/Ctrl + T” and rotate -45º. Use “Shift” for easier rotating.
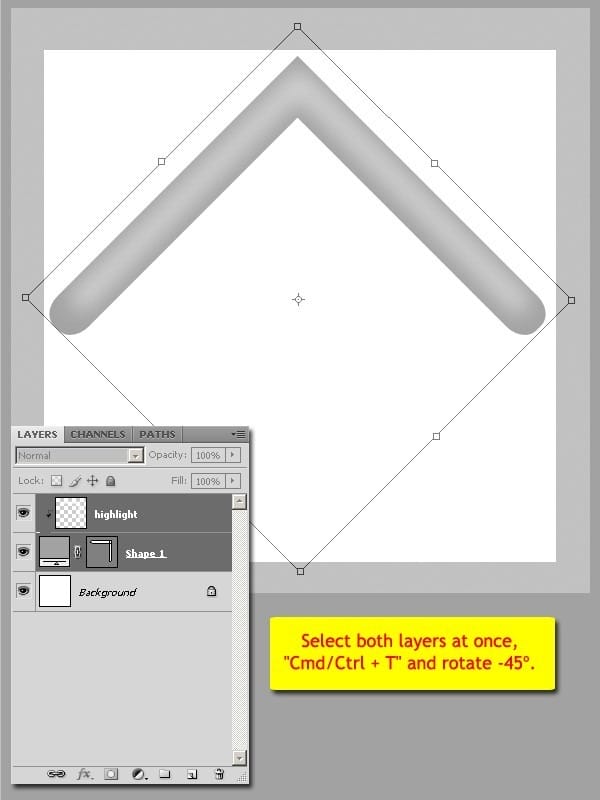
Step 12 – Adding Layer Style.
Add layer style onto shape layer.
Inner Shadow
- Blend Mode : Multiply
- Set the shadow color to #515252
- Opacity : 100%
- Angle : 90º
- Distance : 5 px
- Choke : 0%
- Size : 10 px
Bevel An Emboss
- Style : Inner Bevel
- Technique : Smooth
- Depth : 100%
- Direction : Up
- Size : 24 px
- Soften : 16 px
- Shadow Mode : Multiply
- Set the shadow color to #515252
- Shadow opacity : 100%

Step 13 – Creating Shape Again.
With Rectangle Tool, create shape above background. And the color setting is #677479. And don’t forget to use “Shift” to make a square rectangle.
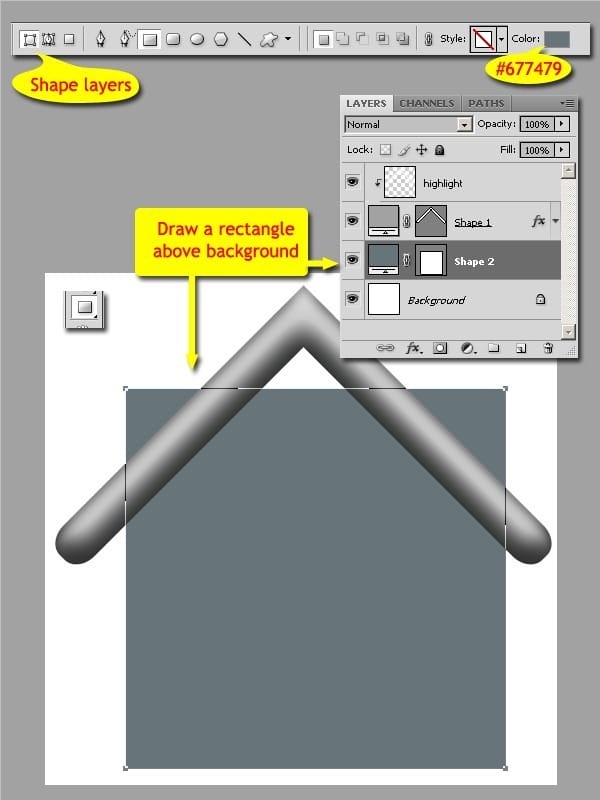
Step 14 – Rotating, Scaling and Placing.
Rotate the new shape, scale and place it proportionally.

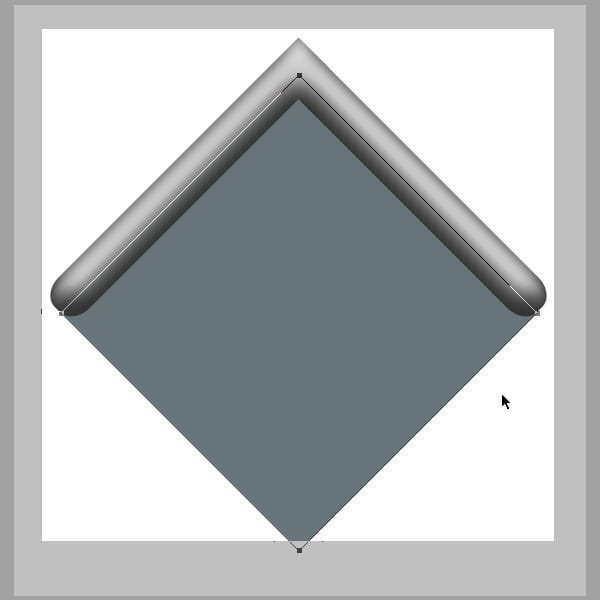
We’re going to edit this new shape for completing “roof”, but it’s better to create front side first in order to get pola for editing.
Step 15 – Grouping.
Group these layers by select them and press “Cmd/Ctrl + G”. Give name “roof” to this group.
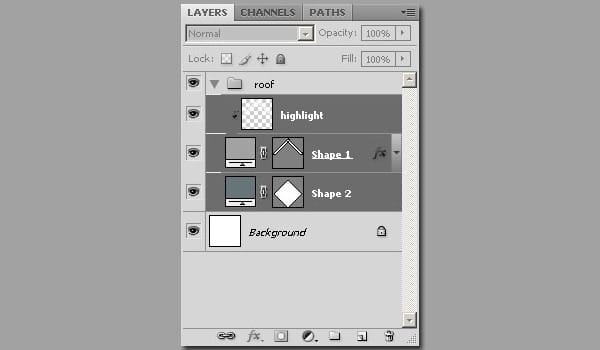
Step 16 – Drawing Path For Front Side.
Hide the “shape 2” layer by clicking eye icon. Then using rectangle tool, draw a rectangle outside the group, above the “Background” layer. Shown below.
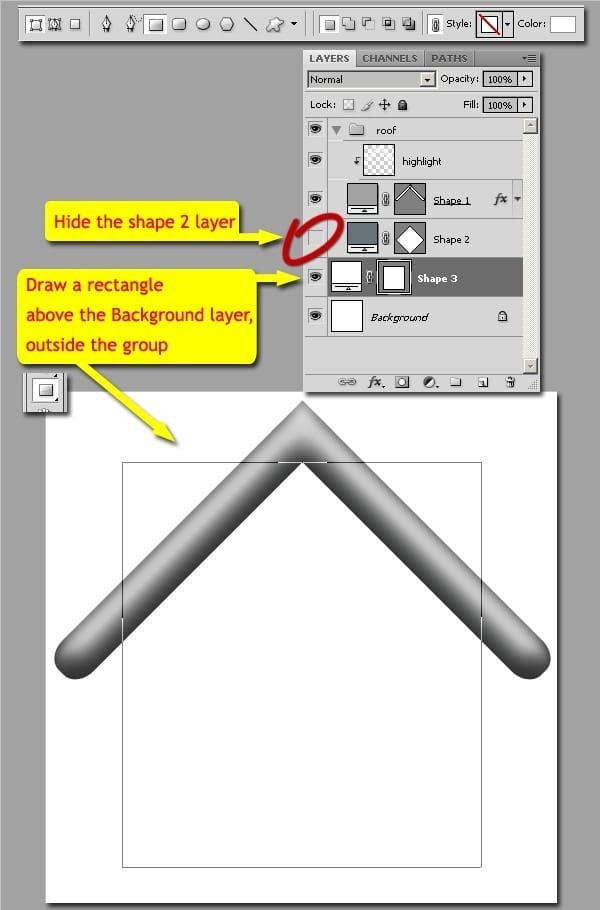
Note : while drawing, hold the spacebar key in order to be able to place path in center by dragging mouse.
Step 17 – Modifying Path – Add Anchor Points.
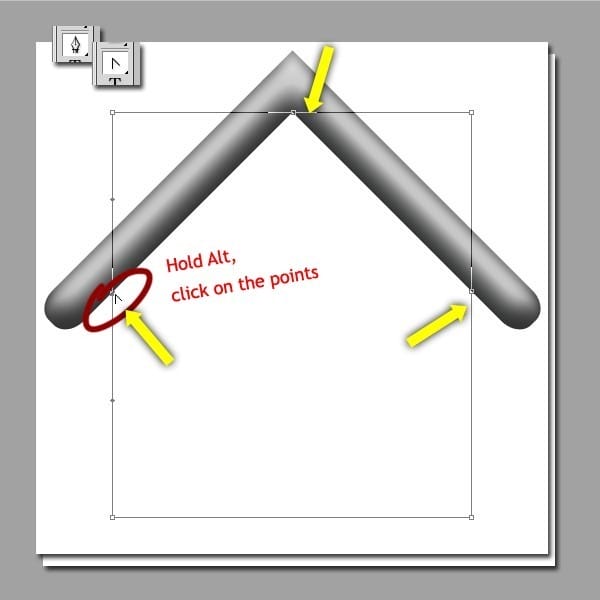
Using Pen Tool with “Auto Add/Delete, add anchor points on three places below. The pointer will automatic changed to Add Anchor Point Tool when brought nearer to path.

Step 18 – Modifying Path – Converting Points.
While Pen Tool still active, hold down the “Alt” key, pointer will be changed to Convert Point Tool. Click the anchor points we’ve just already created.
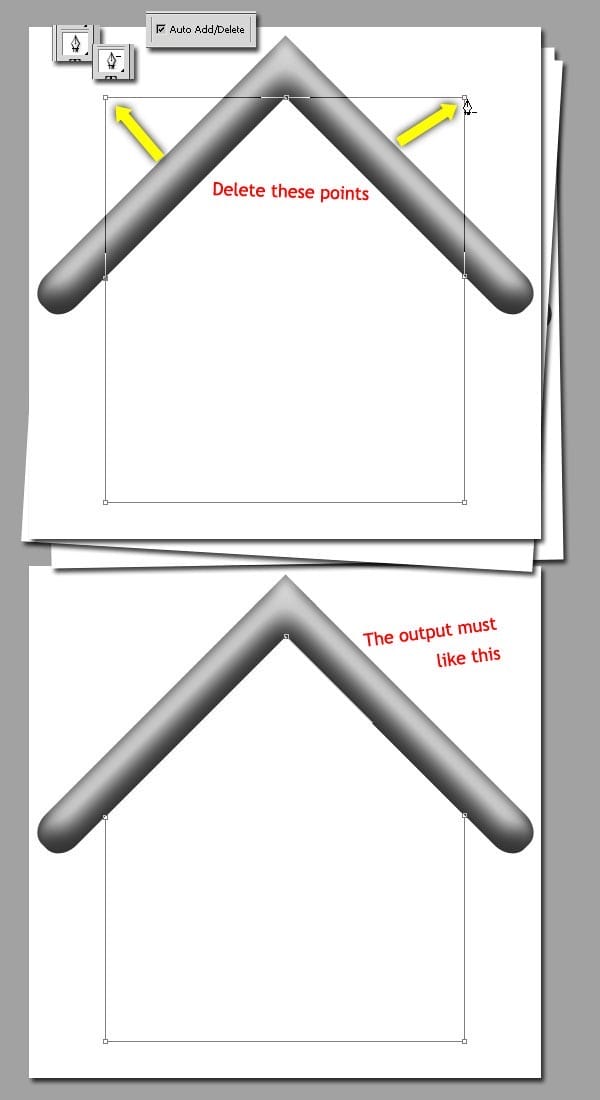
Step 19 – Modifying Path – Deleting Unnecessary Points.
There are two unnecessary points wich must be deleted. Use Pen Tool with “Auto Add/Delete”. The pointer will automatic changed to Delete Anchor Point Tool when brought nearer to anchor point.
Step 20 – Adding Layer Style.
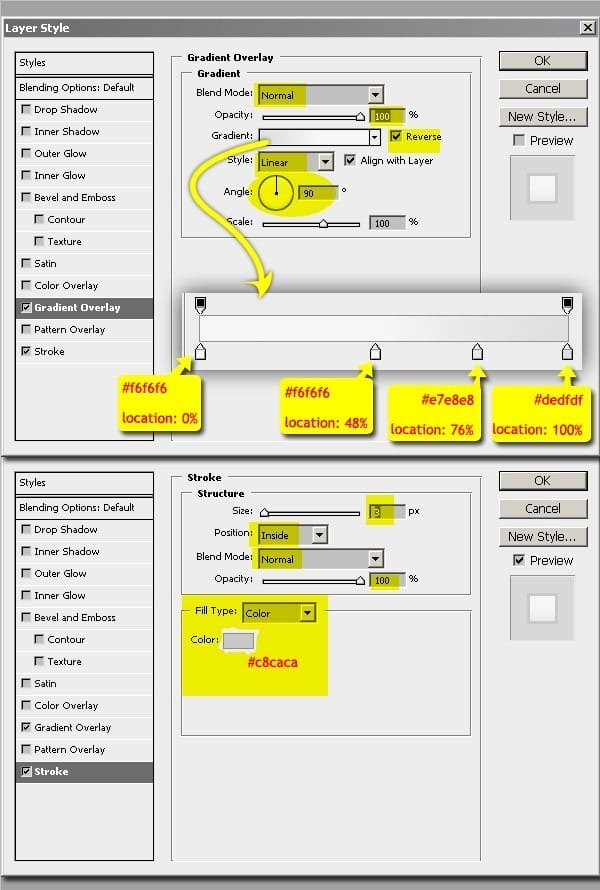
Add layer style with following parameters.
Gradient Overlay
- Blend Mode : Normal
- Opacity : 100%
- Angle : 90º
- Style : Linear
- Scale : 100 px
- Custom Gradient with following stops:
- #f6f6f6 on location 0%
- #f6f6f6 on location 48%
- #e7e8e8 on location 76%
- #dedfdf on location 100%
Stroke
- Size : 3 px
- Position : inside
- Blend Mode : Normal
- Opacity : 100%
- Fill Type : Color
- Set the stroke color to #c8caca
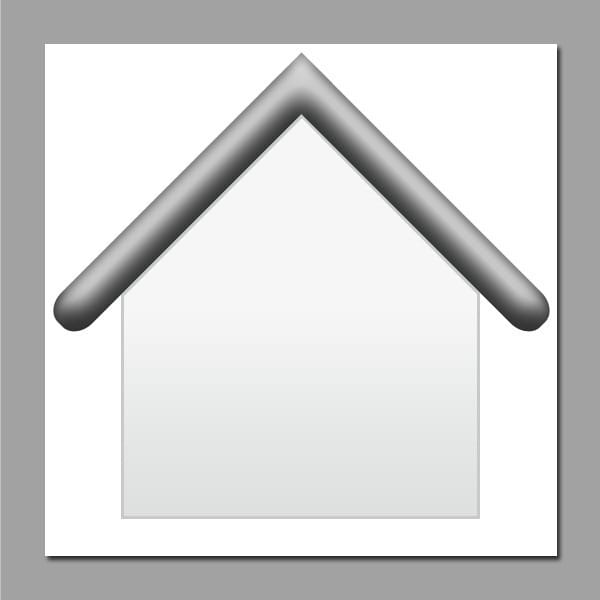
After layer style added, our image should look like this:
Step 21 – Back to Roof – Duplicating Path.
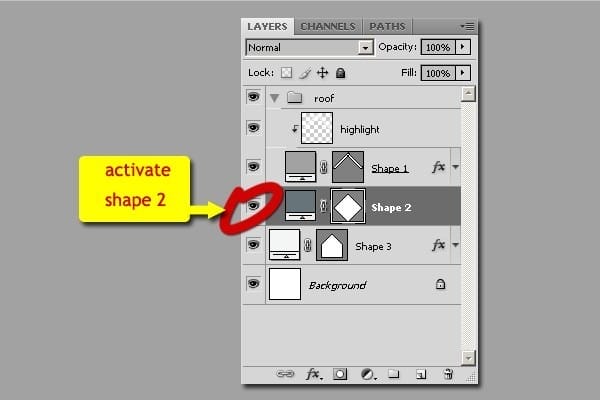
Activate shape 2. We will edit it.
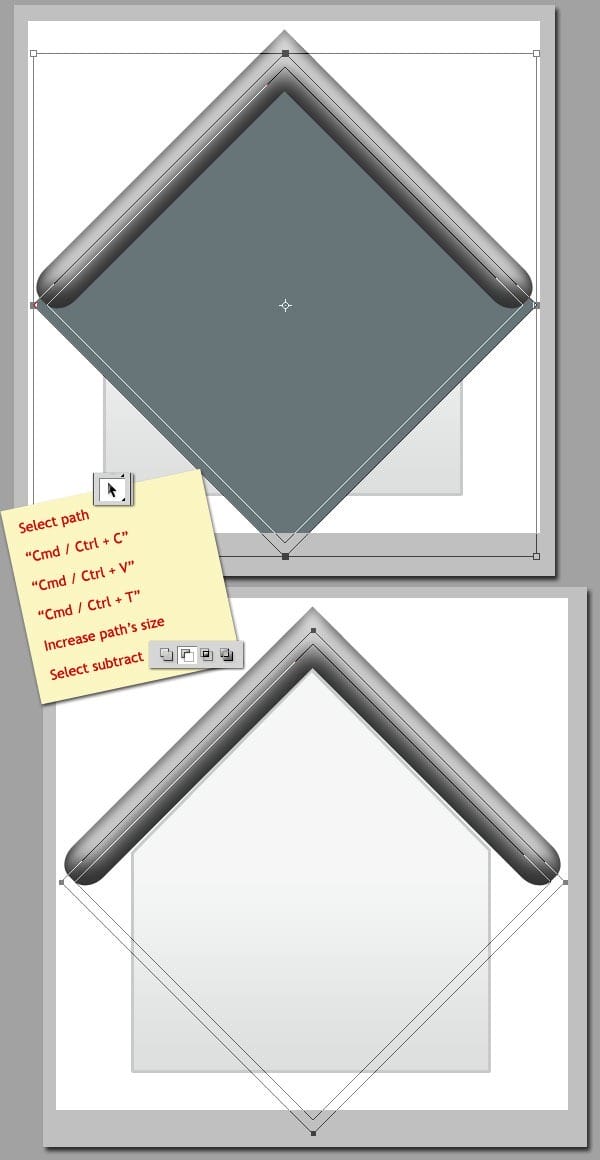
To duplicate the path, use Path Selection Tool. Select Path. Copy the path with “Cmd / Ctrl + C” and paste the path with “Cmd / Ctrl + V”. And then resize the path, “Cmd / Ctrl + T”, make the path copy bigger than original path. After that, on the option bar, select “subtract from shape area”.
Step 22 – Modifying Path – Creating Guide.
To get easier way to edit this path, we will use guide. Use menu View > New Guide…
Orientation : Vertical
Position : Just set to 1 in, we will change it later.
After the new guide has been already created, move it snap to shape 3. Then create new guide again and move it snap to the other side of shape 3.
One response to “Create a Mac Style Home Icon in Photoshop”
-
Hi, I am currently constructing a Christian based website. I was wondering if I could use the Mac Style Home Icon image on my site?
Thank you


Leave a Reply