Hello photoshoppers! We occasionally need a home icon for our design project. Commonly, a designer draw with Illustrator, but this time let’s create a mac style home icon with Photoshop. The techniques used will be about making shape and playing with layer style. It’s not difficult to make this sweet icon. I hope you will get inspiration after following this tutorial.
Preview of Final Results

Download the PSD
Mac Home Icon.zip | 0.21 MB
Mac Style Home Icon Photoshop Tutorials
Tutorial Details
- Program: Adobe Photoshop CS4
- Difficulty: Beginner – Intermediate
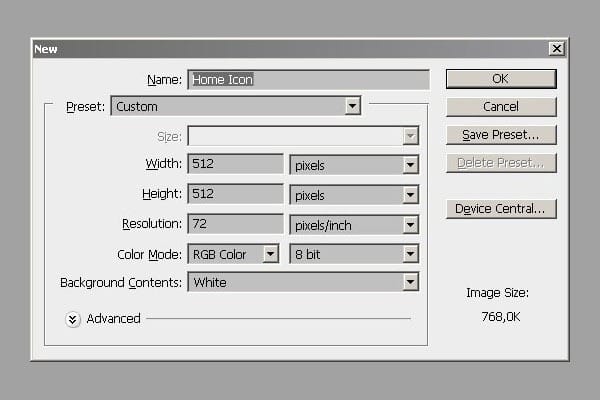
Step 1 – Creating New Document.
Create a new document (Cmd/Ctrl +N) with these setting:.
Step 2 – Creating Shape For Roof.
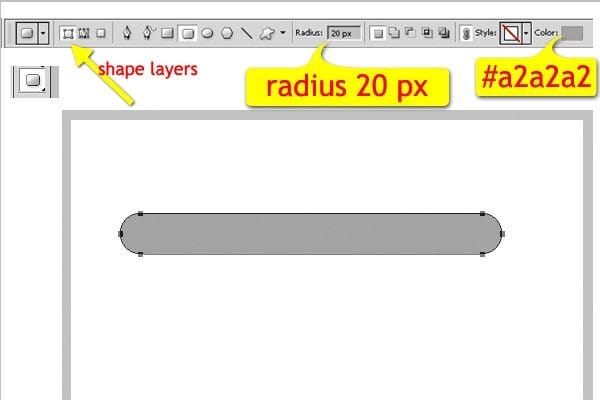
Activate rounded rectangle tool . On the option bar, set to shape layer, with 20 px radius, set color to #a2a2a2. Create a shape.
Step 3 – Modifying Path.
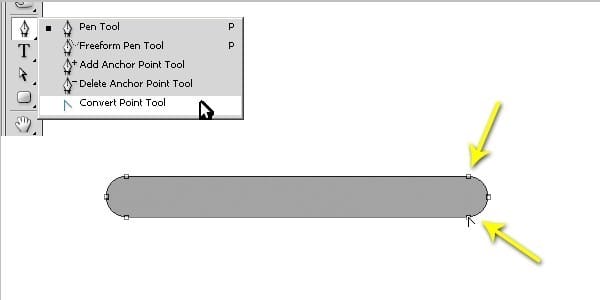
Activate Convert Point Tool. And click on these points shown below to convert them into angles.
Step 4 – Modifying Path Again.
With pen tool and its “Auto Add/Delete”, delete the anchor points below.
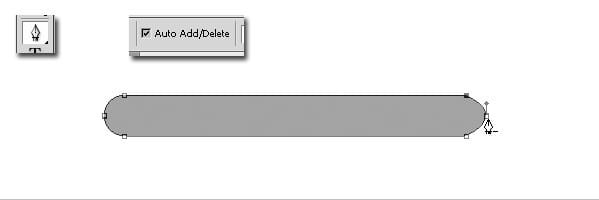
Look at this. There are two points we have to delete.
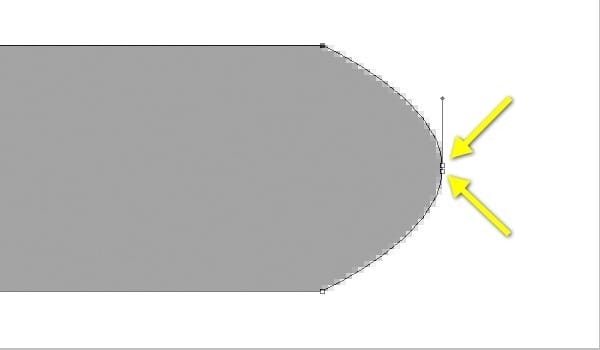
And our image should like this.

Step 5 – Duplicating Path.
Use “Ctrl/Cmd + C” to copy path, then paste path “Ctrl/Cmd + V”.
Now we have two path in one layer. And then we’ll make them into a 90 degree angle. Use “Ctrl/Cmd + T”, and move the center of transform control to top right corner.
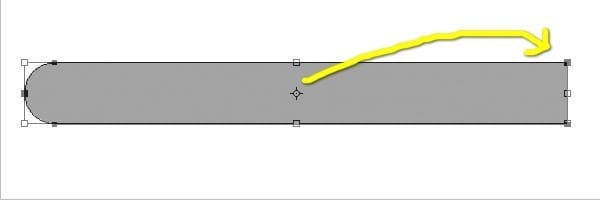
Rotate it 90º CCW, press enter to apply. Activate Path Selection Tool (A), nudge the path to left like this.
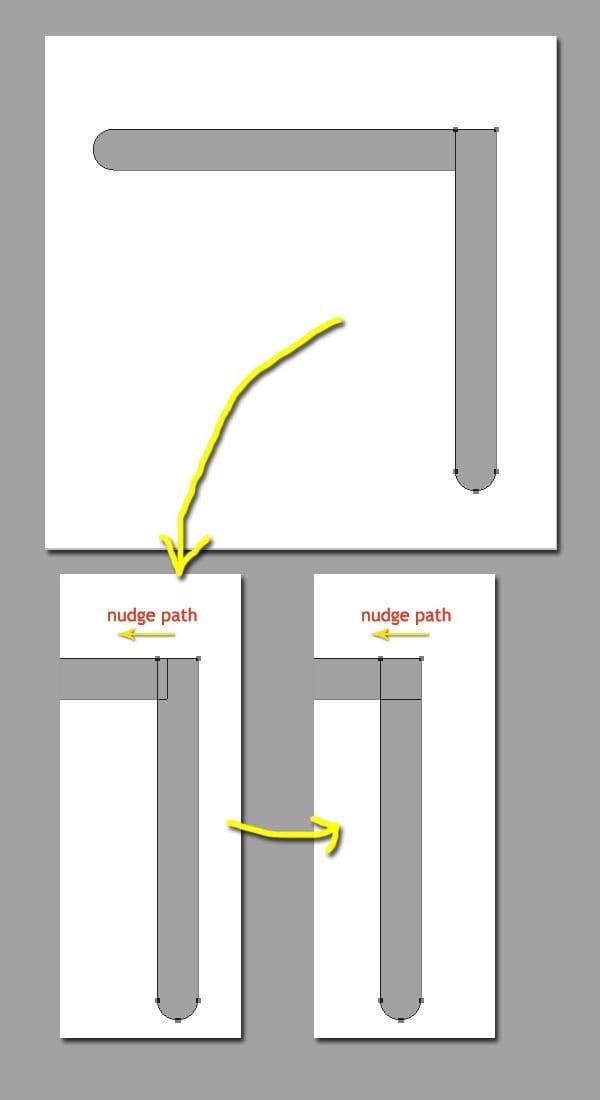
Step 6 – Preparing for Highlight (Duplicating Path and Scaling Down).
Now, we need to duplicate the layer with “Cmd/Ctrl + J”. And name it “highlight”. Then transform the paths on this new layer. Hit “Cmd/Ctrl + T” to show transform control. To get easier transforming, we can use Alt and Shift key. Scale down horizontally first, an then scale down vertically. Just like this.
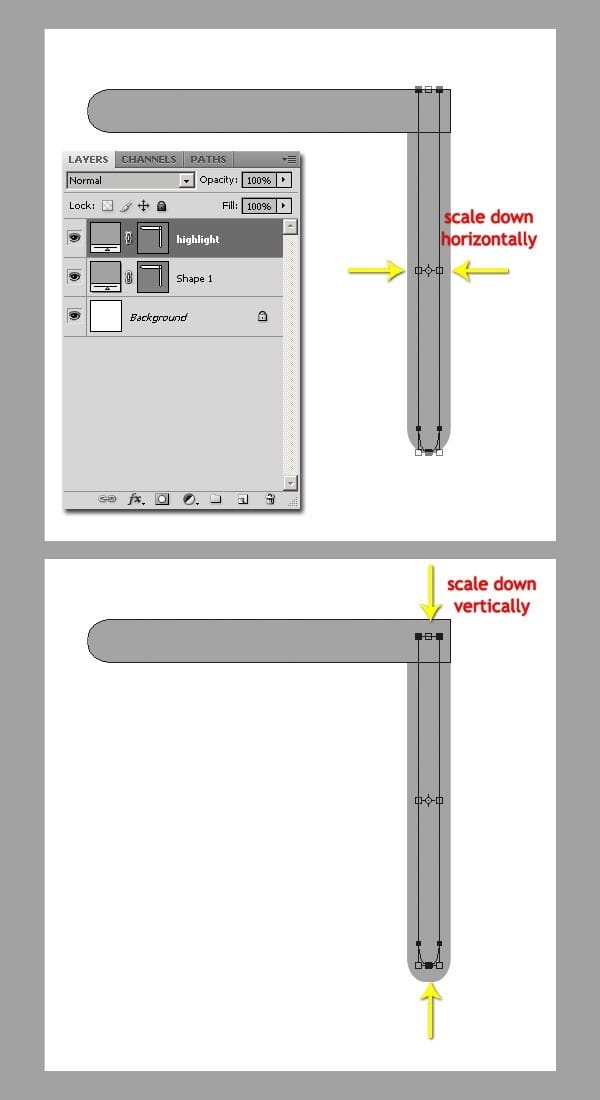
Repeat the transforming onto another subpath.

Step 7 – Rasterizing.
On the layer pallette, right click on “highlight” and select “Rasterize Layer”. Or we can access it on Menu Layer > Rasterize > Shape.
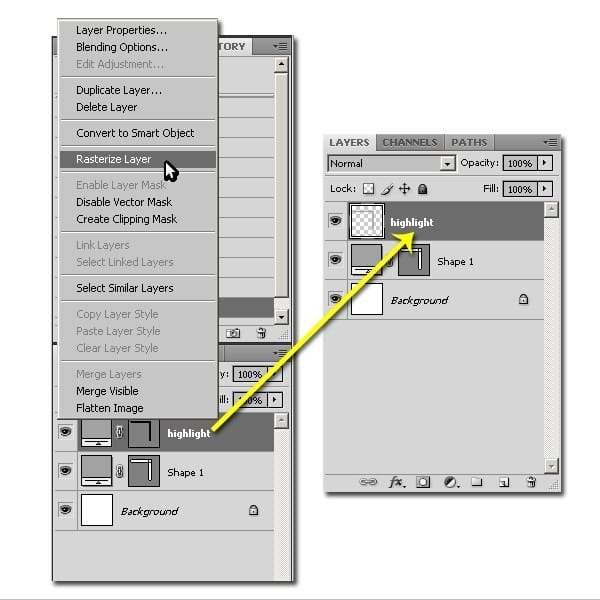
Step 8 – Selection
On layer palette, Ctrl + Click on “highlight” layer thumbnail to load selection. Then click menu Select > Modify > Feather or use “Shift + F6”. Give 10 pixels radius.
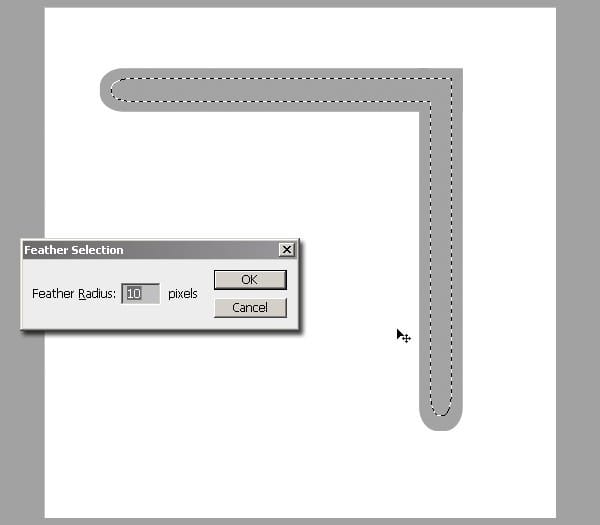
Step 9 – Filling with White.
Hit “D” on keyboard to set default color. “Cmd/Ctrl + Delete” to fill the selection with background color (white).
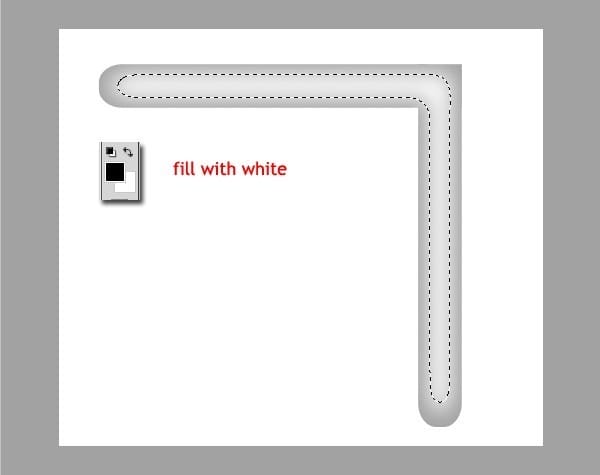
Step 10 – Make it Smoother.
Hit “Cmd/Ctrl + D” to deselect. Then add “Gaussian Blur” onto this highlight. Click Filter > Blur > Gaussian Blur and give 5 pixels. Then reduce the opacity layer to 50%. So it become smoother. But, the Gaussian Blur may increase its size. So make it into clipping mask to the lower layer. Just hit “Cmd + Opt + G” / “Ctrl + Alt + G”. The highlight will be inside the shape of roof.
One response to “Create a Mac Style Home Icon in Photoshop”
-
Hi, I am currently constructing a Christian based website. I was wondering if I could use the Mac Style Home Icon image on my site?
Thank you


Leave a Reply to David ReidCancel reply