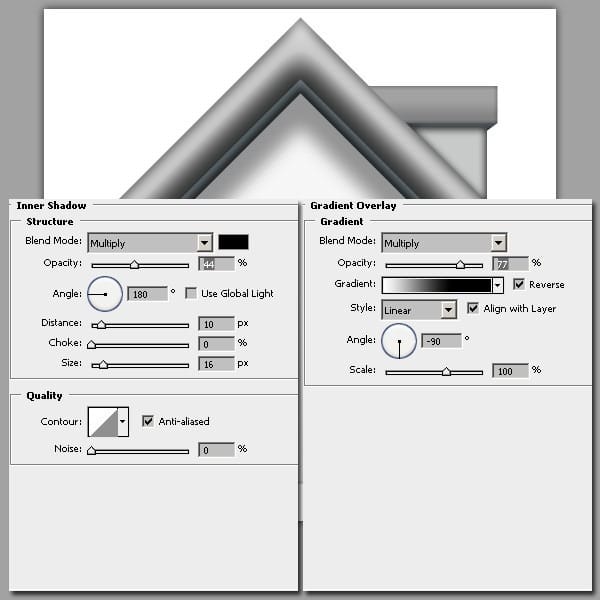
- Blend Mode : Multiply
- Opacity : 77%
- Gradient : White to Black
- Style : Linear
- Angle : -90º
- Scale : 100%
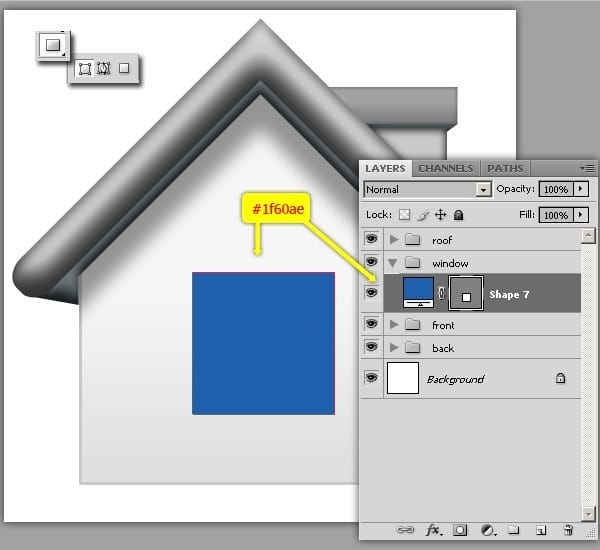
Step 37 – Shape For Window.
Create a square shape with Rectangle Tool. Set color to #1f60ae. Make a group named “window”.
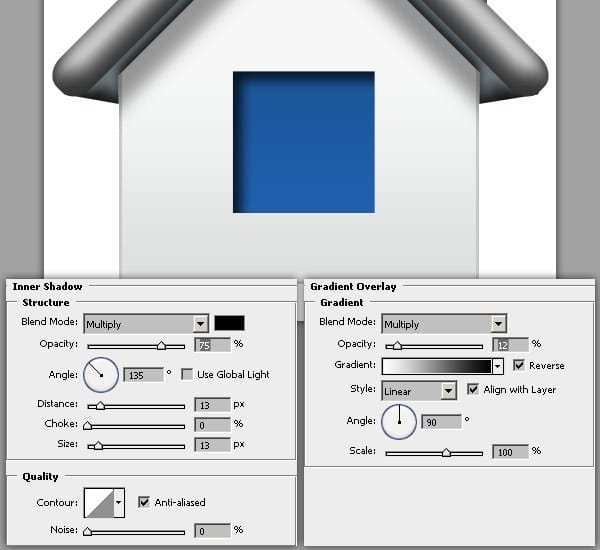
Step 38 – Layer Style For Shape.
Add layer style with following parameters.
Inner Shadow
- Blend Mode : Multiply
- Opacity : 75%
- Angle : 135º
- Distance : 13 px
- Size : 13 px
Gradient Overlay
- Blend Mode : Multiply
- Opacity : 12º
- Gradient : White to Black
- Style : Linear
- Angle : 90º
- Scale : 100%
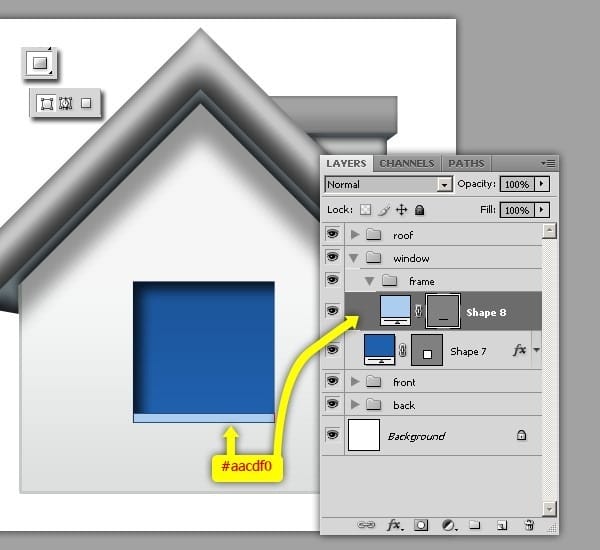
Step 39 – Making Frame – Making Shape.
Use Rectangle Tool to create shape above “shape 7”. Make a group named “frame” inside of “window” group. And all of frames will be placed here. See layer pallet below for reference.
Step 40 – Making Frame – Making Shape Furthermore.
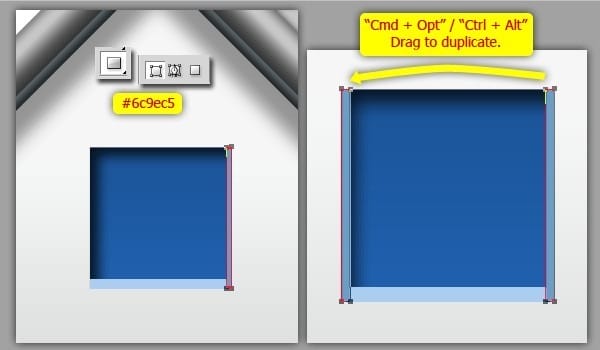
Make shape again on right side of window, use #6c9ec5 for color setting. And duplicate it to left side. Just use “Cmd + Opt” / “Ctrl + Alt” click and drag to duplicate.
Step 41 – Making Frame – Again, Making Shape.
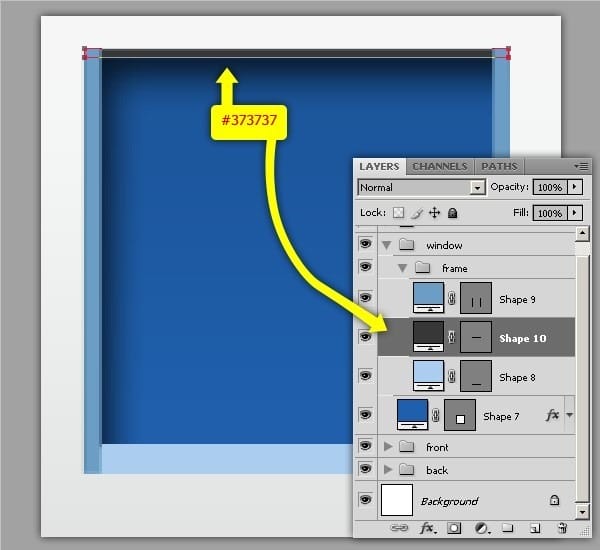
The last frame on top side. The color is darker than before, that is #373737.
Place it under “shape 9” layer.
Step 42 – Making Frame – Editing Points.
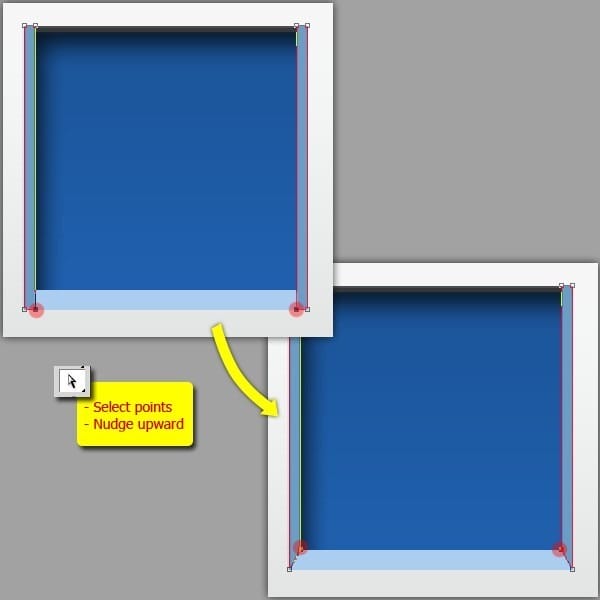
Use Direct Selection Tool to select points below (shown as red circle). Then nudge upward. See the following picture for reference.
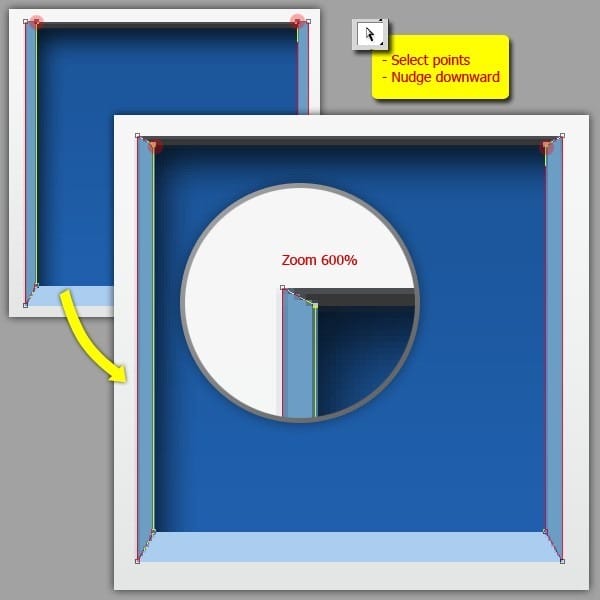
Then do it again to the other points. Select points and nudge downward. Shown below.
Step 43 – Making Frame – Adding Layer Style.
Add layer style with following parameters.
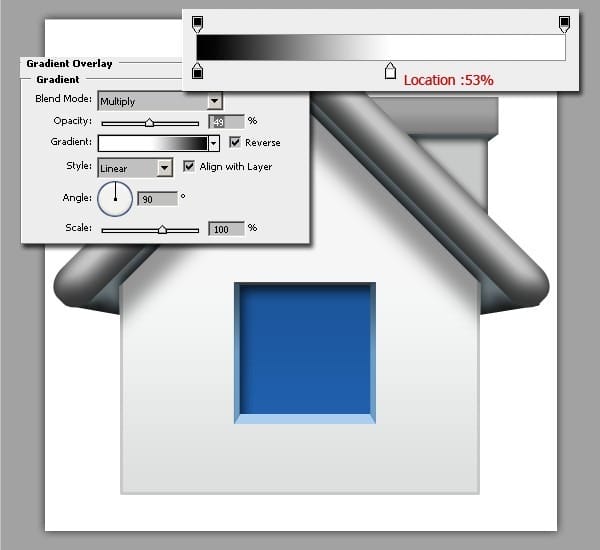
Gradient Overlay
- Blend Mode : Multiply
- Opacity : 49%
- Gradient : Black to White (reverse), drag the location of white color stop on 53%.
- Style : Linear
- Angle : 90º
- Scale : 100%
Step 44 – Making Glow – Duplicating.
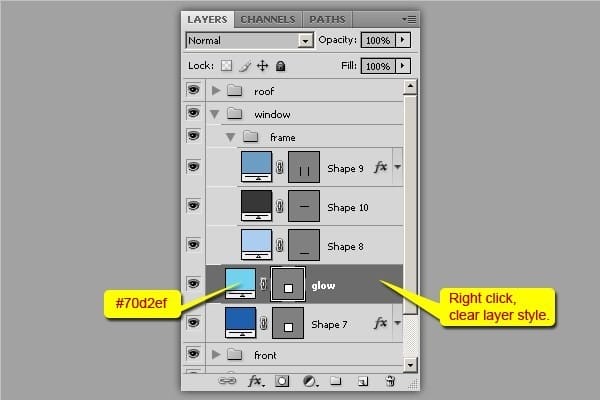
Duplicate “Shape 7” layer with “Cmd/Ctrl + J”. And rename the duplicate copy with “glow”. Then change its color, double click on layer thumbnail and set it to #70d2ef. Then remove all layer effects on it. Right click and select clear layer style.
Step 45 – Making Glow – Scaling Down & Rasterizing.
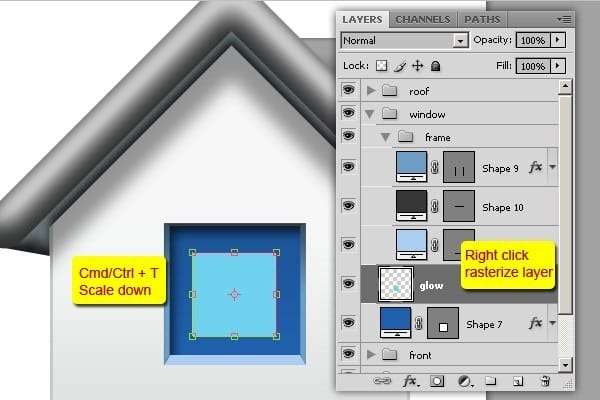
Scale down the “glow” layer. Then rasterize.
Step 46 – Making Glow – Blurring.
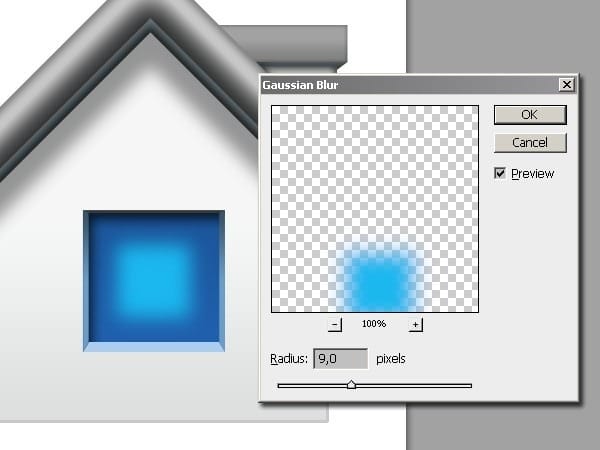
Menu Filter > Blur > Gaussian Blur.
Step 47 – Shape For Highlight.
Above the “glow” layer, use Rectangle Tool to create shape, and then duplicate it by using “Cmd + Opt” / “Ctrl + Alt” and drag. After that activate Direct Selection Tool to edit points. See picture below for reference.
Rename the layer with “highlight”.
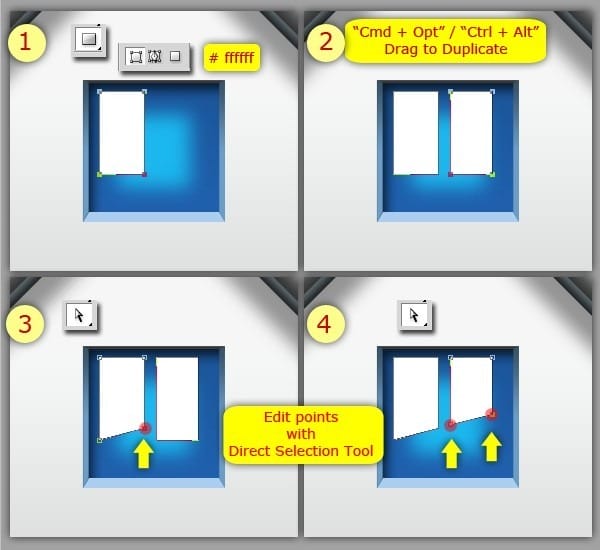
Step 48 – Gradient For Highlight.
First, add layer mask on “highlight” layer by clicking layer mask icon.
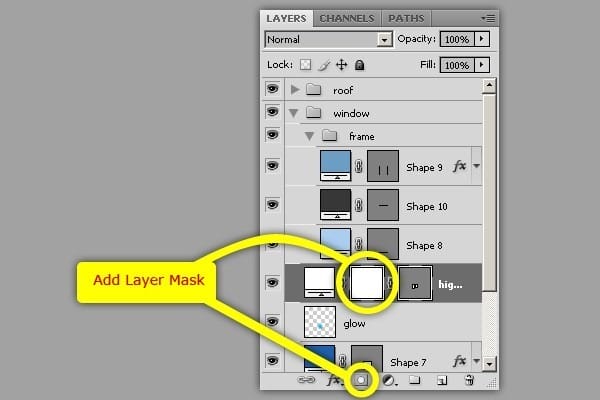
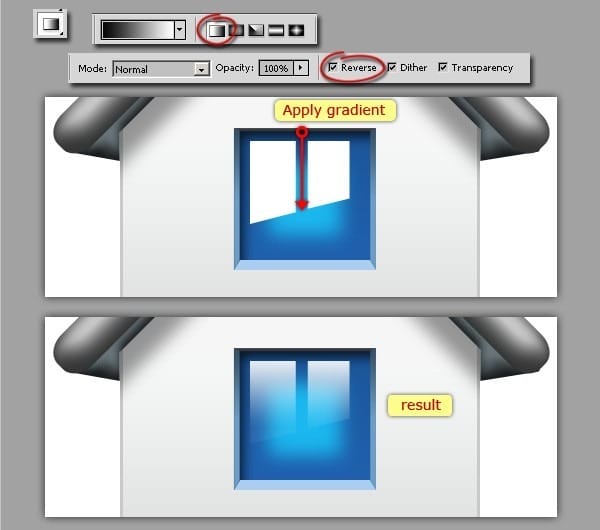
Use Gradient Tool, set it “Linear Gradient”, “Black to White” with “Reverse”. Be sure that layer mask is still activated, and apply gradient by dragging with holding “Shift”. Dragging process shown as “red arrow” on this example below.
Step 49 – Creating Shadow.
Create new layer above “Background” layer and name it “shadow 1”. Then use Elliptical Marquee Tool to make ellipse selection. After that, fill selection with black color and remove selection (deselect) with “Cmd/Ctrl + D”. Give Gaussian Blur with radius 9 pixels. And set the opacity layer to 50%.
One response to “Create a Mac Style Home Icon in Photoshop”
-
Hi, I am currently constructing a Christian based website. I was wondering if I could use the Mac Style Home Icon image on my site?
Thank you


Leave a Reply