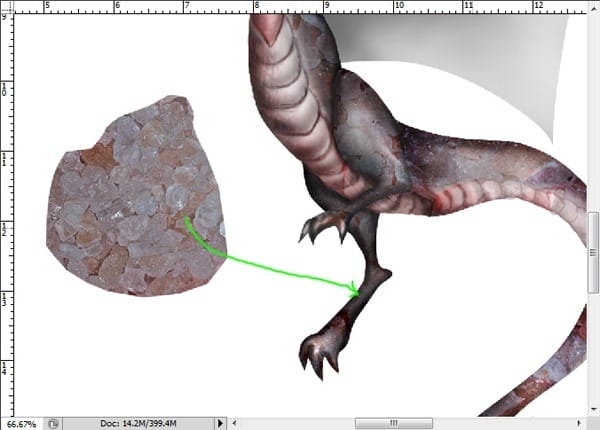
Step 16
Create a new layer above the left wing layer. Take Pen tool and create the path like the one I created. Fill the path with black.
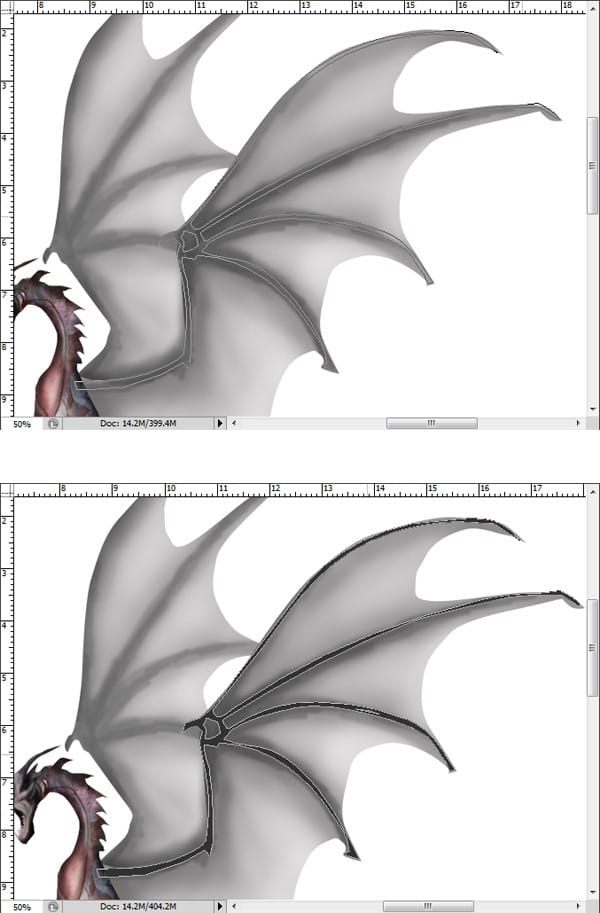
Step 17
Give this layer a layer style:
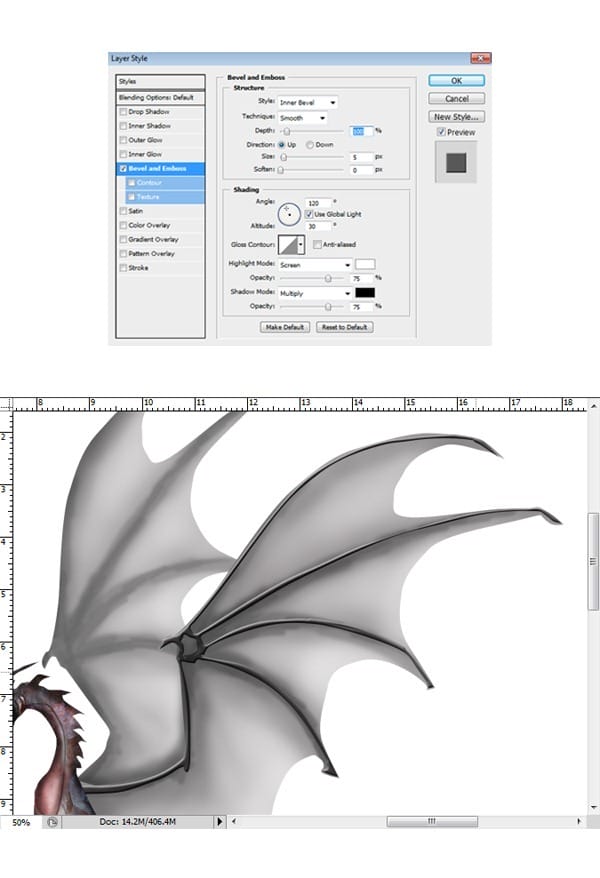
Step 18
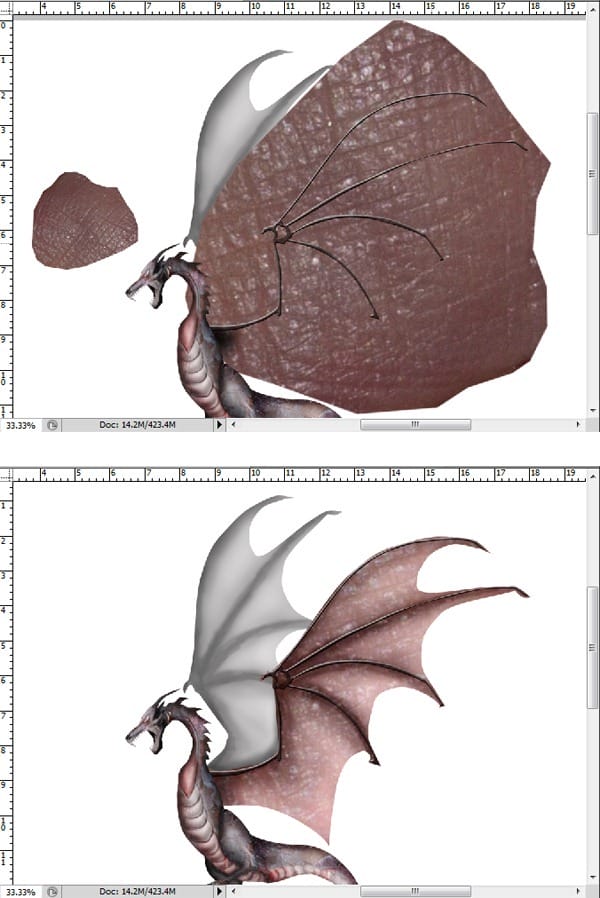
Cut out another part of the source picture (step 8). This cut out is for the wing texture. Scale the cut out up to fit the wing. Create clipping mask for this layer. Set it to soft light at 100% opacity. Duplicate this layer some times as needed. Set the blending of the duplication layers vary to color and soft light. Finally, group the wing layers.
Step 19
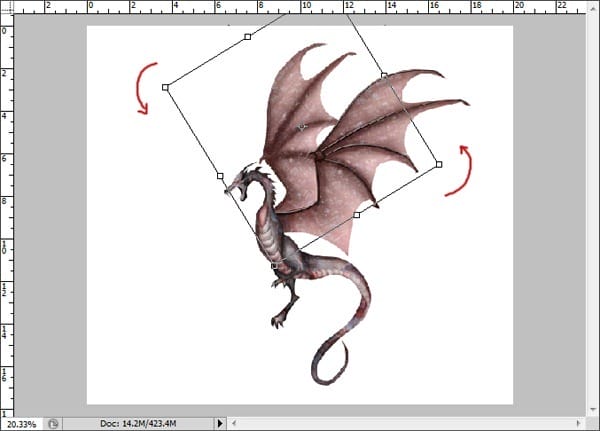
I decided to simply duplicate the wing group and place the duplication group underneath the original wing group. We will use this duplication for the other wing. Scale the duplication down a bit. Rotate it. And there it is.. we have the right wing for the dragon. We have done with the dragon.
Step 20
Create a new document of 1500 pxl wide and 1596 pxl high.
Step 21
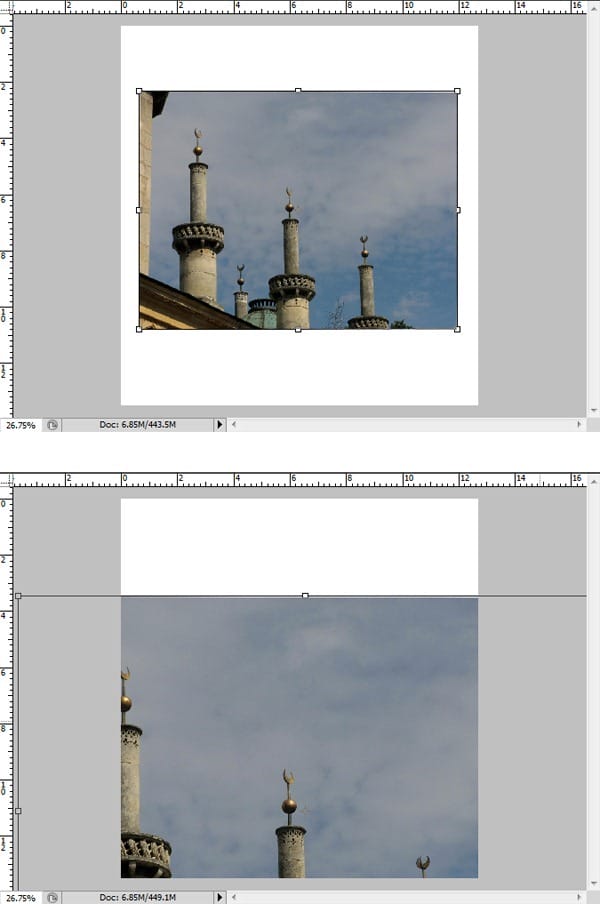
Open the tower picture into the new document. Hit Ctrl+T to activate Free Transform tool. Scale the tower picture up. Try to get the result I created.
Step 22
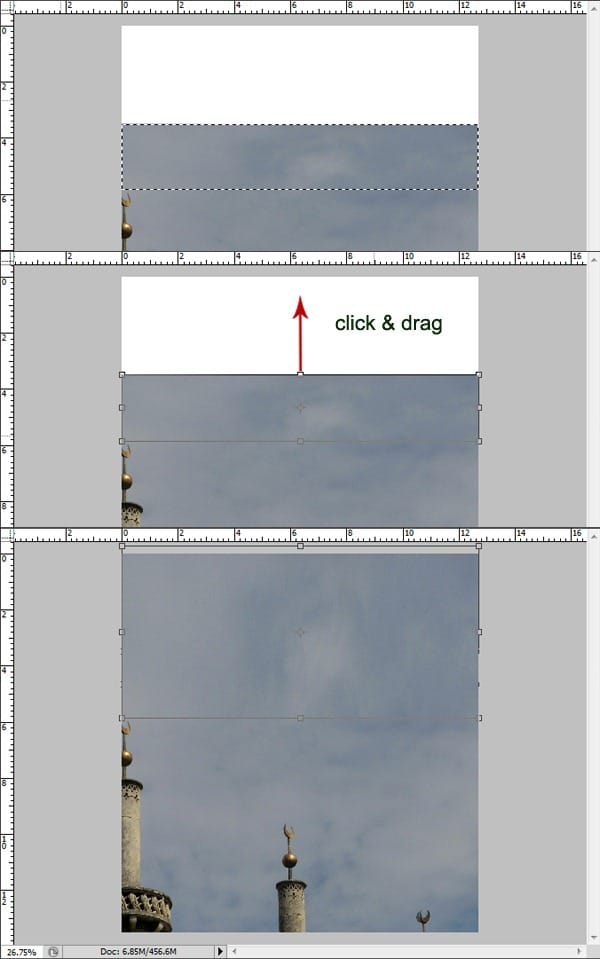
There is a white blank area on the document. We need to fill it out. Take Rectangular Marquee tool. Make selection on the upper part of the tower picture. Hit Ctrl+J to duplicate the selection into a new layer. With this new layer still selected, activate the Free Transform tool again. Click and drag up the layer to cover the blank area. Finally, merge these layer (Ctrl+E).
Step 23
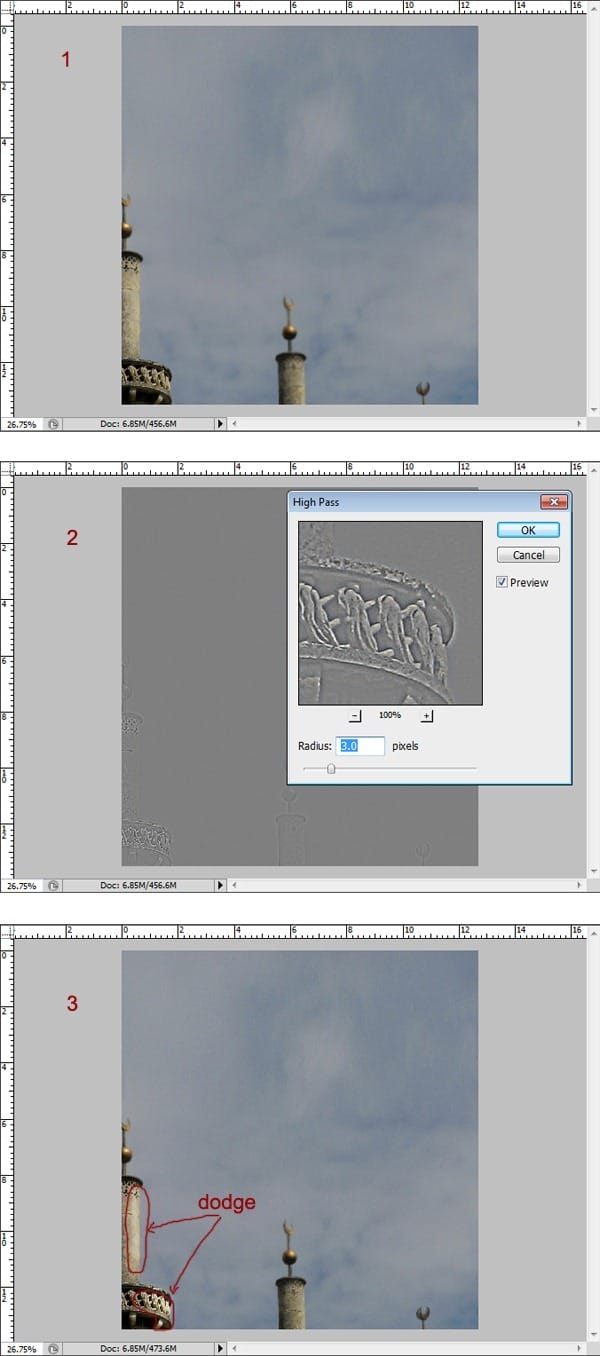
Duplicate the tower layer. With the duplication selected, go to Filter > Other > High Pass. Then set the blending of this layer to overlay. Take Dodge tool. Set it to Highlight at 8 % exposure. With a very soft brush, stroke gently some part of the closest tower.
Step 24
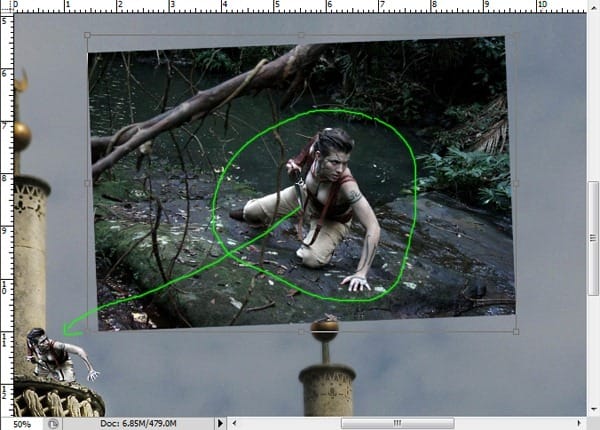
Open the model picture. Extract the model from the background. Finally, drag it to the document. Place the model on the tower.
Step 25
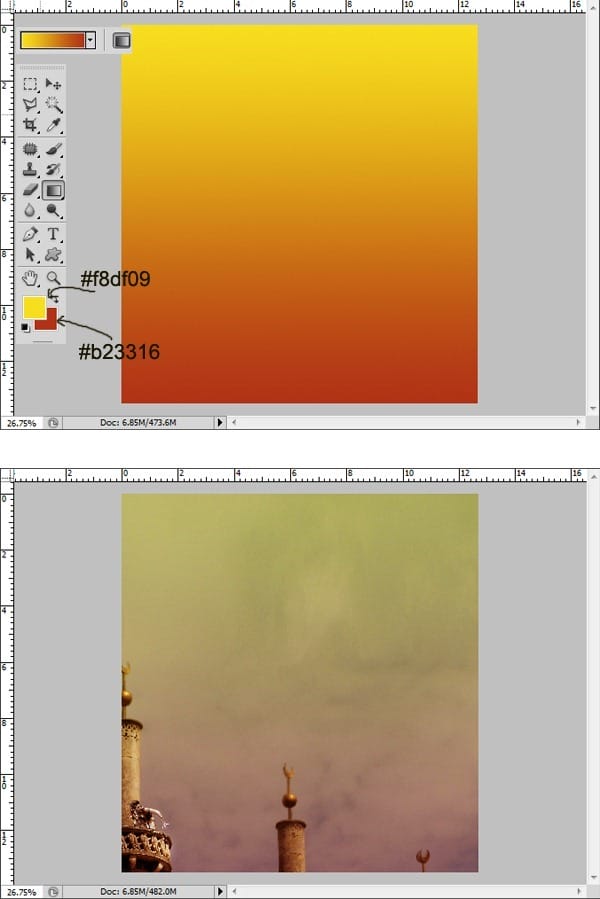
Next, create a new layer. Give this layer Gradient. Please see the illustration picture for the gradient setting. Set the blending of this layer to soft light at 100% opacity.
Step 26
Create a new layer again. Make sure to set the foreground color to #51514e and the background to #e4dfde. Next go to Filter > Render > Cloud. Set this layer to soft light at 40% opacity.
4 responses to “How to Draw a Colorful Fantasy Dragon Battle Scene in Photoshop”
-
Method have draw on photoshop and painting on the pts.
-
awesome ….keep uploading this step by step process
-
First of all I love this and have learnt a lot but….
Couldn’t get the fire selection bit to work, every time I pressed Control which I assume is command on the mac and clicked the thumb nail it selected the whole thing. I tried making my own selection but I ended up with a black outline and no colour. Baffled ! -
That’s really cool and very helpful.
I tend to use reptile scales for the texture of the dragon – I just take a picture of my pet lizard XD
But still, thank you :)


Leave a Reply